12 ways to hang a picture, frame, poster or decorative plate on a wall without nails
Many will agree that even the most modern and expensive interior can look a little boring and inexpressive without small elements of decor. Such trifles as wall paintings, frames with family photos or decorative plates brought from different exotic places make the house more comfortable, homely, filled with a characteristic mood and emotional atmosphere. However, given how much effort and money has been spent on this very repairs, many still refuse to place such items on their walls, fearing damage wallpaper or other finishing materials. To avoid undesirable consequences from the use of habitual fasteners, in this article we will look at several ways how to hang a picture on a wall without nails, frames or decorative plate.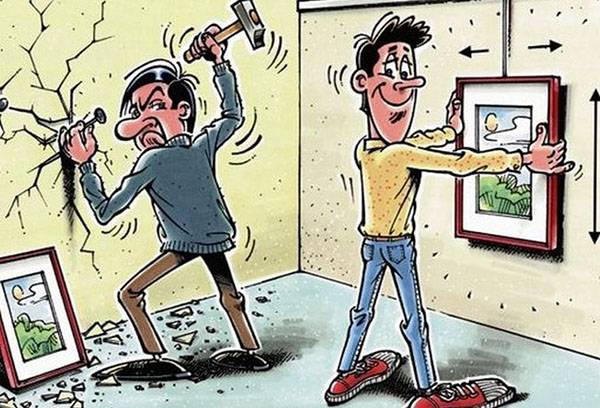
Criteria affecting the choice of attachment method
Before we begin to consider the fastening methods themselves without using nails or screws, you need to understand what parameters affect the possibility of their application. The most important indicators are:
- item weight;
- type of wall covering;
If you do not take into account such an obvious fact as painting weight or plates, then all your efforts may not succeed. Some fastening methods allow you to securely hold objects weighing up to 9 kg. But most are still intended for small-sized elements weighing up to 1.5-2 kg. It is clear that a heavy clay plate cannot be held with double-sided tape.
The next important factor is base material on which fasteners will be held. For example, the same double-sided tape will not stick well to wallpaperhaving an invoice. However, on smooth wallpapers or on drywall surface he will feel quite reliable. Brickwork or surface made of natural or artificial stone It interacts well with various adhesives.
Do not forget about the fact that it is not reliable enough to fix the picture on the wall - this must be done relatively smooth. Only correctly placed objects will create a harmonious atmosphere. For this, do not neglect building level or by marking immediately before starting work.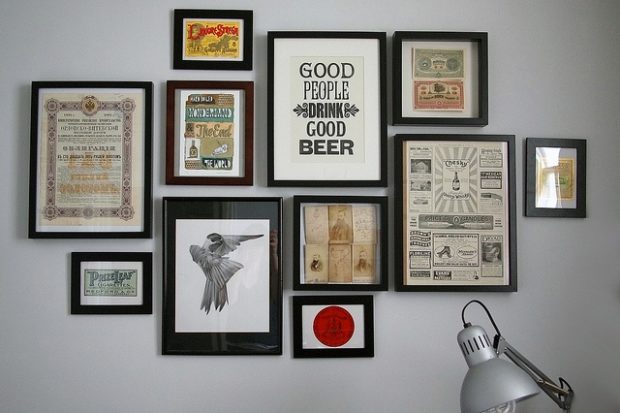
Methods for attaching light objects without nails
Weightless objects like posters or posters calendars or schedule of the day, photographs without frames and other delicate elements, the most quickly and reliably can be mounted on the wall using the following methods.
No. 1. Double sided tape
Double-sided tape will be the best solution for placing items on drywall walls. This is explained very simply - such fasteners do not violate the integrity of the GCR, which has a positive effect on its strength indicators. By the way, this indicator decreases with each new hole that you make in such a surface.
The most aesthetic will look like an object that is glued to all four edges, which will prevent them from bending. To fix a small photograph, it is enough to glue small stripes no more than 1 cm wide at the edges. The larger the format, the longer the pieces of tape should be. Mark the location of the poster on the wall in advance and check that it is even. Neglecting this item and focusing “on the eye”, there may be a need to tear off the glued element in order to correct its position. In this case, you can tear the object itself or tear off a piece of wallpaper or paint from the wall.
It is necessary to remove the protective layer from the second sticky side immediately before gluing. So you will not leave fingerprints on the sticky layer and the dust will not have time to settle on it while you will “try on” the photo on the wall. The surface of the wall should be dry, smooth, clean, free of dust and other particles. If after some time you need to remove a strip of adhesive tape from a decent wall without damaging its lining, you need to carefully peel off a small area, starting from the corner, and slowly pull the rest of the strip downward at an angle of 90 degrees to its orientation.
You can immediately use double-sided tape on a fabric basis, which is removed without a trace at any angle and from any coating. There is such a variety as foamed tape, which can withstand much greater loads. It can be used to attach small paintings or photographs in a plastic frame.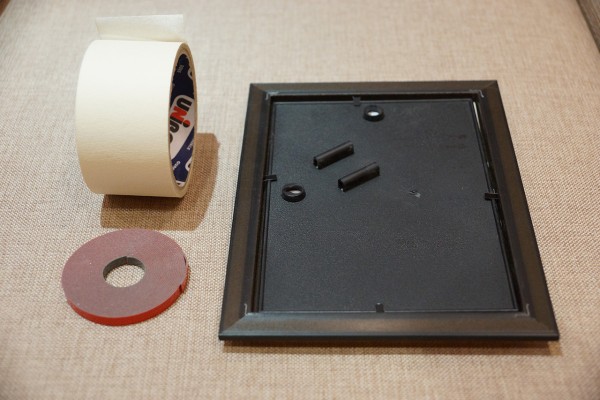
No. 2. Stationery buttons
Stationery buttons also perfectly cope with the task of reliable fastening of light objects. There are many types of buttons whose heads have a decorative design. Thus, this visible fastener will not only not spoil the appearance of the poster or photo, but will also help to decorate and even complement it. Push pins will stick well on plastered wallsas well as the walls covered with wallpaper covered with paint or decorative plaster. They are easy to stick into such a surface. But in the case of concrete walls, difficulties may arise. If the layer of plaster under the wallpaper is already old and begins to crumble, the puncture spots may turn out to be too loose, and the buttons will periodically drop out. Keep this in mind when choosing this method of mounting in the children's room. You may not immediately notice the missing button, and the child will easily prick it.
After dismantling such a mount, barely visible traces will remain in the form of small holes. To eliminate them, just swipe the wallpaper with your finger and smooth them at the puncture site. Thus, the buttons are good if you need a private change of scenery.
Now back to concrete walls. Attaching the same photo to them using the buttons is still possible. You only have to spoil the wallpaper. To do this, select the buttons with a flat thin hat. Using a clerical knife, it is necessary to make a horizontal cut of the wallcover, the length of which is equal to the diameter of the cap with a small margin. Now make the same transverse incision. You will get a small cross. With a knife, carefully separate the wallpaper from the wall and bend the corners.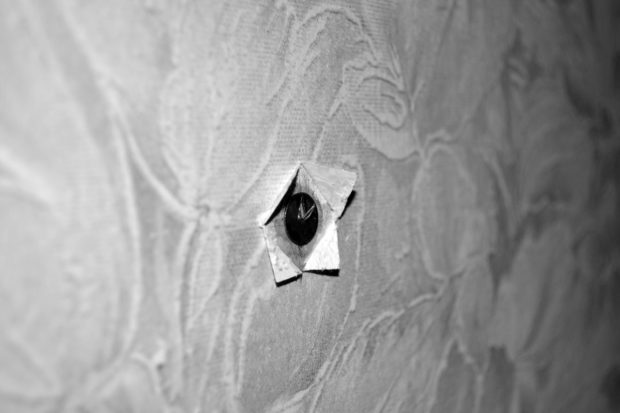 In the resulting free space, lean the button with the hat against the wall, after dropping a drop of superglue on it so that the point looks at you. Now drip small droplets on each corner of the bent wallpaper and bend them back. When the glue dries, you get a fairly strong mount in the form of a small tip protruding from the plane of the wall. It remains only to chop the desired element on it. This method is good if you are not afraid to damage the surface. After installation, you can hide the tip with a foam ball or a piece of wine cork.
No. 3. Paper clip
Paper clip can also quickly and easily turn into a fastener for light paintings or frames. To do this, you need to redo it a little.We will paste the paper clip under the wallpaper as in the previous version. Only the cut will look a little different. The horizontal line should slightly exceed the length of the paper clip, and the perpendicular line should be slightly larger than its width. A transverse incision is necessary for a free paper clip. The edges need to be bent and peeled off the wallpaper from the wall along the entire length of the incision. The paper clip itself must be unbent so that it resembles the letter “L”. It’s as if you fastened it with a large stack of papers, and then removed it. 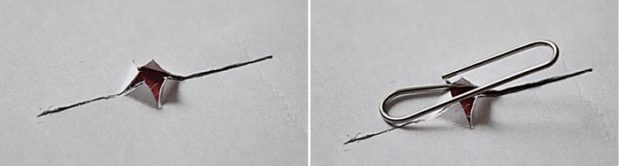 Get one of the edges behind the wallpaper, see if it completely goes into the cut. If all is well, remove the paper clip, drip the glue, place the paper clip completely and firmly press the wallpaper into place. Glue should fill all the resulting void and be sure to get on a paper clip. Leave the improvised fasteners to dry for a day, and then boldly hang a picture on it. The edges of the wallpaper will stick well and the cut marks will be almost invisible, especially if the wallpaper has a texture.
At first, it may seem that such fasteners are not particularly reliable, but in practice you will be pleasantly surprised. If you still have doubts, you can make several of these hooks. If there comes a time when you have to remove the paper clip, you do not need to pull it together with the wallpaper. Just bite it off at the base with sharp nippers. By the same principle, you can use fishing or clothes hook. All stages of the work will be similar.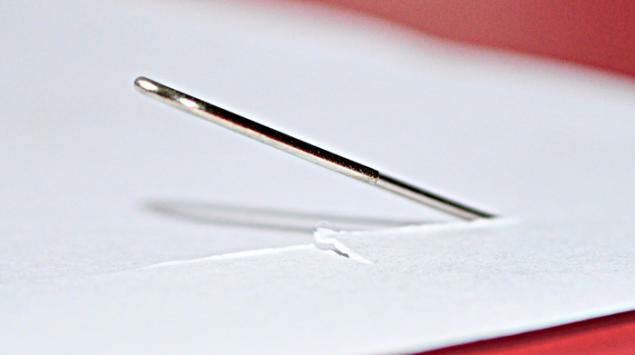
Number 4. Sewing pins
Sewing pins - One of the most accurate mounting methods, which causes the least damage to the surface of the walls. Lean the photo against the wall and pierce it with a pin at a slight angle to the plane of the wall. Her leg should go behind the wallpaper, but not stick into the wall. Instead of pins, you can use a regular sewing needle. She will be less noticeable. Such fasteners are able to withstand weight up to 500 grams.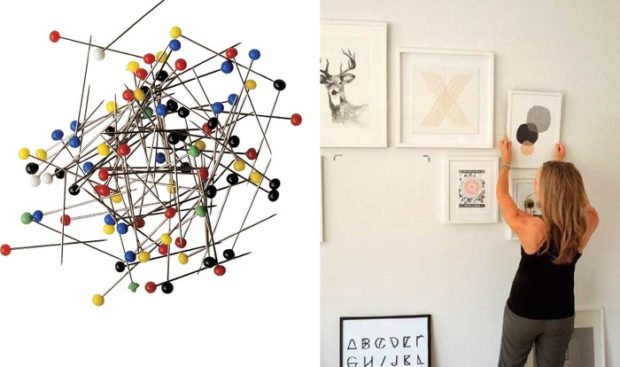
No. 5. Decorative ribbon
Decorative ribbon or a decorative harness can also be used as a fastener. With it, you can arrange small pictures or photos in a more original way. In the desired location, you must perform one of the above hooks. Take the tape with the processed edges, bend in half and tie it on a hook. You will get two loose-hanging ends. We will place pictures on them. If you don’t really like the knot in the middle of the wall from an aesthetic point of view, you can tie a neat bow and another knot so that the bow does not untie under the weight of the items. You can fasten the bow separately and just stick it on the knot later. There are a lot of options for decorating the place of attachment of the tape, ranging from artificial flowers to beautiful beads. Build on the overall interior. To fix the picture on the ends of the tape, it is necessary to put a little glue on their back side. And for reliability, you can cut strips of thick paper and glue them on top of the tape. By alternating the height of the arrangement of decorative elements, you can create a very unusual collage.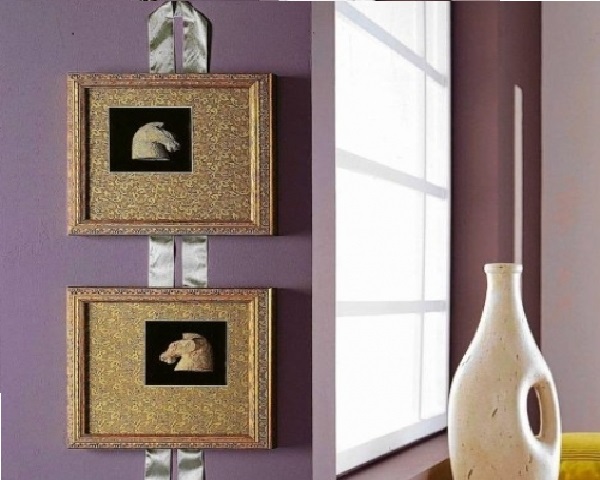
In such simple ways, you can fix small plates of light materials, photographs or small pictures in a plastic frame. If you make several fasteners of the same type on the same line, and on the back of the picture stretch a fishing line or kapron thread into the ears at the edges, then hanging it in such a way on all the fasteners at the same time, you can significantly increase the fastening strength, and the allowable weight will increase several times.
Methods of mounting objects of moderate severity
Those, beloved by many, modular paintings or photo frames made of wood with glass protective sheets weigh much more. And if the format exceeds the size of A4, then they can reach a weight of 1-1.5 kg and more. But this is not a reason to clutch at hammer drill and remind your neighbors about yourself. If there are several painless fastening methods that can easily withstand large objects and heavy plates.
No. 6. Spider Hook
Spider Hook - a small tricky item, which despite its simplicity and modest size, is highly reliable. It is a plastic product with a flat back. On the front side at the bottom there is a hook resembling a hook on a clothes hanger. And on the top edge are four sharp spikes. They provide reliable fixation. The spider is attached to the wall as follows - in the selected place, make a mark to which the fasteners are leaned against the flat side. The spikes will look at you. Now with the help of a small bench hammer it is necessary to hammer these spikes into the wall. Do not hit it all the way so as not to damage the plastic surface or break it. As soon as the spikes enter the wall flush with the plastic, the hook is securely locked.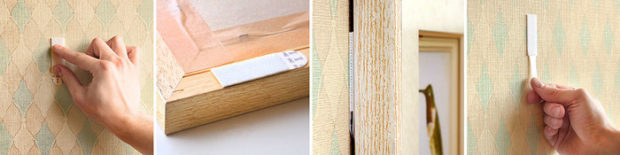 Please note that the hook is located at the bottom. Therefore, the loop on the back of the picture or plate must be made at such a height that its surface hides the fastener completely. The spider hook can withstand objects weighing up to 2 kg. This is his average. The smallest model is designed for a weight of 1-1.5 kg, and the largest withstands loads of up to 9 kg. Delete such a hook is very simply. Grab the outer plane of the hook with pliers at the level where the spikes enter the wall, and simply pull it out. There will be a trace in the form of four small holes, which can be easily smoothed out. Definitely it is better than a dowel sticking out of the wall.
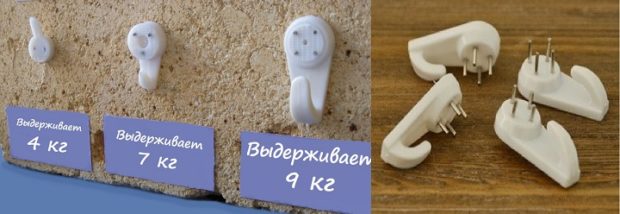
Number 7. Miracle Velcro
Miracle Velcro, or Command system They have proven themselves as a way to mount objects on smooth, smooth walls. These Velcro is made of plastic. At the ends they have a small hook. This system consists of two parts that have an adhesive layer. One part is glued to the wall, the other to the back of the desired item, and then they are connected together.
The beauty of these Velcro is that they can be easily removed without harming the surface of the walls and reuse unlike double-sided tape. There are several types of configuration that differ depending on the permissible weight. The smallest equipment is 4 sets of 8 small strips. The average includes 3 sets of 6 strips. In the first case, one Velcro can withstand 100 g, and the whole set - 450 g. In the second case, Velcro can withstand 400 g, and the whole set - load up to 1 kg. To dismantle or outweigh the picture, you just need to remove the white strip from the system.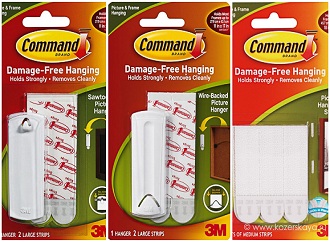
Number 8. Fixing system "Craps"
System fastenings Kreps - Another modern system designed to attach various elements to the wall without the use of nails and without harm to the surface. "Craps" is intended for items that are attached to ropes or cables. Therefore, if you like this method, you will need to take care of attaching the ropes to the back of decorative objects.
The system is a plastic element, the back of which is flat and has an adhesive layer. The surface of the wall should be smooth and even. Then it will turn out to provide high reliability of fastening. The lower part of the device is extendable and has several rows of small hooks. Using this system is very simple even for the first time. It is necessary to remove the protective tape from the adhesive tape and stick it to the wrong side of the hook. Now you need to remove the protective tape from the second side and lean the hook against the wall. Press firmly for 30 seconds. Now you can hang a picture. Maximum load on one "craps" is 1.5 kg. To hang a larger item, use several fasteners. The main thing is to arrange them evenly to ensure a snug fit of the picture to the wall.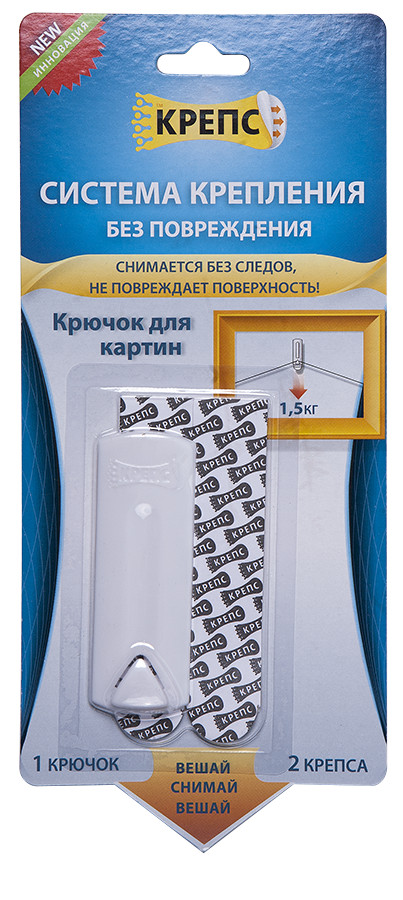
№9. Curtain rail
Curtain rail - Another reliable way to hold weighty objects. And if you find an old cornicethen you can borrow it from there.We also need a strong fishing line or kapron thread. We will make a suspension system that will allow post right away several items at different heights and will not be striking. Inside the rails there will be small plastic hooks to which you need to attach a fishing line or thread, given the desired length and distance between the objects. Now you need to glue the rail to the wall and fasten the ends of the thread of the picture. The impromptu installation is ready. The advantage of this design is that at any time you can add or, conversely, remove several items.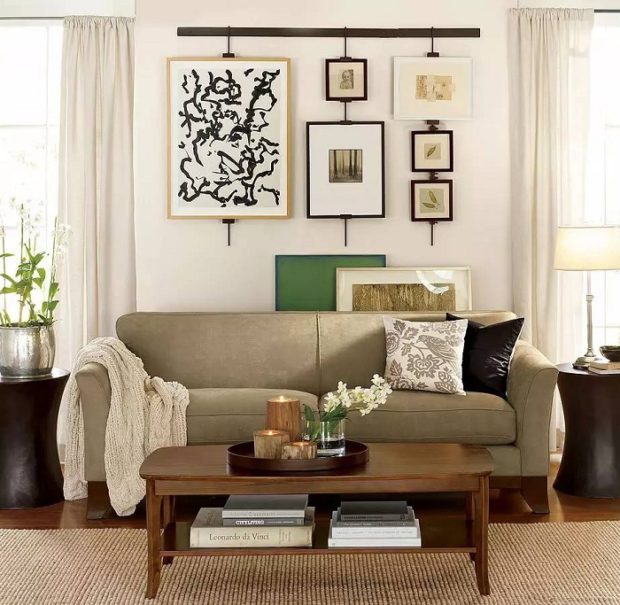
No. 10. Wine cork
This item will serve as a layer between the wall and the picture, into which you can easily screw a small self-tapping screw and hang anything on it. It is necessary to cut the cork into circles, 1-1.5 cm thick. This should be done with a sharp clerical knife. Glue the resulting circle to the wall with a reliable glue. After drying completely, take a short self-tapping screw and simply screw it into the cork. Threaded elements will hold tight in such a structure. Only need to choose a very tight cork. Wine silicone is also suitable. Reliability will depend on the selected glue.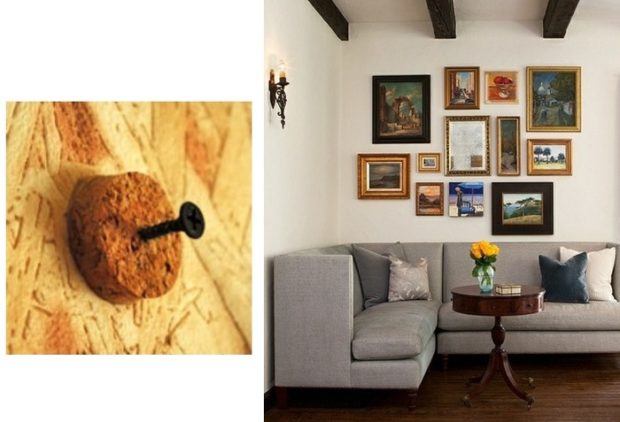
Fasteners in “serious” ways
In this paragraph, we will consider ways of attaching items or a series of items having significant weight without using nails. It is worth noting that the dismantling of some elements will be difficult and will leave characteristic traces. In this regard, it will be necessary to update the wall covering.
No. 11. Board for pictures
This method is used when it is not a pity for the floor and ceiling, but a pity for the wall. Please note immediately that if you have a suspended or stretch ceilingthen this method is not for you. Unless, of course, this was not foreseen in advance. It is worth noting that the use of a whole separate wall for placing objects will help to achieve unique interior solutions. Such a board can become the center of the room and set the rest of its environment. More harmoniously and thoughtfully look compositions that are designed to talk about something. For example, a series of landscape photos taken at different times of the year that convey the brightest moments of each month and tell the story of the withering and rebirth of nature. Or a series of black and white portrait photos of a married couple, which depicts the history of their acquaintance and the most significant moments. Or the story of growing up your loved one. Emphasizing such an element is very simple with the help of spot lights. And to build such a design is even easier. You can use real wooden boards, knitted into a single canvas of the desired size. More affordable options include the use of laminated or sanded chipboard or MDF. You can paint the surface yourself in a suitable color. For mounting, special brackets are required, which are sold in any hardware store.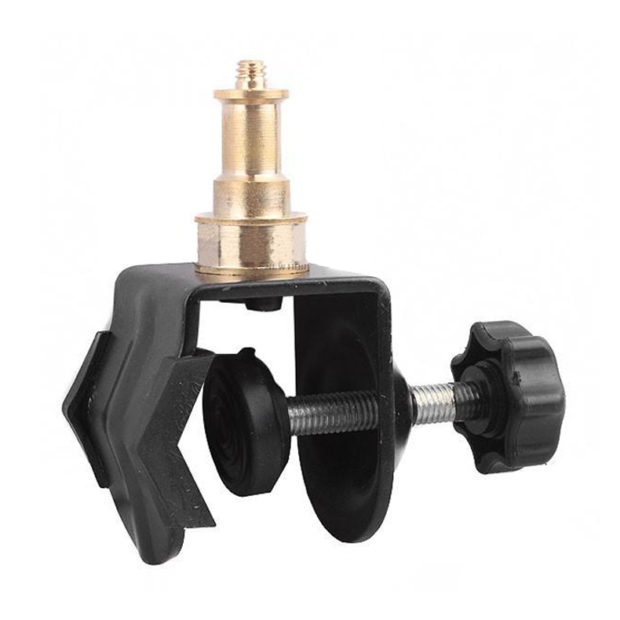 Immediately you need to make markings on the floor, and then transfer it using a plumb line or a laser level to the ceiling. So you will avoid distortion. Now you need to make holes in the floor and in the ceiling. They do not have to be located opposite each other. Dowels are inserted into the holes and a stud is screwed. You need to wind the bracket on it. The brackets must be able to adjust the thickness with a clamp. Now insert the sheet into all the brackets on the floor and ceiling at the same time. An assistant will be required at this point. While one person will hold the sheet, the second should clamp it in the brackets. Then it is necessary to check the deviation of the plane from the vertical position using the level. It is best to place such a board at a distance of at least 5-10 cm from the wall to emphasize the individuality of this object and to direct maximum attention to it. If you knowingly decided on the order of placement of objects on the board, then mounting under them is better and more convenient to perform before installation. If not, you will have to use the stairs.
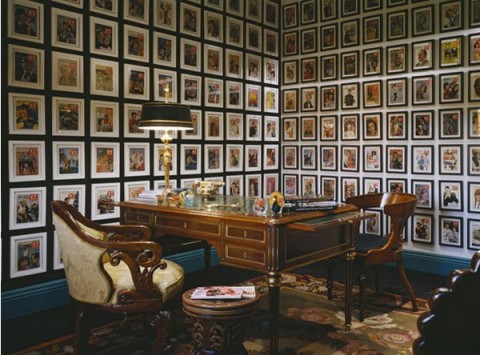
№12. Adhesives
Adhesives help fix heavy objects without much effort. Well established "liquid Nails", "Cold welding" and polymer glue. The back of the frame, plate or other object must be degreased first. The wall on which the item will stick must be dry and clean. Put any of the funds on the back of the picture and just lean against the wall, adhering to the markings. Heavy objects need to be smeared with glue around the entire perimeter, on lighter ones, glue can be applied only to the upper part. Hold the picture for a while while the glue is set. You can elbow something on it for a better effect. Polymer adhesive has a slight advantage - after dismantling it does not leave greasy marks on the wall surface. Some experts claim that the shelf life of such fasteners is about 1 year. Therefore, be prepared to periodically renew the adhesive layer.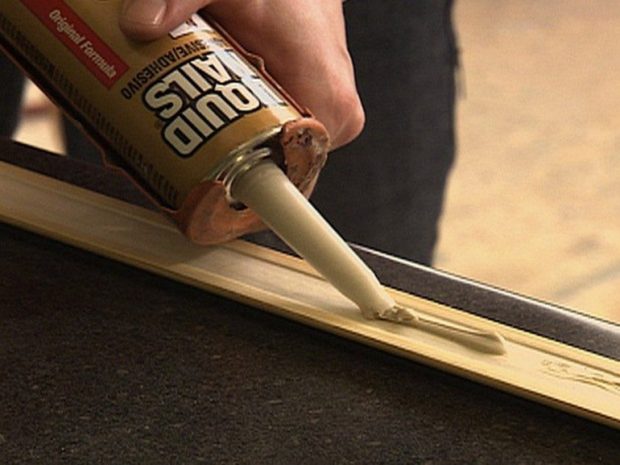
With these simple methods, you will be able to hang a picture, frame and other objects on the wall without having to drill holes in it.

 10 tips to choose which liquid nails: ...
 How to choose nails: types, material, length
 TOP 8 manufacturers of nails in Russia
 How to hammer a nail?
 4 tips on how to choose screws: types of screws, ...
 How to hang a wardrobe from a drywall ...
 10 tips on how to choose a screwdriver: types of screwdrivers, ...
 Liquid wallpaper: properties and application
 7 tips for fixing lining: methods and types of fasteners
 7 tips for choosing wall shelves: design, types