8 ways to remove plaster from walls and ceiling
The repair process in any of its execution is always a very time-consuming task. People who first take up the job on their own will surely have a lot of questions in the course of various works. One of the most relevant for sure will be associated with methods for removing various types of old finishes. In this article we will consider basic ways to remove plaster from walls and ceiling, we will learn to correctly analyze the current state of the coating and make decisions regarding the unambiguous need for its dismantling. We also consider situations where the old plaster can be left or locally repaired and strengthened.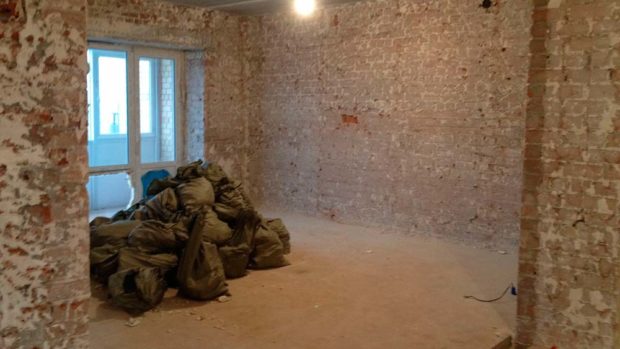
1. To remove the old plaster or not?
Stucco layer is the base, the basis for any other finishing materials, whether it’s wallpaper, facing tilefinish decorative stone etc. The final result of the repair and the appearance of the room depend precisely on how well the plastering is done. The coating should be even, smooth and have good adhesion to the wall surface. Only in this case the wallpaper or paint will fall evenly. That is why the front finish is competently evaluate the condition of the old plastering layer and to understand whether it will withstand the further load, whether it will collapse under a layer of glue or heavy facing materials. It is one thing when the plaster has already begun to obviously move away from the surface of the wall under its own weight and rests on parole. And quite another - when visually the coating looks completely holistic and reliable. 
In this case, you need to carefully knock all surface walls:
- You can do this with a small bench hammer. Just move sequentially from one edge of the wall to the other, inflicting light blows;
- Listen carefully to the sound of the beat. If it is deaf, then the grip on the wall is good. A loud sound will signal that there is a gap between the wall and the plaster, that is, in this place the solution has moved away from the wall, but does not fall off, since it is "held" by the adjacent layer of plaster, which has not yet lost its adhesive properties. Be prepared for the fact that upon impact, the integrity of the surface is violated and the layer of a solution of a certain size may fall off;
- It may happen that the tapping test of the old coating passes. But do not forget that it can crumble. Previously, builders used the cheapest cement-sand mixture. And in order to save even more, the cement component was present in the composition in a minimal amount, which is why the plaster had a light gray color. The predominance of the sand component makes the solution less monolithic, prone to precipitation of the surface layers. Is this the case in your case, you can check with a conventional spatula;

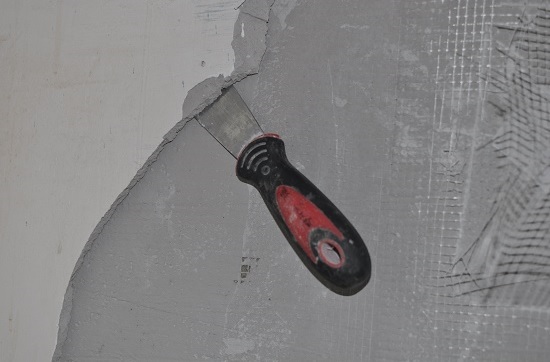
- Swipe the edge of the trowel along the plaster layer with some effort. If a deep furrow remains, and you see that the grains of sand began to peel off, as soon as you touched with a spatula, there was a natural wear of the coating;
- Now need determine how thick the plaster is and whether he is in such a state throughout his depth. To do this, try to pick the plaster at the place of the furrow formation with the same spatula or a flat screwdriver. If the tool is easily included and you even managed to clear a small area up to the wall in this way, you will need to remove the solution.
Things are not always so bad. Sometimes only a thin surface layer with a thickness of 2-3 mm is removed, and under it is a completely suitable plaster. So be sure to explore the wall as thorough as possible. This will not only help reduce the recovery time of the coating, but also save money on the purchase of a new plaster mix. In addition to the state of the coating itself, the nature of the successive facing works also affects. Sometimes such a laborious and dirty process can be avoided:
- For example, if you plan on wall cladding drywall, then the old plaster will not bother you. In order for the design to be reliable, and last more than one year, just try to install so that the load falls not only on the mortar layer, but also on the wall itself. In other words, choose a dowel and screws it is more authentic that they enter the wall at least half their length;
- If you plan to finish the walls with decorative plastic, wood, mirror and other types of panels on a frame basis, then you can also adhere to the above recommendations.
2. Complete disassembly or repair?
After you have identified all the shortcomings of the old coating, the next question arises - do you delete it completely, or partially? Consider the cases when complete disassembly is necessary:
- A complete removal of the old plaster may be necessary not only if it has lost its operational properties, but also in the presence of obvious irregularities. If at one time the repair team plastered the walls, without bothering to maintain an even plane, you will have to do it instead of them. Especially relevant is the preparation of walls for future painting or wallpapering. If minor irregularities can still be corrected during the laying of tiles or stone by the adhesive itself, then in other cases this is not possible. But in this case, you must also evaluate all the extent of the curvature. It may be much cheaper to use a similar stucco for these purposes;
- You also need to try to remove the old layer on the ceiling, if you plan stretch ceiling. A particularly thick layer will be at the junction of the floor slabs. It must be removed without fail. Even if he is holding on tight now, several years may pass and the situation will radically change. Falling plaster will fall on the canvas itself and in the presence of sharp edges can damage it;
- At the slightest doubt, regarding the reliability of the plaster, especially if it is planned to finish with heavy materials, it is better to remove it. Firstly, why once again load the floor and walls with an additional layer of decoration. And, secondly, it is not a fact that the currently strong coating will not begin to peel off at a considerable weight and will not pull in excess moisture from the same adhesive mixture under the tiles;
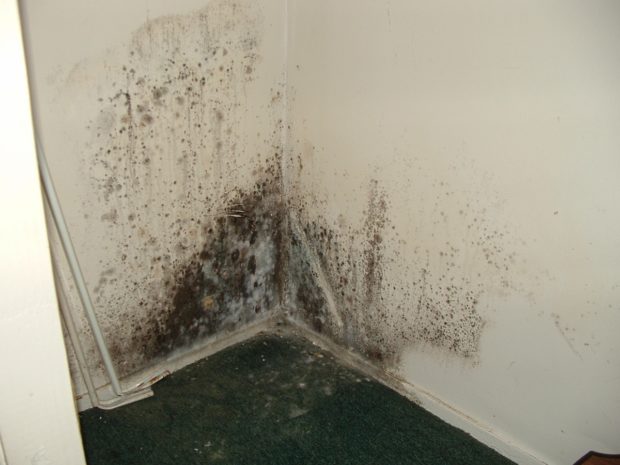
- With surface damage mold.
Also, an important role in deciding on the complete removal of the plaster plays its composition. On your walls you can find the following types of solutions, depending on the year the building was built:
- Clay based - Especially common in old private homes. Similar plastering was done fireplaces or stoves. If peeling or cracking of the material occurred, then the thermal conductivity is significantly reduced, so a complete replacement cannot be avoided;
- When loosened calcareous plaster or, if necessary, the further application of a cement-sand mixture on it, the old solution must be completely removed;
- Gypsum the plaster is quite durable and monolithic, so it can be removed locally, as necessary;
- Cement the plaster must be removed if the correct proportions of the composition are not maintained and the mortar is more sandy than cement. If all requirements are met, a partial replacement can also be made;
- The strongest are polymer solutions. They can withstand subsequent application of other mixtures and provide a solid base. The removal of such a layer is largely due to the appearance of defects associated with errors in application.
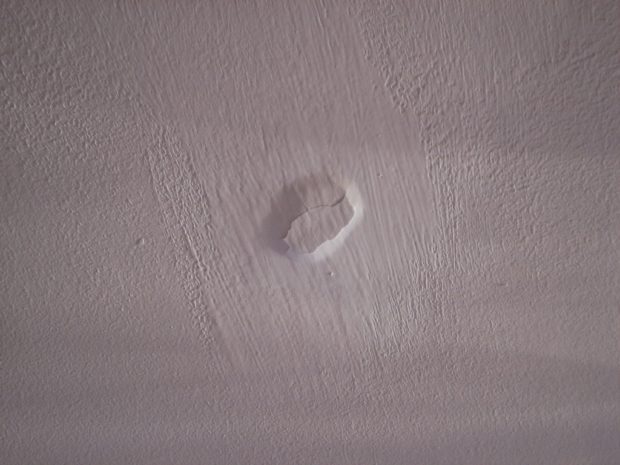
Pay attention to Availability characteristic defects plaster layer. They can be a signal to certain actions. Most often you can meet the following disadvantages:
- Cracks - their occurrence is due to the fact that the composition of the mixture was poorly balanced or poorly kneaded. Perhaps the room was too hot, which led to too quick drying of the solution and its subsequent cracking;
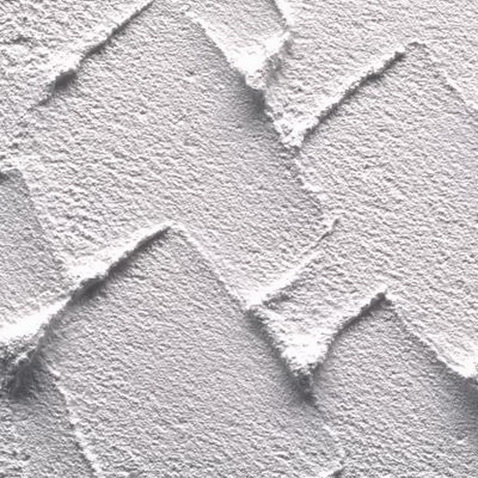
- Tubercles - usually appear when decorating with lime plaster, which contains outstanding particles in the composition;
- Swelling - appears with an excessively high rate of moisture in the base;
- Exfoliation - may form if a stronger solution is applied to a weak base, or if the substrate is excessively dry.

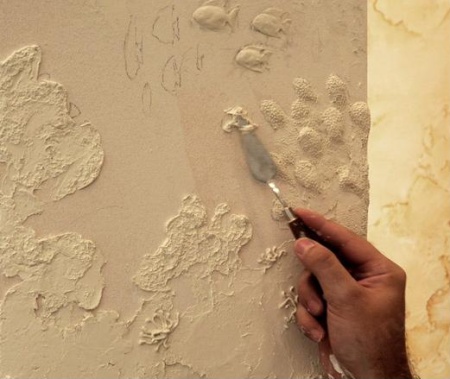
If the old plaster is quite strong and only in some places the above-mentioned discrepancies come across, you can carry out local repair:
- The mesh of small cracks needs to be sanded and wiped with a finish putty. Deeper cracks need to be cut, reaching the surface of the base, and then putty in several approaches. Before this, it is necessary to clean the crack from dust and moisten it with water. First, 2-3 depths of the crack are closed, and after drying, the rest. If there are several large nearby cracks, it is better to cut the damaged area. For this grinder cut a section of the necessary size and beat off the solution. Strip surfaces, remove dust and putty in a fresh mixture;
- The tubercles must be completely cleaned off together with a layer of plaster and putty again;
- When swelling, you need to remove the exfoliated area, dry the base well (possibly using a building hair dryer), after which you can proceed to re-finish;
- When peeling, on the contrary, it is necessary to moisten the cleaned surface before applying the plaster.
The security the fact that this kind of repair will be successful and will not entail further damage is the use of a similar composition. Well, or at least refuse to use denser and stronger mixtures. For example, anything can be applied to cement plaster if it really consists of good cement. But on gypsum or lime, applying cement is highly not recommended. The base must always be stronger.
Left behind old plaster to strengthen. To do this, open the wall several times deep penetration primer. You can use deep penetration acrylic soil, which is absorbed to a depth of 10 mm, polymerizes and strengthens the structure from the inside. Or contact acrylic primer with the addition of quartz fine sand. It additionally cements the surface. The compositions are applied to a pre-wetted wall.
3. Room preparation
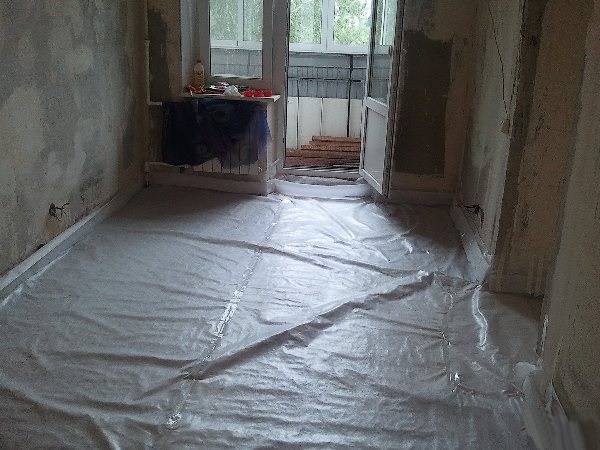
It’s worth noting right away that no matter what method you want to remove the plaster, a large amount of dirt, and sometimes dust, is provided to you. Lime or gypsum plasters are subject to moisture. You can use this fact to facilitate your work. Many experts recommend abundantly dampen the wall before dismantling with hot water 15-20 minutes before starting work. This will worsen the adhesion of the solution to the base and make it more loose.A thin layer can be moistened with a spray gun, and more than 6 mm thick will have to be well impregnated with a roller, sponge or rag. Just imagine what puddles will form on the floor. Take care in advance not to harm other surfaces, especially if the apartment is already partially in a residential condition:
- Be sure to cover the floor with a thick oilcloth so that its edges go onto the walls;
- If you somehow already have a finish coating on the floor, and now you decide to knock down the layers of plaster from the wall, make sure that they do not damage the floor when they fall. You may have to lay thick cardboard or old shit under the oilcloth;
- If there are any on the walls sockets, they must be drowned out and protected from moisture. Cover them with masking tape and oilcloth;
- Cover up window sills newspapers or cloth;
- If interior doors have already been replaced, do not be too lazy to wrap them with special stretch film;
- It is also worthwhile to close the lighting;
- Disconnect the room in which the work is planned;
- Try not to pollute the neighboring rooms. To do this, close the doors, glue them around the perimeter with masking tape, and lay a damp rag on the floor in front of the door, which will close the gap and minimize dust;
- Leave free access to the window so that you can ventilate the room;
- Take out all equipment such as radio, telephone, etc. from the room. Dust can affect their performance.
All this must be done, even if you decide to slowly remove the plaster with a hammer and do not plan to dust. In the process of use drill or hammer drill it may just become a necessity, but you will be ready for this, and then you won’t have to painfully wash away everything from corrosive dust.
4. Personal protective equipment and safety equipment
Now it's time take care and own protection.In any case, small pieces of plaster, breaking off the wall, will fly in different directions.
- Be sure to wear safety glasses. And as practice shows, it is better to use models that fit tightly to the face, for example, a mask for diving. Because when using a power tool, grains of sand can ricochet and slip even between glasses and face;
- Mandatory use of a respirator. It will not only help to breathe less dust, but also protect the rest of the face. Immediately warn that when working with a punch or grinder, even a respirator may be ineffective;
- Wear closed clothing with long sleeves and legs;
- Also wear closed hard shoes. Home slippers or slippers are not an option. Even small fragments and a huge amount of dust will fall into the sneakers. You will have to constantly interrupt the work and shake out the shoes, because the discomfort will be palpable. Old tall boots that fit trouser legs are best;
- Do not forget about the hat;
- In addition to the fact that you need to disconnect the room, you must determine the location of the passage of hidden wiring. Of course, if you are going to change it, damage may not be undesirable.
5. Methods for removing plaster with a hand tool
The room is ready, you are fully equipped, you can safely get down to business. The topic of how to remove old plaster from the walls in many forums is called hackneyed and "worn to holes." Indeed, we have not yet invented anything new, so we will try not only to list possible methods, but also give some recommendations that we have collected based on user feedback.
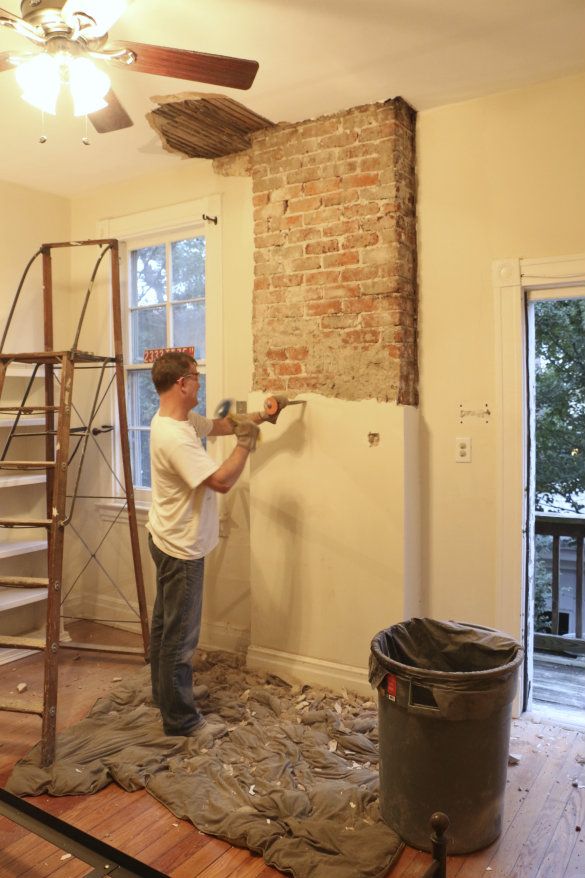
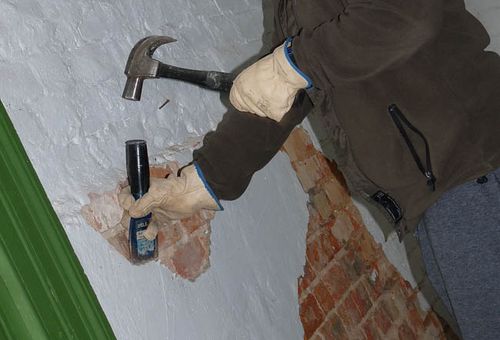
- Plaster layers, which themselves have already begun to fall off in whole layers, are usually first tapped with a hammer, and then they edge the edges with using a spatula. Sometimes you can tap on the handle of a spatula with a hammer to drive it deeper under the plaster and thereby break off the larger layer. To facilitate the process and reduce the amount of dust, periodically wet the surface. If in some places fragments of the old coating do not lend themselves to a spatula, leave them for later. Other methods will be required to remove them;
- Old plaster will fall equally well from both the concrete and the brick base. But what if it is laid on drywall? In no case should you violate the integrity of the sheet, and even more so of its paper layer. Therefore, one cannot strike with a hammer to destroy a layer of plaster. To tap a drywall wall, especially a hollow inside, to determine the place where the putty is already peeled off is almost impossible. Therefore, start from some angle, carefully pick out a small fragment with a knife or a screwdriver first. Now use a loop. This tool resembles a spatula, only sharpened sharply. With its help, you need to gradually pick out the putty, driving it as carefully as possible under the solution. Sometimes you can use a chisel, but you need to keep it at an acute angle;
- If you need to make great efforts,use a chisel and a hammer. With it, you can remove the coating, which holds more or less firmly. To make the work easier and faster, divide the surface into small fragments. To do this, lean the chisel against the surface vertically at one angle and strike from above. You will tap the outline of the fragments in this way. Then tilt the tool at an angle of 45 degrees, placing it in the formed strobe, and begin to knock, moving in one direction;
- The favorite "grandfather" method is to remove the solution with using a hatchet. In approximately the same way as notches are applied to the painted surface before tiled, it is necessary to inflict oblique blows on the plaster. Many argue that it is this method that allows you to quickly cope with the work.
All of the above ways are the most quiet work is not accompanied by an excessive amount of dust and does not require special skills and the acquisition of expensive tools. Plus, their implementation requires less physical effort. After all, is there a difference - wielding with a small hammer or even an hatchet, or a four-kilogram punch? The only disadvantage there will be a low speed of work, of course, if the plaster does not fall off at the slightest touch. There are places where you can’t get a hammer, for example, in the corners, you will have to combine several methods.
On many resources, you can find recommendations that it is best to start work from the top and move down. In fact, this picture turns out - you tapped the corners, along the way some layers of plaster fell off by themselves, began to move down, 2/3 of the walls passed and stopped. They stopped because a sufficient amount of construction debris had already accumulated on the floor, which simply did not allow reaching the bottom of the wall. We'll have to stop, scoop it to the side (or better immediately in a bag, so as not to do one job twice), and only then continue. Therefore better start off from bottom of the wall. Even if you need to substitute a stool, chipped fragments will not bother you. You will put it close to the wall, it will just be inconvenient to work, since everything will fly in the face.
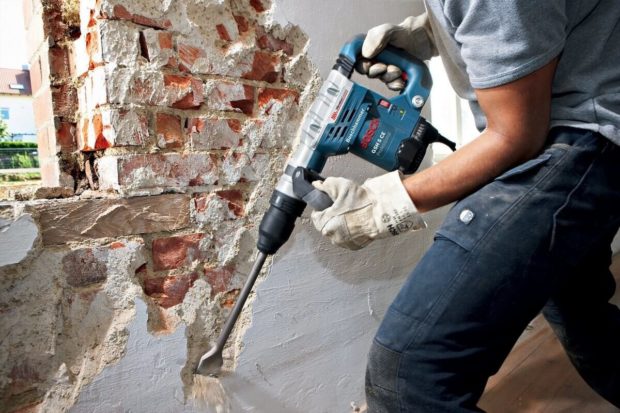
6. Methods of dismantling using a power tool
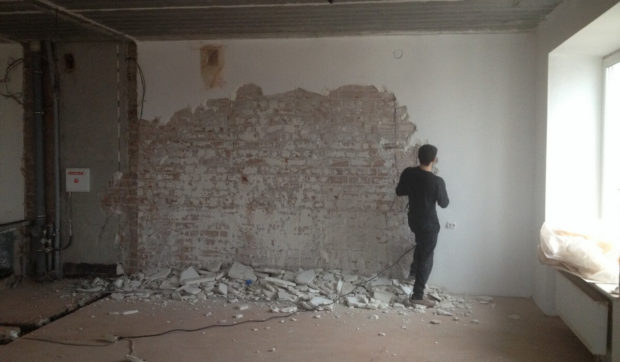
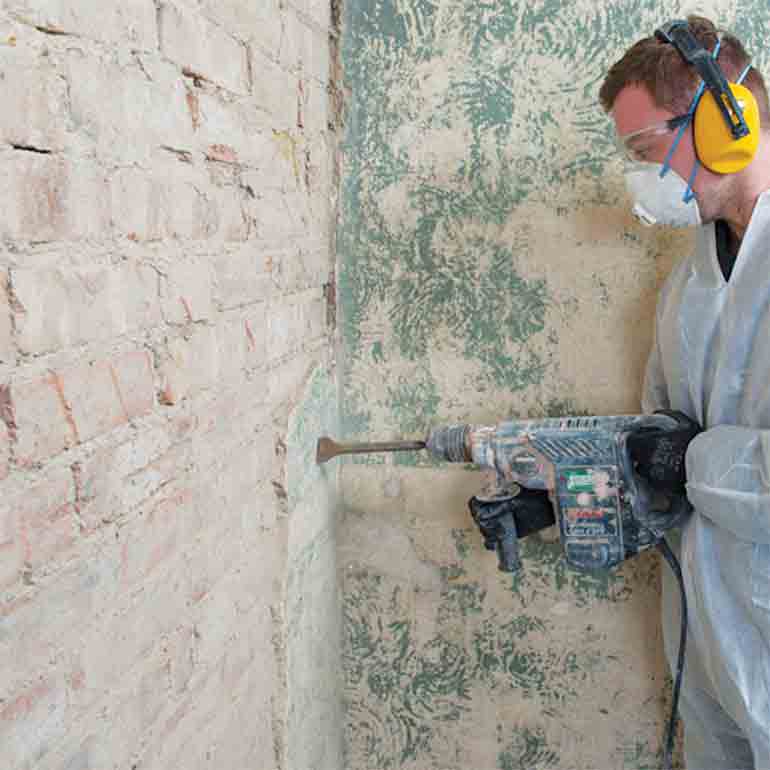
Those areas that did not succumb to the blows of a hand tool will have to be cleaned using a power tool. Get ready for heavy physical exertion and a lot of dust.
- Work really will progress faster if used hammer drill with nozzle in the form of blades of various thicknesses.It is necessary to work by putting the device into the chiselling mode and setting it at an angle of about 80 degrees to the surface. In this position, it is necessary to pierce the plaster to the full depth, and then tilt the punch at an angle of 30-40 degrees, begin to drive it under the solution. So you can achieve the greatest efficiency. But often a punch is effective only when working with monolithic surfaces of the base, for example, with concrete. Passing a softer layer of plaster, you will feel how the nozzle has already rested on solid concrete. Problems may occur when working with removing plaster from masonry. The nozzle can slide off the brick and fall into the seam. Thus, not only the integrity of the connection is violated, but also a lot of bricks chipped along the edges can be obtained. Of course, if you are a professional, this may not be the case. In the case of removing loose plaster with a very high sand content, it may happen that the nozzle, penetrating deep into the composition, will simply be perforated, but not chipped. This is due to increased softness;
- In the same way it can be used instead of a perforator slotting drill;
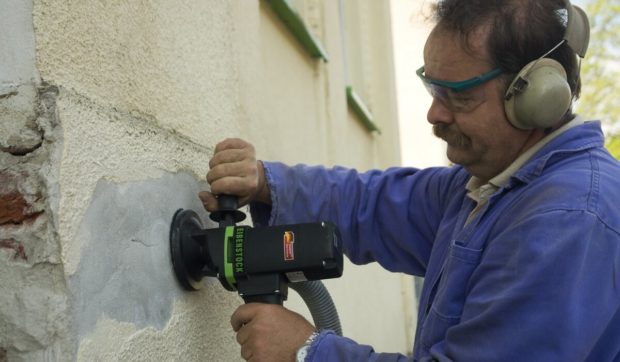
- Can be used grinder with diskdesigned for cutting the corresponding material. The old solution is "cut" into pieces, and then they are chipped with a hammer and a chisel;
- Via grinding machine and a large nozzle sandpaper or brushes you can sand a layer of decorative gypsum plaster. It is necessary to determine the end time of the work visually - they grind to expose the base material.
If possible, use the tool with dust collector be sure to take advantage of this. Maybe it makes sense to rent one for a few days.
7. Removing plaster from the ceiling
The process of removing old plaster from the ceiling is considered especially heavy process. This is due to the fact that you have to work in a position where the hands are constantly raised up. They quickly get tired and numb, more rest breaks are required.
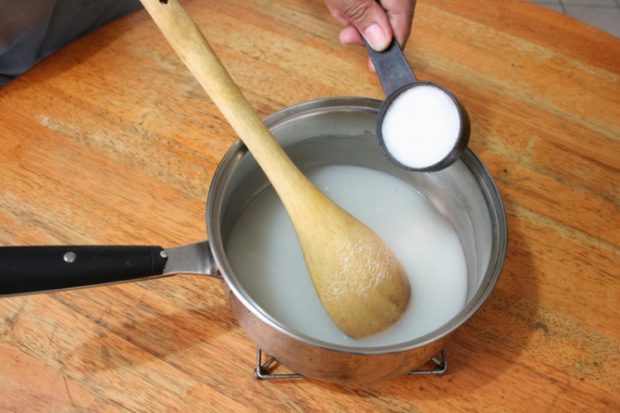
It is impossible to say unequivocally which method is better to choose for removing the solution from the ceiling. Firstly, it is necessary to evaluate each specific situation separately. Somewhere just can not do without a grinder or punch. Somewhere a simple spatula and your patience will suffice. But there is one small trick that can facilitate your work. we will cook special softening composition which, by the way, can be used for walls:
- All ingenious is simple, but in this case, there is also in every house. We need to dissolve 2 tablespoons of potato or corn starch in one liter of water. The resulting mixture must be generously treated with the required surface. The action of starch is aimed at the destruction of the adhesion of the plaster with the base material and its loosening;
- After 10-15 minutes, try to remove the plaster in different ways, starting, of course, with the simplest.
If the solution layer is very thick and only its surface layer breaks off, remove it, then re-impregnate the ceiling with starch solution and remove the rest of the mixture.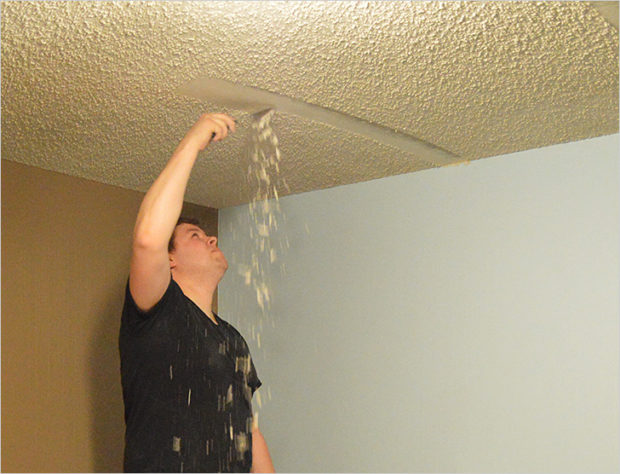
8. How can the remaining construction waste be used?
After such a “fascinating” process, you will certainly have mountains of construction waste. Especially when you consider that on average 15-25 kg of waste is obtained per square meter of wall, depending on the layer of plaster. It is most convenient to immediately put it in bags. Do not fill bags to the top, otherwise they may be too heavy. Use a broom and dustpan during cleaning. If there is an old unnecessary bucket, you can cut off its bottom and place it in a bag. So it’s much more convenient to store waste than if the edges of the bag are constantly wrapped and you will spill everything by. Residents of an apartment building are unlikely to be allowed to simply throw the bags into the trash. Certain standards prohibit this.You have to hire a special machine that deals with garbage collection. 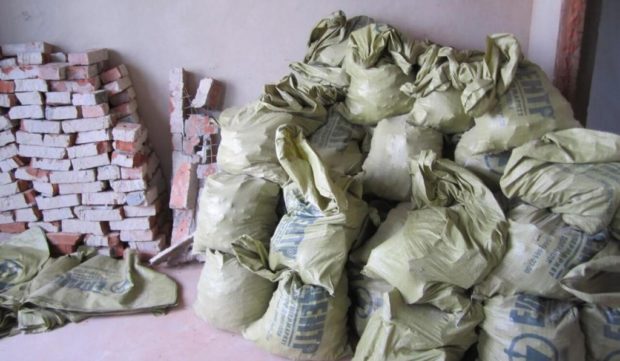
But those who live in their home or have a summer cottage, like waste can even come in handy:
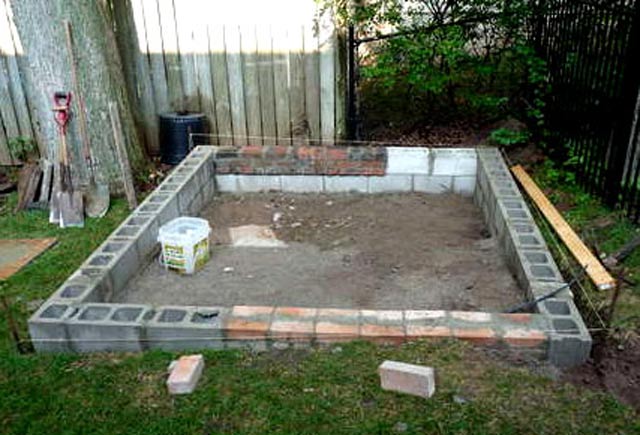
- For example, a cement-sand plaster battle can be used to organize foundation under fill porchparking spaces garden pathssex in summer soul or toilet or terrace grounds. It all depends on its quantity and your ingenuity;
- Clay plaster is generally a natural material, which, incidentally, can be reused. Simply re-soak the pieces of plaster and mix well. Moreover, the proportions are already maintained and there is no need to buy / add anything;
- Gypsum plaster can be sprinkled with the organization of the overlapping of the utility posts as a natural insulation;
- Using the remains of lime plaster, you can stop the unwanted growth of plants on the ground. It is enough to pour its fragments under the ground.
In such a simple way, you can usefully use even construction waste!
")
") TOP 8 manufacturers of stucco (plaster mixes)
TOP 8 manufacturers of stucco (plaster mixes) DIY wall plastering
 Types of dry plaster mixes: composition and ...
 Decorative plaster: types, application, painting
 7 tips for choosing warm plaster for the facade and ...
 4 ways to align walls for interior decoration
 9 tips to remove / wash off whitewash
 10 ways to remove paint from a wall
 5 ways to remove tiles from the wall and floor
 Wall decoration with decorative artificial stone