LED strip in the interior: 45 ideas for use + photo
With the advent of LED lighting fixtures, many designers looked at the process of organizing lighting from a completely different, more interesting side. Today, work on home lighting can be safely classified as creative and time-consuming. Indeed, every day there are new ideas and opportunities for organizing a truly unique light picture. As a rule, several types of lighting devices are used, which together create a unique, enchanting play of light and shadow. One of the sought-after elements that no modern design can do without is LED Strip Light. The scope of the diodes is so wide that you can even find LED grass for the lawn on the Internet. However, we will devote this article use of LED strip in the interior, we will share interesting ideas and tips, and also consider how to properly and, most importantly, securely attach it to the desired surface and avoid common mistakes during self-installation.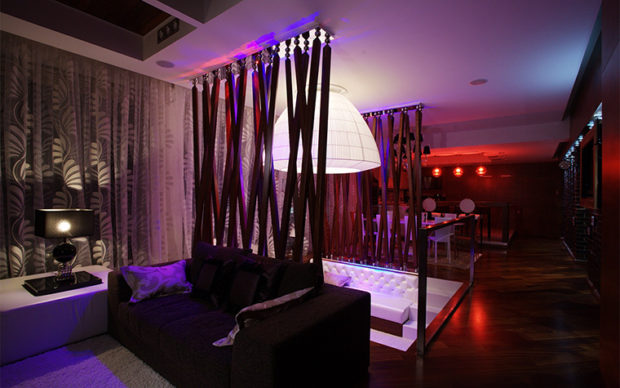
LED strip in the interior
Within even modest apartment size, definitely there is a suitable place to place the LED strip, to say nothing about spacious private mansions ... Those who once personally tried all the delights of using this decor element are unlikely to deny themselves the pleasure light up using it literally all possible corners. Having seen amazing pictures on the Internet, where the tape not only helps to create bizarre illusions, but also performs a practical function, instantly there is a desire to realize what he saw in his home. In addition to the fact that the diode tape is beautiful and stylish, it also:
- A very convenient way to create an additional light source due to the ability to adjust the length and connect the elements together;
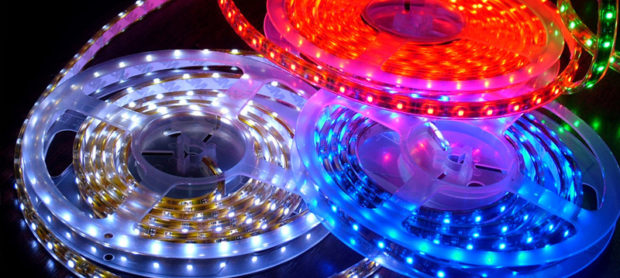
- Due to the fact that the tape is not only monochrome, but also multi-colored, it is possible to get the most suitable for your particular shade of the walls or ceiling, the color of the glow;

- It is possible to purchase a tape that changes color using the remote control. Thanks to such simple manipulations, your interior will radically transform in a matter of seconds;
- Tape - a flexible element that can most accurately repeat curved contours. This means that any curved niche, arch and other decorative element can be emphasized favorably with the help of this type of illumination;
- LED tapes are moisture resistant and even sewn into a special waterproof profile, which makes it possible not only to use them in rooms with a high level of humidity, but also in aquariums. Imagine how magical a large aquarium will look, at the bottom of which there is a backlight;
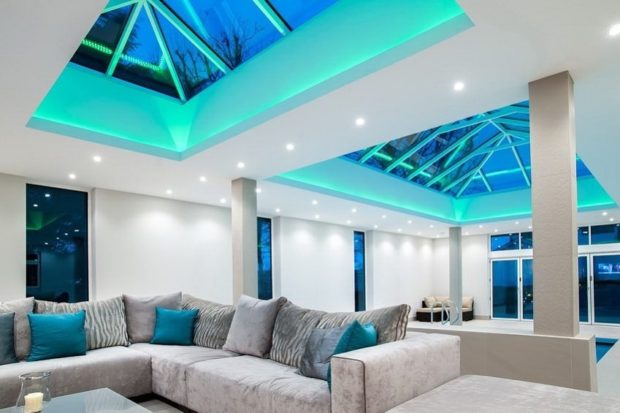
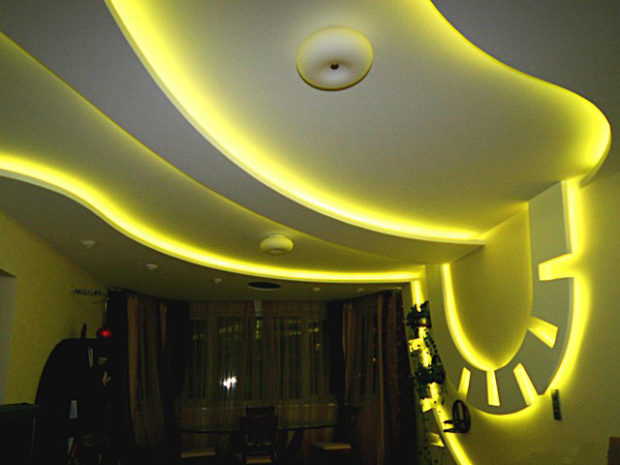
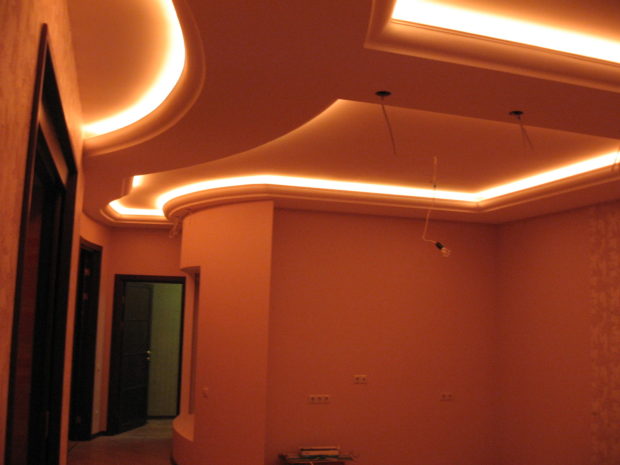
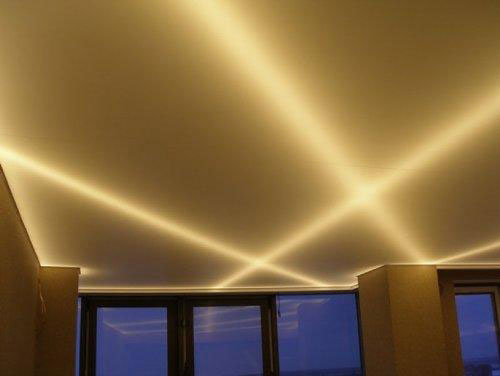
- It is with the help of diode tapes that you can achieve the effect of soaring or blurring of borders. The most striking example is the organization of lighting along the perimeter of the ceiling, which creates the illusion that the ceiling arch is absolutely weightless and does not touch adjacent walls;
- You have the opportunity to create both directional lighting and a soft, diffused light source by simply placing the tape in a special profile;
- And the most important plus - the tape does not emit radiation harmful to humans such as ultraviolet radiation and others. It does not heat the adjacent surfaces. Thanks to this, it can be safely used for stretch ceiling lights.
Concerning disadvantages use of LED strips, then, perhaps, it is only one - a decrease in the brightness of the diodes after a certain number of hours. Now about the ideas themselves regarding the use of tape in the interior.
LED strip in the interior of the hallway
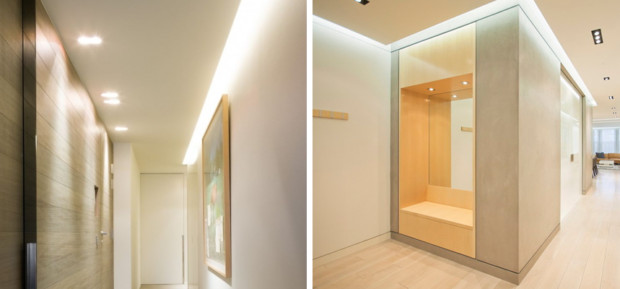
The entrance hall in ordinary apartment buildings most often represents a rather narrow and long space, absolutely devoid of natural light. Therefore it is very important to do artificial lighting bright and uniform, without leaving a single corner without attention. A good idea would be to use LED spotlights on the ceiling in combination with a tape that will make lighting differently tiered and diverse. Thanks to this approach, the room will visually appear more spacious, not so cramped and uncomfortable.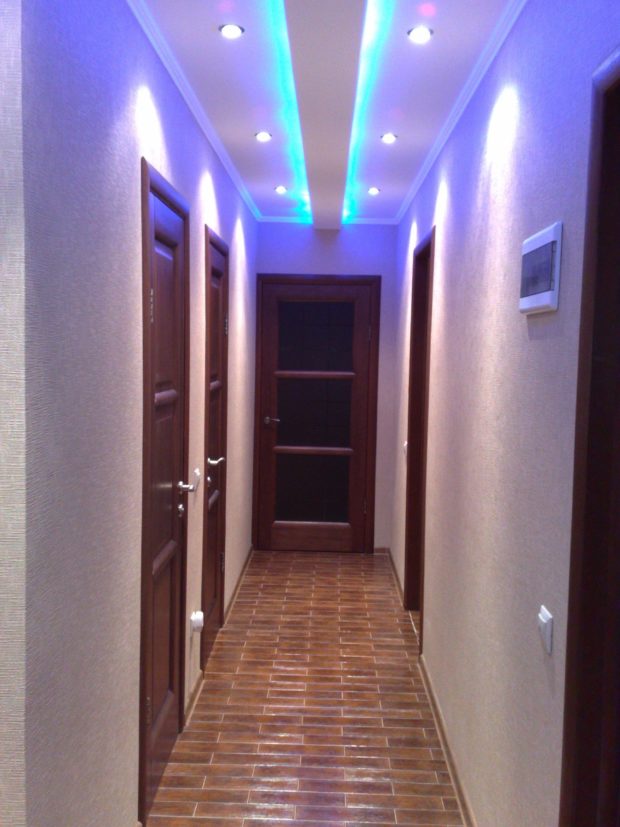
In the hall suitable place for tape fastening will be:
- Doorway. This technique is very interesting, but it is not often found in the interior of ordinary apartments, especially if the repair was carried out without the preparation of a design project by a specialist. Therefore, if you want your hallway to make it clear to the guests that the owners of the house are creative and extraordinary, be sure to take note of this idea. There are several options for designing a portal. You can only fasten the tape over the door. You can decorate the side walls of the opening, or you can decorate the entire door frame completely. The main thing, choose tape not too much brightness - with fewer diodes and a large pitch between them. This is necessary so that the person entering the apartment is not blind. The backlight should be soft and muted. To achieve this effect, it is necessary to use special aluminum profiles. Their cover is made of opaque plastic and is a scattering element;
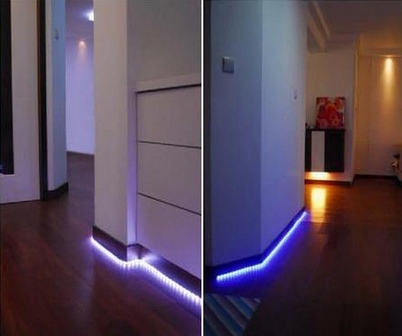
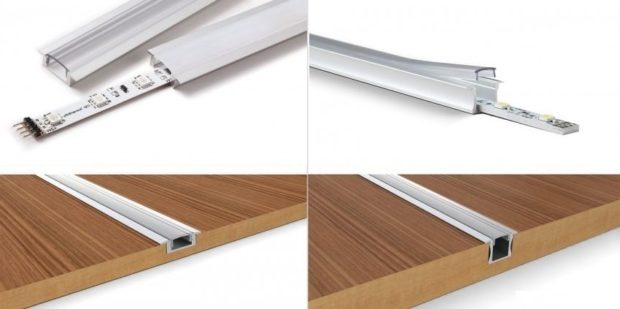
- If your hallway is not cluttered with a lot of furniture, it is advisable to perform floor lighting. That is, use skirting boards specially designed for such purposes. On their front part there is a groove in which the tape is glued, and which is then closed with a special transparent strip. The design is almost the same as usual skirting board. By the way, if you decide to just stick the tape to the MDF skirting board or to a regular plastic skirting board in the place where they are screwed screws and do not close the recess with a bar, then immediately abandon this idea. Firstly, an unclosed tape will quickly become covered with dust, which can lead to burnout. Secondly, due to the lack of a protective strip, it will be very difficult to wet-clean;
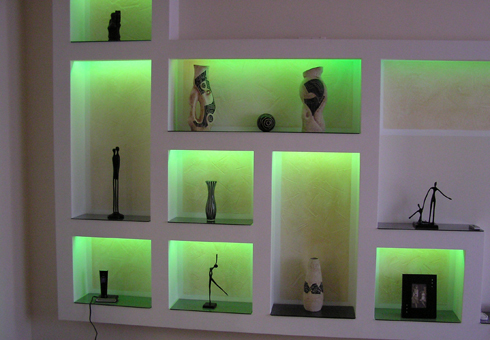
- If there are corridors on the walls decorative niches, then placing the backlight inside around the perimeter, you visually deepen these elements. To enhance the effect, you can stick a mirror panel on the back wall. A composition of several niches that are highlighted with a multi-colored ribbon will look very beautiful. The interior of such a room will immediately become multifaceted and dynamic;
- Very often over the front door or over the door that leads to the kitchen, there are mezzanine. We all actively use such places for storing items that we use very rarely. Naturally, the builders did not think that in such a place would not hurt the presence of a lamp, in the role of which the LED strip will act. It is bright enough to illuminate the farthest corners of the mezzanines and, most importantly, does not occupy usable space.And if you equip the design with a sensor that will trigger to open the doors, using such a lighting system will become much more convenient;
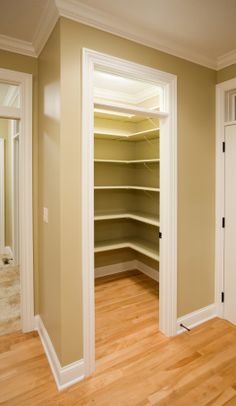
- Between the hallway and the kitchen there is often small pantry, which no less than the mezzanines needs high-quality illumination. You can fasten the tape both around the perimeter of the pantry doors from the inside, directing its light on the shelves, and on their lower plane;
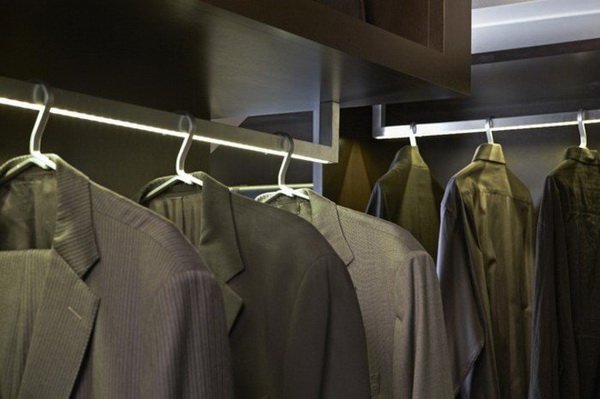
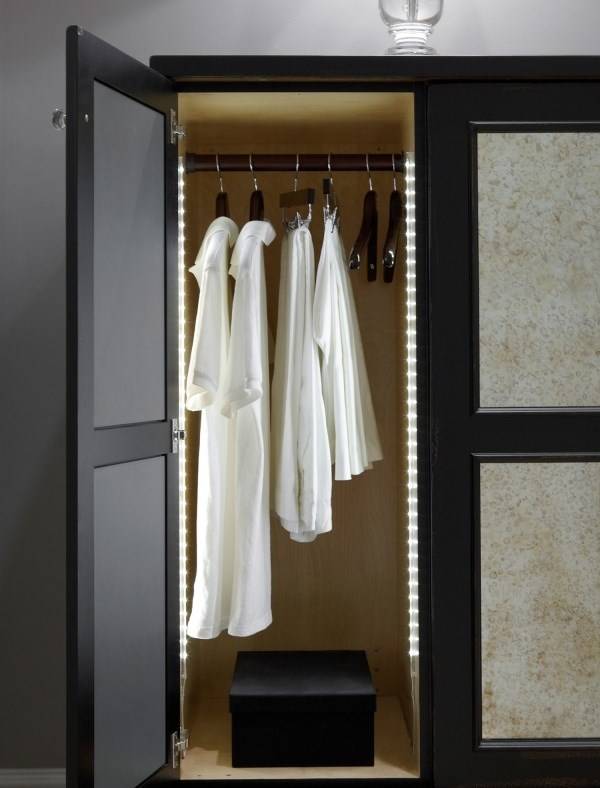
- Another useful way to use the tape is to install it in closet or a cabinet for shoes. Indeed, even when overhead lighting is turned on, not the entire internal cavity of these pieces of furniture is illuminated to the necessary extent.
When it comes to the above methods of applying tape in the interior, it is very important to connect it independently. That is, each element should be able to turn on and work separately, and not in conjunction with the main lighting. In this case, it will turn out to make the interior both bright and functional.
Living room with modern lighting
Living room lighting, both spacious and little, requires special attention.
- After all, there should be present and quite bright upper light sourceso that it is convenient to receive guests and celebrate various holidays;
- There should be a source of soft, subdued light to create a cozy, homely atmosphere;
- There should be a directional light source that will allow you to read a book, work on a laptop or do needlework without the need to turn on general lighting;
- It is important to create beautiful light accents that emphasize certain decor items or distinguish between different functional areas;
- Reception light zoning often found in living rooms combined with a dining room or hallway. This method is good because it does not take up precious space and is very beautiful in itself. For these purposes, an LED strip that can be mounted on the floor with a special profile is just the right fit. Above the light line on the floor, diode spotlights on the ceiling in the same direction should also be located. A light portal forms, which clearly delimits space.

Such zoning can be used not only in living rooms, but also in other combined rooms. Also in the living room, LED strip is actively used for highlight certain elements. For instance:
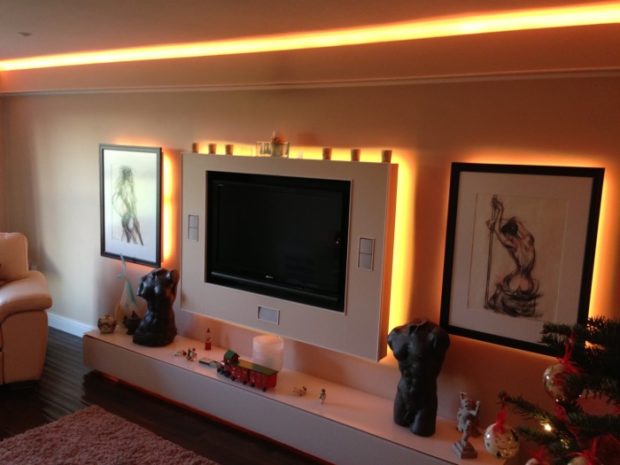
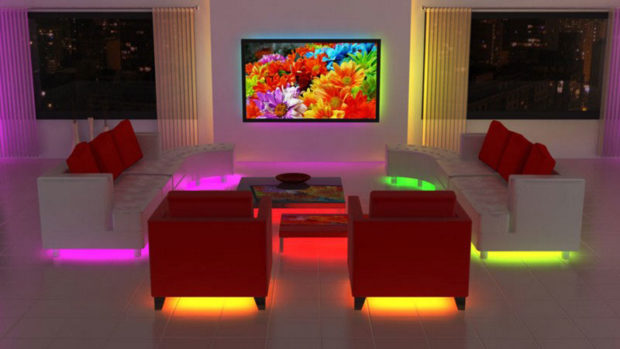
- TV zone backlight, namely, the TV itself, began to be used not so long ago, but instantly won a lot of fans. The diode tape is mounted on the back of the TV screen as close to the edges as possible. Thanks to this, the glow covers a large area on the wall to which the TV is attached. Such illumination looks especially impressive in cases when a colored tape is used or when the wall has a textured pattern. Each unevenness instantly becomes more pronounced and noticeable;
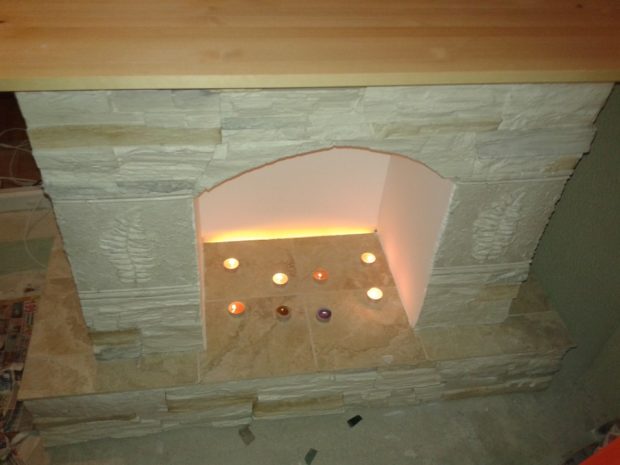
- Using a warm yellow diode strip, you can easily simulate the light from a fire in a fireplacedo it yourself. Bio or electric fireplaces - pleasure is not cheap. Therefore, more and more can be found in the interior false fireplacesthat can only remotely resemble the portal itself. Even such a small similarity is enough to bring a little warmth and coziness into the interior. Often in the area where the firewood should burn, they put candles. This method is not entirely safe. Therefore, it is better to highlight the firebox with tape, but so that it is not visible. The effect will be what you need !;
- A favorite element of all interiors in loft style or in a mixed style - a wall lined artificial brick whether another type of stone, simply can not do without additional lighting. After all, it is with its help that it will be possible to emphasize the contour of each individual pebble and make the wall “alive”. The tape can be placed both under the ceiling and on the floor in front of the wall. And you can both there and there.The difference between a wall with and without lighting is enormous;
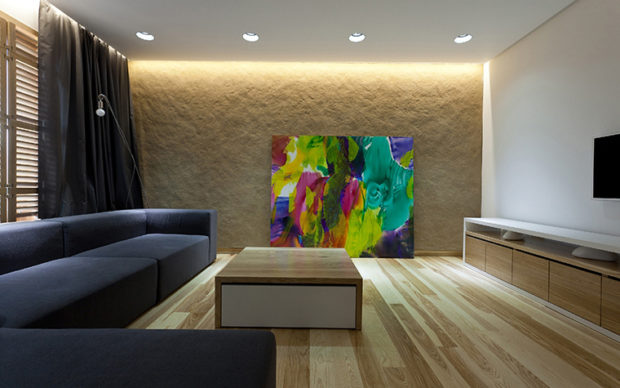
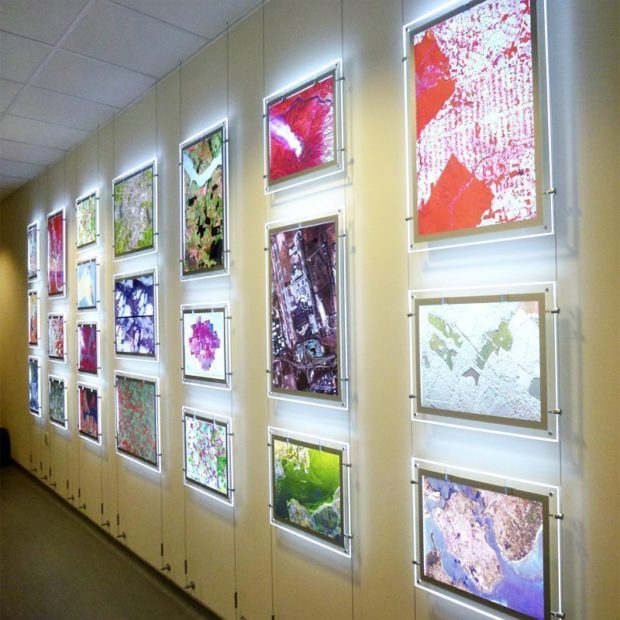
- If you like painting and prefer use paintings to decorate the interior, be sure to make sure to put them in the most winning light and pay attention to them. Special lighting fixtures for paintings undoubtedly look stylish and perfectly fulfill their function, but their cost sometimes frightens them away. You can get by with the usual diode tape, sticking it along the contour on the back of the picture, as is the case with the TV. The light will not strike you when one of your guests wants to admire a work of art, but it will be quite bright and noticeable;
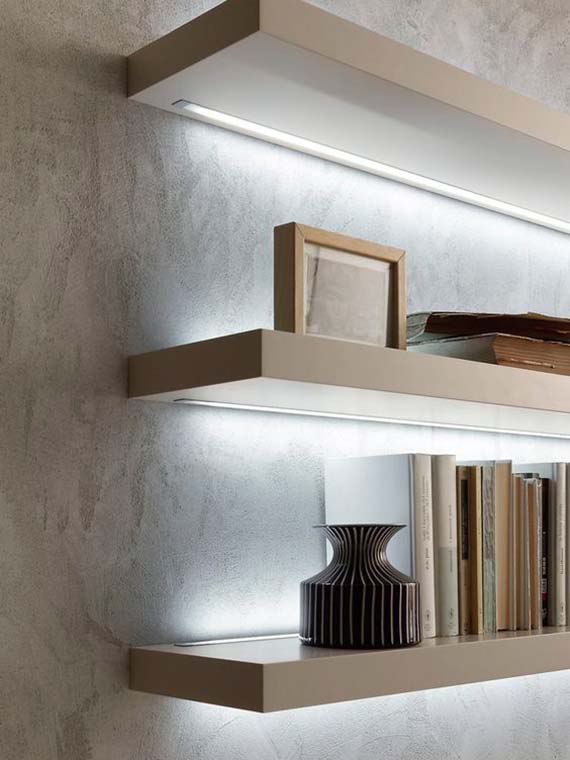
- An interesting effect can be achieved by highlighting wall shelves. Moreover, the tape can be glued both on their lower plane, and on the upper, or around the perimeter. The main thing is to position the light source closer to the wall so that the light is projected gently onto it. Such shelves themselves will act as decorative elements, so heap them with various vases, statuettes and other little things are not worth it. One, two items - no more. Better yet, put your favorite photos in glass frames;
- Many of us are very fond of books and can even boast of having our own, albeit small, home library. Most often, books are placed on an open shelf. By itself, this element is very saturated, as it is replete with a variety of colorful bindings. In this regard, designers recommend the use of decor in rooms where there are such racks to a minimum, or even completely abandon them. It is much better to put the finishing touch, adding shelves with books backlighting. The tape can be used both monochrome and color. You can highlight sections in different colors in a certain order - in a checkerboard pattern, diagonally, vertically, etc. In general, rely on your imagination;
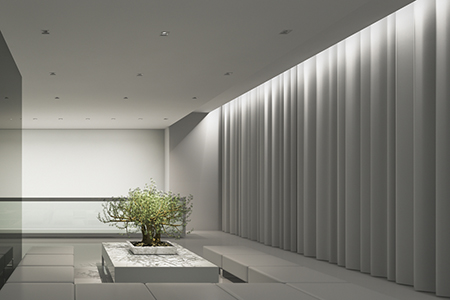
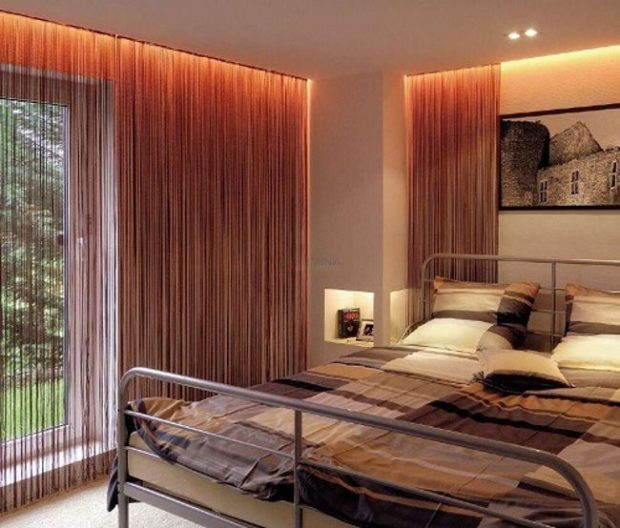
- It is impossible not to mention window opening illumination, namely cornice. The tape is positioned so that the diodes are directed down. At your request, you can glue the tape both in front and behind the curtains. Depending on this, you will get different glow intensities. When highlighting in front of the curtains, you can further emphasize their beautiful texture, do not forget about it and do not miss the opportunity to add luxury with the help of expensive textiles;
- Sofa backlight or coffee table will create the effect of furniture soaring above the floor. Especially if the pieces of furniture are low, mundane. The backlight on the sofa can be placed both behind its back, so that the light falls on the wall, and on the bottom of the base. If you decide to highlight a coffee table with a glass top, remember that by placing the tape with diodes down, you will make its back visible. This can ruin the aesthetic appearance of the countertops. Therefore, it is better to mount the tape on opaque areas;
- Like the hallway, lighting wall niches in the living room would be a very good idea. In addition, if the doorway in the room is made in the form arched portal, you can safely decorate it with a ribbon, thereby paying attention to its graceful bends;
- May be completed with soft backlight the columnswhich are an integral element of the living room in classic style. Just do not stick the tape along the column pillar. It is better to place it at the very top under the ceiling around the column;
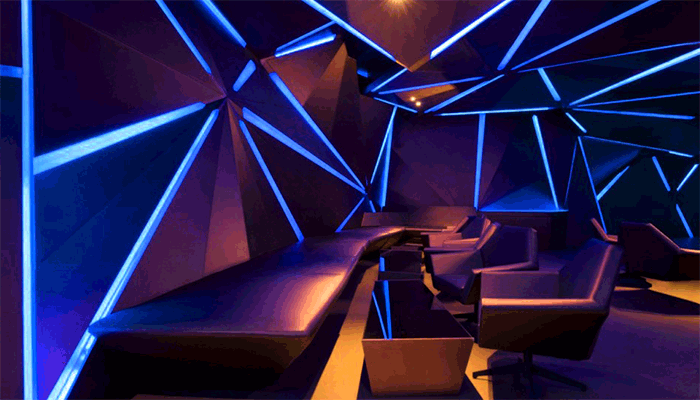
- Various bends of walls, decorative ledges or geometric elements will look much more expressive and deeper with additional illumination;
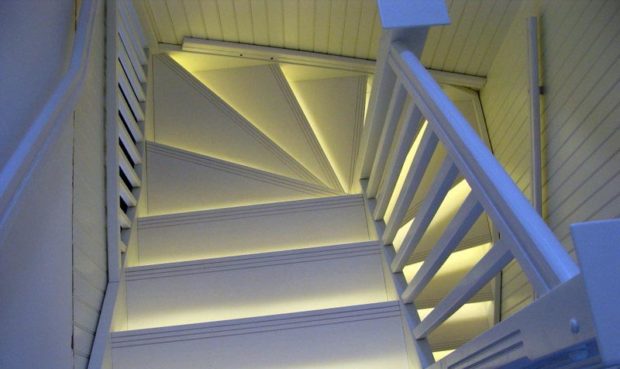
- Layered apartments or living rooms in private houses have such an element as a staircase. And for you it should be a wonderful canvas for creativity. The staircase can be shined in a variety of ways. It is worth noting that this not only looks spectacular, but also reduces the risk of injury.The main thing is to arrange the tape so that when you look at the steps, its light does not dazzle you, but only creates a soft backlight and indicates the path. Choose different colors, matching them with the color of the surrounding walls or the steps. Decorate the railing, the ends of the steps or lay the tape in special skirtings, in general - go for it !;
- Can not be ignored ceiling vault lightinga. In this case, there are a lot of options for placing the tape. The effect that you get in the end depends on this. We will talk about how to fix the tape to the ceiling a little later.
Do not use all methods at the same time. A maximum of two or three ideas within a spacious room, and no more than two in the interior of a small room.
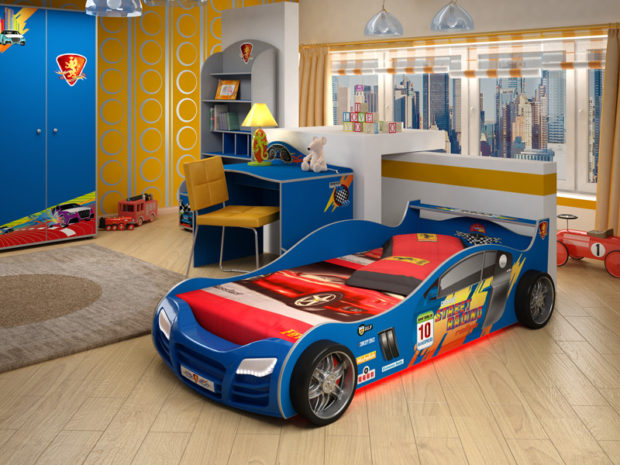
LED strip in the interior of the children's room
This room should be very calm, sustained in warm pleasant shades. appropriate highlightespecially if your child is overly active. Use bright lighting is permissible only in the playing area or in the area where the developmental classes are held.
- If your child is already old enough and it's time to do homework, you need to provide him with sufficient lighting. Sometimes the dimensions of the nursery force them to use furniture such as an attic bed. On the ground floor there is a desk that cannot boast of large sizes. To put a desk lamp on it also means to take away a certain amount of free space. But if there is a roof over your head, you can try sticking a neutral white light diode tape that will do the job perfectly;
- In the same way, you can highlight wall shelves or a desk extension;
- If your little astronaut dreams of owning a ship, highlight some pieces of furniture using a colored ribbon. For example, his bed below and a closet or chest of drawers. And then for you everything will be done by a children's fantasy;
- If the child is afraid to sleep in the dark, the above method will help get rid of this problem;
- You can also create a soft glow by sticking the tape on the ledge behind the curtains;
- In the play area, you can highlight the chests with toys so that it is more convenient for the child to find the desired item in them. The main thing is not to use cold white light, which will turn the room into an operating room and can distort colors and not be abused.
Ideas for Using Ribbon in a Bedroom Interior
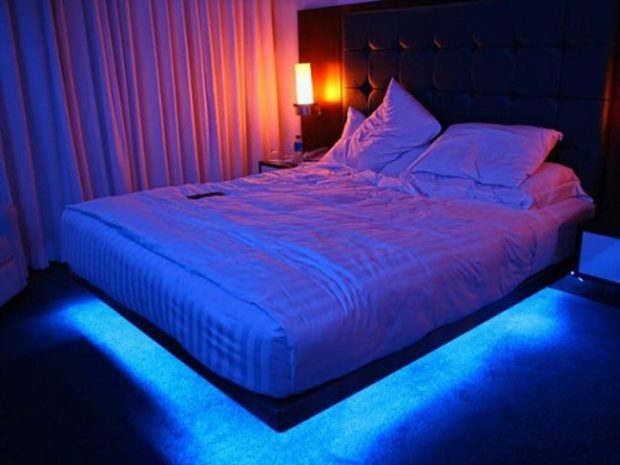
Just like a children's room, a bedroom is primarily a place for rest, relaxation and peace. Excessively bright light will irritate the nervous system, and provoke its activity. Therefore LED backlight must be used from caution.
- The picture that is one of the first to appear after the query “LED strip in the bedroom” is bedthe bottom of which is decorated with a ribbon. So why not? Especially if your room is decorated in contemporary style. Even if the bed is not equipped with mirror panels around the perimeter or does not have a special design that creates the effect that it hangs in the air, the effect of soaring will still be achieved. Plus, it’s an additional light source, soft and pleasant;
- The tape can be used instead of wall lights, placing it at the head of the bed. Especially if the bed is installed in a specially provided niche. The reading process will be very comfortable. And electricity consumption is economical;
- The dressing table must have a bright source of light, which will not miss a single trifle during the gathering. Diode tape can be glued around the perimeter of the mirror;
- The illumination of the cornice will help to create a soft light source;
- If a balcony or a loggia adjoins the bedroom, which in principle do not need bright lighting, it is advisable to use a diode strip for their illumination.And when it is necessary to create an intimate atmosphere in the bedroom, it will be possible to turn on the light only there and to curtain the curtains;
- Most modern interiors cannot do without dressing rooms. To illuminate each of its sections, you can also use LED strip.
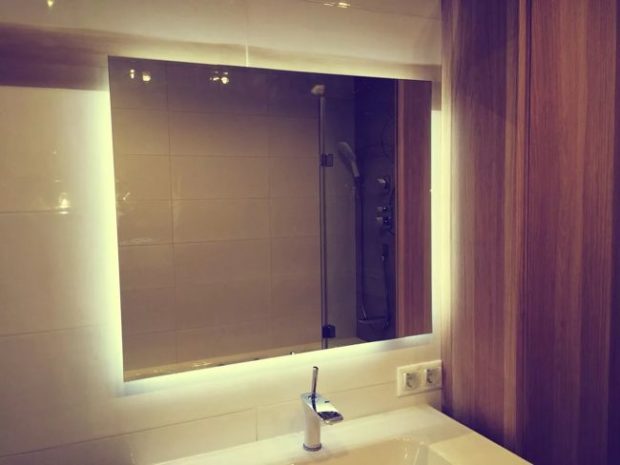
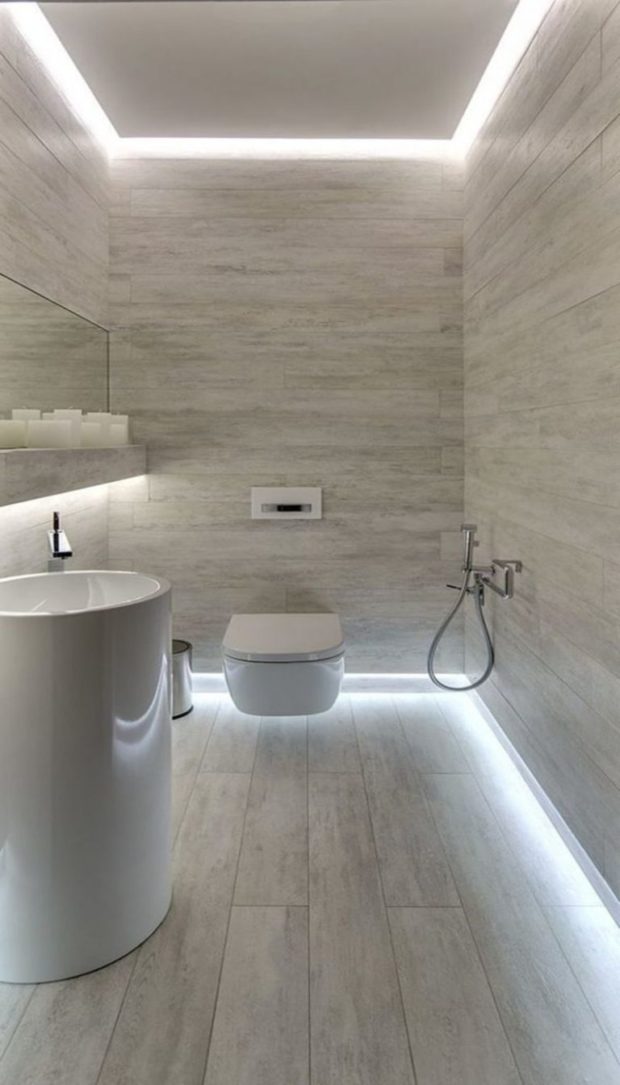
Bathroom lighting
This room is for sure not particularly open. That is why not only the use of finishing materials in bright colors, but also filling it with a sufficient amount of light will be the right decision. It is important to choose the right light temperature. Cold white is not suitable for these purposes. Only a neutral or, in extreme cases, a warm spectrum. So where appropriate to use tape:
- Of course, not only beautiful, but also rational, sticking the tape on mirror. After all, it is not for nothing that mirrors with an already built-in LED backlight are sold. Their cost is sometimes simply unjustified, so it is much more economical to use our idea. The tape can be placed both around the perimeter, and only on the side or on the upper and lower faces. In any case, it will be convenient for you to apply makeup and perform other procedures;
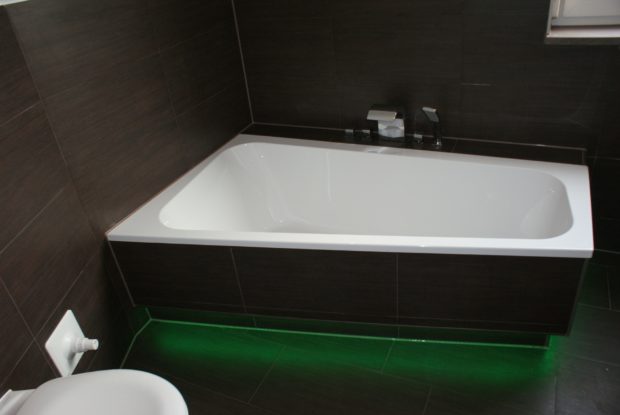
- It looks very interesting bath light around the perimeter of the floor. Such a soft glow will be comfortable for the eyes even at night and slightly expand the space;
- The same can be said about the lighting of the ceiling in the bathroom;
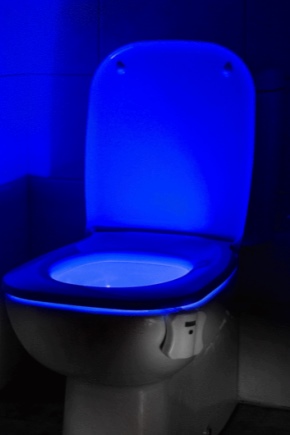
- Recently, it has become very popular to use lighting for various plumbing. And we are talking not only about the illumination of the bathroom, which is located on the protective screen, but also about the illumination of the sink by sticking tape on its lower plane around the perimeter, as well as the illumination of the toilet. It is beautiful or not - judge for yourself by the photo;
- It will definitely look spectacular if a hinged plumbing is used;
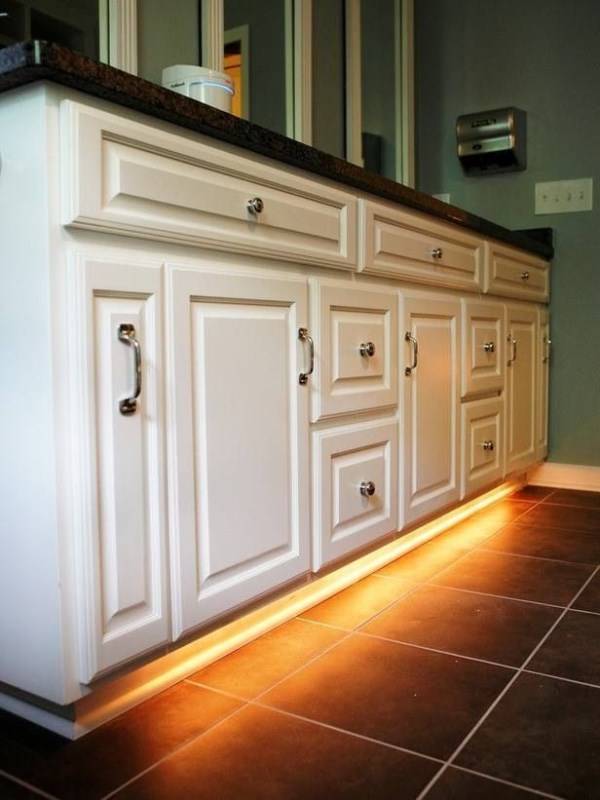
- Wall cabinets or cabinets it’s just not a sin to decorate in this way. The effect of soaring will be achieved to the maximum;
- You can also highlight wall shelves, if any.
When organizing lighting in the bathroom with an LED strip, do not forget that this is a room with high humidity. This means that the tape must also have an appropriate protection class. And again - do not try to use all the ideas within this modest room at once.
Using LED strip in the interior of the kitchen
In this case, both decorative and practical aspects of using the tape are most fully combined. The most popular places for its installation are:
- Definitely a leading position should be given work area lighting using tape. In this case, it is also worth using moisture-proof varieties. You can stick it both on the lower plane of the wall cabinets and on the wall using special profiles. An interesting effect can be achieved if the kitchen apron is a tempered glass with backlight;
- Each kitchen cabinet, both hinged and pull-out, can also be made more convenient to use if you provide a sufficient level of lighting. You can equip the system with sensors that respond to opening;
- If indoors low ceilings, be sure to stick the tape on top of the wall cabinets;
- Unexpectedly, but nevertheless - use a tape for additional illumination of the refrigerator. What if it comes in handy;
- Also interesting is the tape placed around the perimeter kitchen set in special skirting boards;
- For convenience, housewives often hang on the wall in the kitchen clock. If you stick a tape on their back side, they will also turn into a beautiful element of decor;
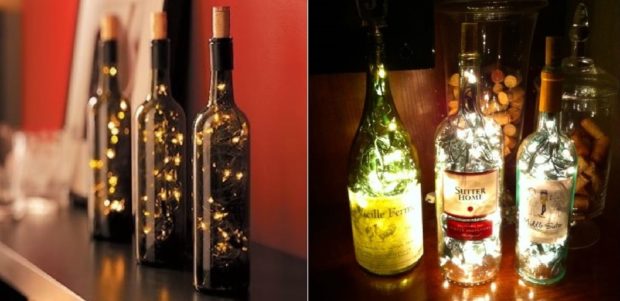
- It is in the kitchen that you can place beautiful glass bottles on the shelves, inside of which a decorative diode thread is laid.


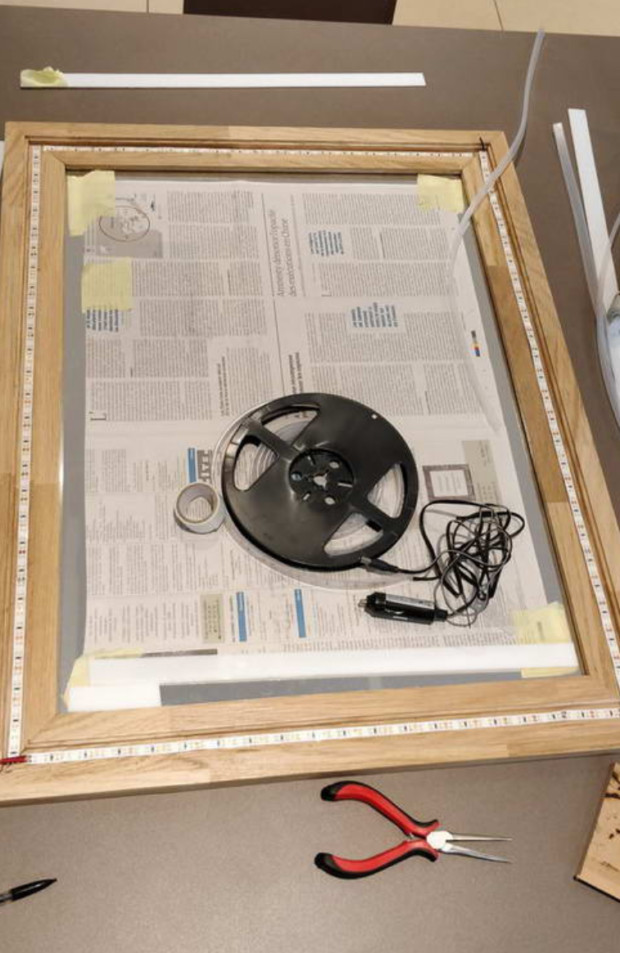
How to properly attach LED strip to various surfaces
After we have considered so many beautiful and practical ideas for using the tape, you need to make sure that your backlight simply does not lag behind the surface in a few days. There are not many mounting options:
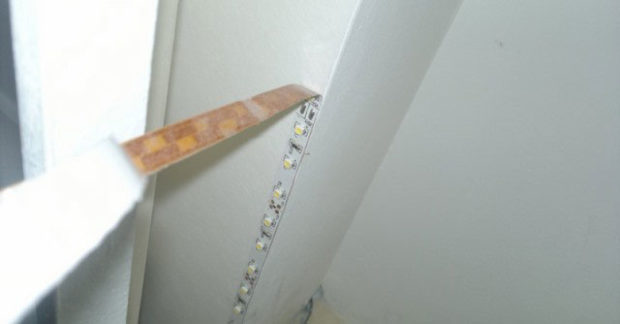
- Almost the entire tape is equipped with a sticky layer. This was taken care of manufacturers. In order to stick it to the desired plane, it is enough to separate the protective layer by a few centimeters, gently press the tape, and then gradually advance to the end. With this installation, it is very important to thoroughly prepare the surface - to get rid of contaminants, degrease, wipe dry and immediately begin to glue until it is dusted. You can use the "native" sticky layer only once. Therefore, think about the exact location of the tape in advance. The second time she just does not stick. In principle, this method allows the tape to stay even on rough surfaces;
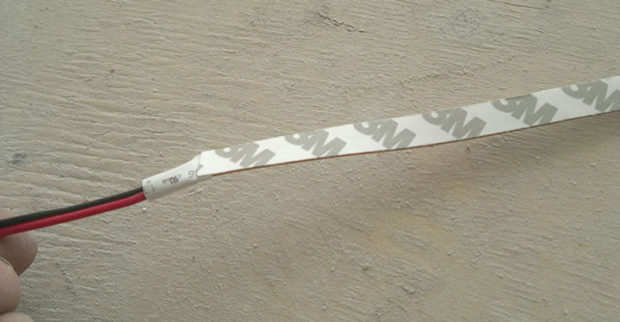
- But often the above method is short-lived and over time, the tape starts to stick and just disappears under its own weight. This is either due to the fact that the surface was not prepared properly, or the adhesive layer itself was not of very good quality. Sometimes the cause may be improper storage conditions of the tape by the seller. If she lay in a cold warehouse for a long time, even the highest-quality adhesive tape will lose its properties. It is enough to just use a new adhesive tape, which is first glued to the tape. It is better to use products that are labeled “ZM” and purchase them from trusted sellers, since there are many fakes;
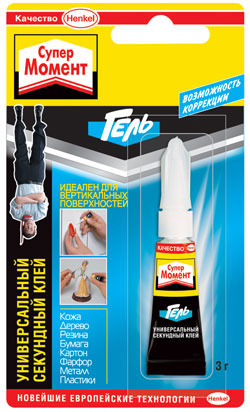
- If the tape is long and has additional moisture-resistant protection, the likelihood of it being peeled off is higher. For reliable fixation, you can use superglue in the form of a gel, which is applied pointwise, with an interval of 3-5 cm. The rest of the space will adhere tightly to the plane with the help of a native adhesive layer;
- If aesthetics is not important - you can use clamps to fix the tape;
- The most reliable way of fixing is the use of aluminum profiles, which are mortise, laid on or angled. This allows you to mount the tape in any place;
- If you are installing a powerful tape, you must first glue the foil tape on the surface, which will serve as a screen for heat dissipation, as well as aluminum profiles. That's why you can not use ordinary skirting boards to place LED strip in them. She will just warm herself;
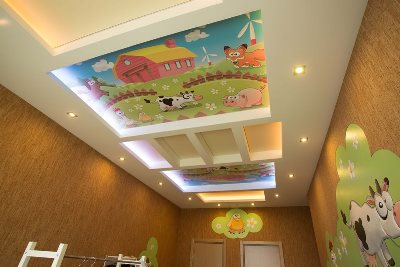
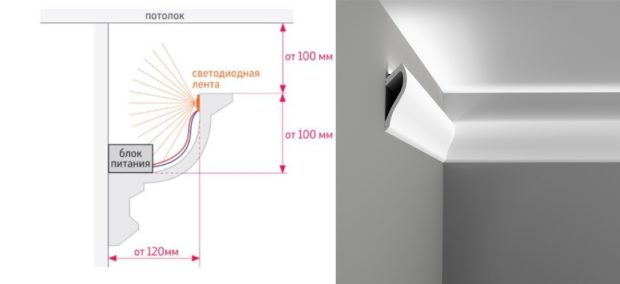
- Mounting on ceiling cornice. This is one way to fix the backlight to the ceiling. The pictures below show a diagram of the correct location of each element.
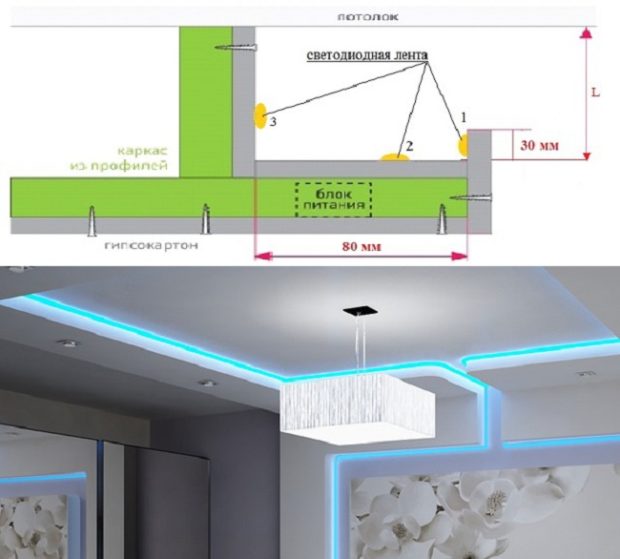
- You can also perform hidden lighting stretch ceiling. The effect will be just amazing. To do this, attach the tape using special brackets from the plane of the main ceiling, and then stretch the PVC film. Position the ribbon so that it forms a specific pattern.
Typical installation errors
It is quite difficult to carry out the installation of a diode strip incorrectly, however, there are such unconventional mounting methods that are best avoided:
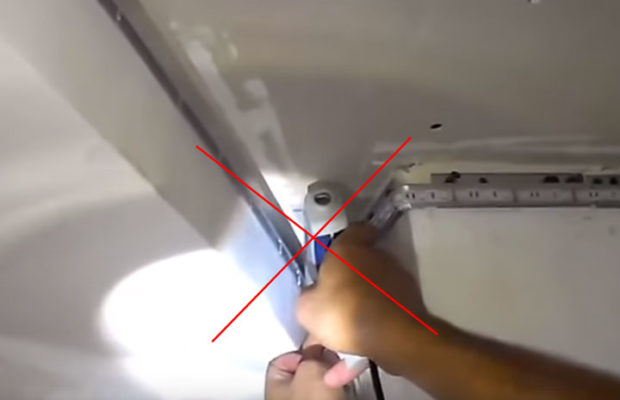
- Fixing with a construction stapler. Undoubtedly, this is a very quick way and quite reliable, but one wrong move - and your tape has become unusable;
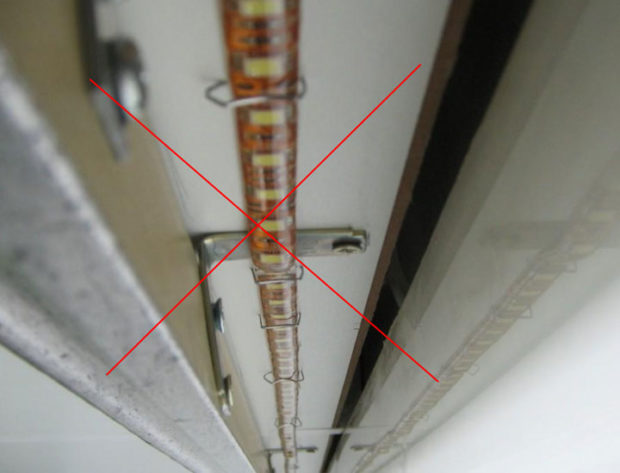
- It is also not recommended to use hot melt adhesive. After solidification, it will serve as a layer that does not remove, but rather, accumulates heat. The tape may overheat;
- Often when separating the protective tape from the adhesive layer, places where conductive paths pass are opened. If you stick a tape with such an unprotected place on the aluminum profile, a short circuit and burnout of the device are inevitable. It is necessary to pre-stick a small piece of electrical tape on the profile at the place where the tracks come into contact with its surface and only after that continue installation;
- Do not use inappropriate cable ducts for laying tape. She's just overheating.

 10 tips for choosing an LED strip
 TOP 14 LED Strip Manufacturers
 7 Tips for Choosing a Dimmer for LED Strip
 8 tips for choosing LED street lights
 Highlighting the floor: 11 tips for organizing
 4 tips on which lights for a stretch ceiling to choose
 6 corridor lighting tips ...
 7 hallway lighting tips
 9 tips for lighting the bathroom: design, choice ...
 10 Kitchen Lighting Tips