Laying tiles on drywall in the bathroom: 9 tips
Wall cladding in the bathroom tile - This is a kind of classic, which, probably, will remain relevant, even despite the variety and availability of other finishing materials. Also a common solution for pre-aligning walls in the room is to use drywall. With the help of this universal material, in a short period of time, without unnecessary dirt and significant costs, you can bring the walls into a suitable form, hide various communications or arrange decorative or functional niche. Before proceeding to further facing the walls of the drywall base, you need to know some features of working with such a surface. Let's understand the features together laying tiles on drywall in the bathroom.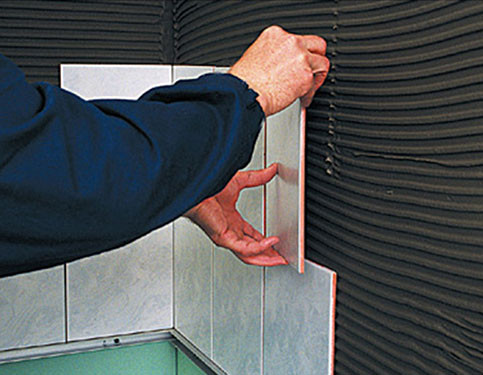
1. The benefits of drywall base
Due to its versatility, drywall has found wide application in the field of repair and decoration. This material can be used for a variety of purposes - from the usual alignment of a wall or ceiling plane, to the construction of decorative partitions or other functional structures. Let's look at the main advantages of this material as the basis for laying tile:
- One of the main advantages is the ability topull out walls in as soon as possible. In the old-fashioned way, many are accustomed to removing the plane using various cement-sand mixtures, however, if the surface drops are too large, the desired result will not be obtained at one time. Just because each solution has limitations regarding the maximum allowable application thickness per coat. Accordingly, to apply a second ball putties, it is imperative to wait for the first to dry completely. Next, you will have to wait again until the finish layer dries to perform a stripping, and then apply a primer. And again, wait until the soil is absorbed and only then proceed to the direct laying of tiles. This process can take from several days to a week, depending on the area of the room, the curvature of the walls and your skills. While wall covering with drywall can be done in a couple of days;
- Another nice fact that those with a limited budget will especially appreciate is low cost of material. If you compare the cost of acquiring the right amount of putty with the cost of buying a certain number of sheets of drywall, you can see that the second option will be more economical. Especially if there are holes on the walls that require a large amount of the mixture to fill;

- It is also worth noting that Work with drywall occurs dust free and a lot of dirt, of course, unless you cut it with jigsaw;
- Do not forget that this material is completely safe for health;
- It has increased fire safety performance;
- It is an excellent heat and noise insulator;
- Differs in sufficient durability;
- Easy to process.You do not need to have special skills to get a perfectly flat surface. Enough to be able to use building level.
By the way, recently even floor leveling using drywall.
2. Requirements for the drywall construction
It should immediately be noted that the quality of subsequent facing works will directly depend on the strength of the base. Drywall, although it refers to strong and dense materials, but under the influence of a rather heavy tile and a layer of adhesive can Little deform. Any "movement" of the structure will sooner or later lead to the fact that the tile layer simply falls off the wall, but before that it starts to crack grouting on tile joints. To avoid this you need:
- First of all, to ensure rigidity and absolute structural immobility. Drywall base should not float;
- Decide on the method of installation of the material. This will depend on the degree of curvature of your walls.
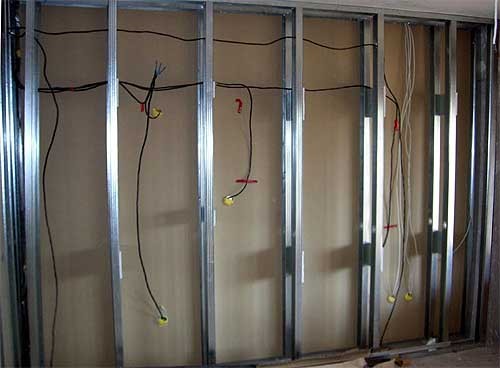
Let's say walls have significant swings which must be leveled. In this case, it is permissible to mount the sheets only on metal profiles.
- In many sources there is a mention that metal can be replaced with wooden beams. However, given that the bathroom belongs to rooms with high humidity, and wood is able to absorb and expand this moisture under its action, we would advise you not to experiment in this way. Especially considering the fact that the bars cost the same, if not more, than special profiles;
- To ensure reliability, metal strips are attached to the wall in increments of not more than 40 cm .;
- If after applying the profile to the wall you see that there are very few contact points, it is necessary to reduce the pitch between the guides .;
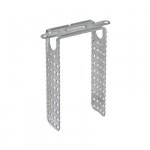
- Fasten the profile to the wall using special suspensions;
- In European countries, this installation technology necessarily implies the presence of double layer of drywall. In this case, the first layer is screwed screws to profiles, and the second is glued or is also screwed to the first sheet in a checkerboard pattern. For additional reinforcement between the sheets, a reinforcing mesh is glued to the usual PVA glue and additionally fastened with brackets. Believe me, such a wall will be "dead." However, it is advisable to do so if the size of the tile is very large, and you fear that one layer of drywall simply can not stand it or if the wall is very long.
If your the walls are relatively flat and have defects in the form of holes, you can stick the sheets directly to the wall.
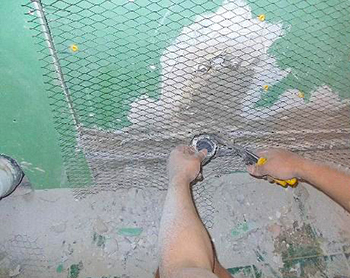
- To do this, you can previously fix the reinforcing mesh on the surface, which will increase the level of adhesion and strengthen the drywall;
- On sale there are special dry mixes designed specifically for fixing drywall. Some use polyurethane foam. However, in this case, it is necessary to take into account the coefficient of its expansion and constantly monitor the evenness until the process of its crystallization is completed. There is a high probability that you will not be able to apply the same amount of foam to two adjacent sheets and avoid formation of differences, therefore it is better to refrain from this method;
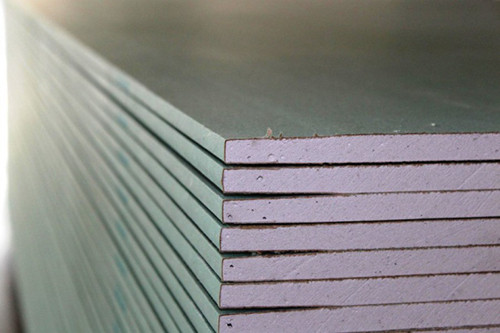
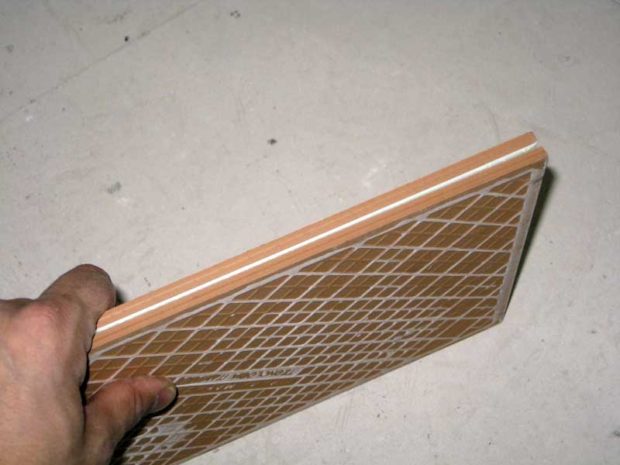
- It is also necessary to ensure the moisture resistance of the base. To do this, it is necessary to acquire a special type of GCR, which has the corresponding impregnation and is designated as GKLV. To distinguish it from the usual is very simple - it has a green front side. And be sure to pay attention to the thickness of the sheet. Wall drywall has a thickness of 12.5 mm;
After the installation of moisture-proof drywall is completed, it will remain make the base airtight.
- To do this, fill the joints between the sheets with putty, stick a grid on them and put the putty again. For these purposes, you can use the finishing compositions;
- Particular attention should be paid to the unprotected ends of the material, which are vulnerable to moisture in the adhesive. They are treated with special moisture-resistant mastics or sealants.

Whatever installation method you choose, be sure to control evenness building level and most importantly - with the help of a square, observe angles clearly equal to 90 degrees.
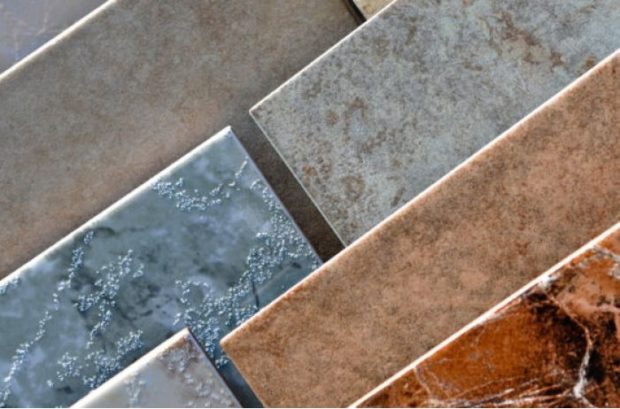
3. What to look for when choosing a tile?
It would seem that now it’s left for small things, - choose tile yes stick. But not everything is as simple as it might seem at first glance. there is many nuances which experienced tilers first of all pay attention to when choosing material:
- Flatness of the surface. Curved tiles are very difficult to lay really beautifully even on a perfectly flat base. There are tile manufacturers whose products frankly do not meet the requirements of geometry. It can be concave or, conversely, have a "belly". Both that and that defect at the same time can meet in one party. Then use the level when laying does not make sense. The tile can be twisted with a propeller, etc. Your task is to determine deviations from the geometry, especially if the installation will be carried out independently. To do this, select any two tiles from the box and attach them to each other with the front side. Grasp the edges of the tiles and look at the light. If there are very large gaps or tiles openly rolls and practically does not fit, do not buy such a product. By the way, of course, there are no perfectly even tiles, so it’s also not necessary to quibble too much. Masters note that tiles have the best geometry. spanish manufacturers;
- The quality of the picture. Low-quality products are immediately easily recognizable by the fuzzy, blurry pattern, which, when two tiles are joined, may not even coincide;
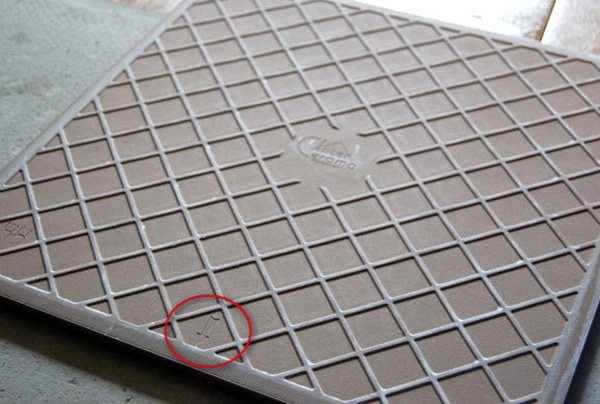
- External seamy side view can say a lot about the product. Quality products have a repeating convex ornament, may contain an imprint with the name of the manufacturer, arrows showing the correct direction of installation. All these elements must be, and must be identical with each other. This indicates the factory manufacturing process and proper quality. Tile with a smooth inside is better not to buy;
- If the tile does not have a picture, rate it monotony. The tile should not have stains, its color should be uniform at all points and not have a discrepancy;
- Front surface even if it does not have a glazed layer, it must be smooth and not porous;
- Sometimes tiles can be overdone which necessarily indicates their increased fragility. It is very simple to determine such a defect by eye - the wrong side will have an uncharacteristic luster.
- The edges of the tiles should be even.
It is no secret that with the popularity of online stores, consumer trips to regular stores have declined sharply. This is quite logical, because without leaving your home, you can quickly find the desired collection of tiles simply by name. In addition, it is possible to compare prices of several stores and choose the most acceptable. Needless to say, Internet sites do not require rent for premises, electricity, or other consumables, which positively affects their pricing policy.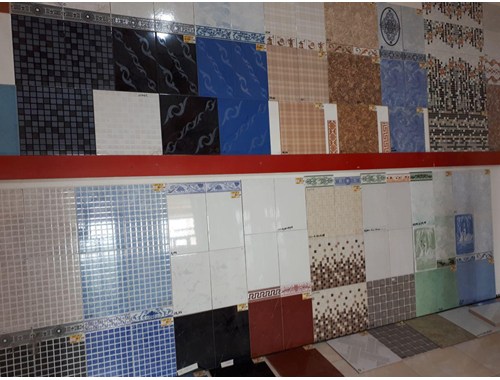 Now regarding how to choose a reliable site and what you should pay attention to:
- First of all, be sure to look for information on the page term of work this virtual store. If he has been successfully working for at least 5 years, this indicates his reliability, high quality products and loyal attitude to his customers;
- It’s better to consider those sites that specialize not in one particular manufacturer, but have wide range of;
- Pay attention to convenience of use resource.It is more convenient if all products will be divided into groups in accordance with their application. This will greatly simplify the search for the necessary products;
- Worthy shops specializing in the sale of tiles will certainly offer you their help in combining tiles and will be able to visualize the future interior with the help of special programs. In most cases, this service is provided free of charge;
- Be sure to check exchange opportunity and return of goods and the possibility of payment after receiving the order;
- Availability of delivery and all kinds of discounts.
Choosing a site that fully meets all of the above requirements, you will not have to face scammers.
4. How to calculate the required number of tiles?
In order to unequivocally answer the question, how much tile is necessary for facing your bathroom, you need to perform simple calculations. For this:
- It is necessary to measure each wall in the room separately;
- Transfer scaled data to paper;
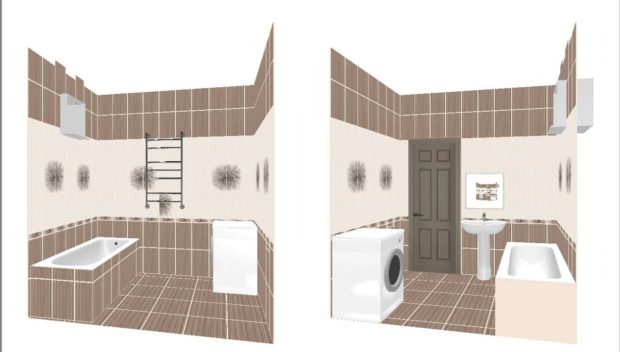
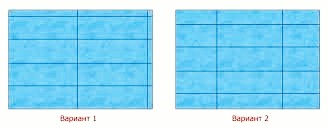
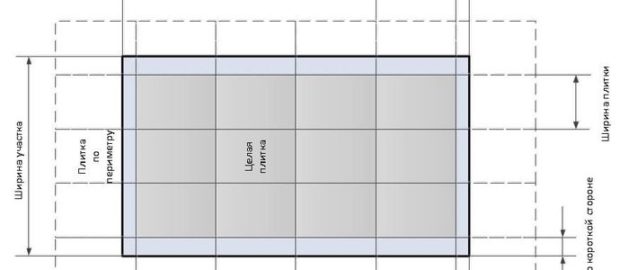
- Calculate how many whole tiles will lie in one horizontal row. To do this, divide the wall width in cm by the length of the tile in cm. For example, divide the wall 2.5 meters wide by the length of the tile, say 40 cm: 250cm / 40cm = 6.25 pcs. We see that 6 whole tiles and ¼ part of the seventh tile lie in a row. Thus, the trim can be positioned so that the most visible angle consists only of whole elements. So the masonry will look more aesthetically pleasing. If the seventh tile lay in a row more than half its length, it would be possible to perform a trim symmetrically from both edges. This method will require the purchase of tiles with a large margin, but we will look better;
- In the same way, it is necessary to calculate the number of tiles that the vertical row contains. To do this, the height of the wall must be divided by the width of the tile. For example: 250cm / 25cm = 10 pcs. In this example, we are lucky, but this is extremely rare. If not a whole number of elements lie in a row, the trim should be at the very bottom, that is, you need to position the first whole tile from the ceiling;
- To find out the total number of tiles for one wall, you need to multiply the whole number of tiles in the horizontal row by their number in the vertical. In our case, we need 6pcs * 10pcs = 60 pcs. At the same time, keep in mind that the rest of the trimmed tiles can be used again if the tile is solid. Accordingly, the number of tiles to trim is halved. And instead of 10 tiles, we can do five. Total: 60pcs + 5pcs = 65. At first glance, it seems that saving insignificant, but do not forget that this is only one wall;
- Such calculations should be made for each surface, taking into account the size of the frieze, if any. To facilitate the task, you can depict the layout of the tiles on paper.
Please note that it is more convenient to count in pieces rather than in square meters. To the value obtained in the end, you need to add from 5 to 15% in reserve, because a fight or a cropped trim cannot be excluded.
5. Tips for choosing an adhesive
The reliability of fixing tiles on the base entirely depends on adhesive composition. When laying tiles on a drywall surface, you need to select a composition that can simultaneously be used for both of these materials. 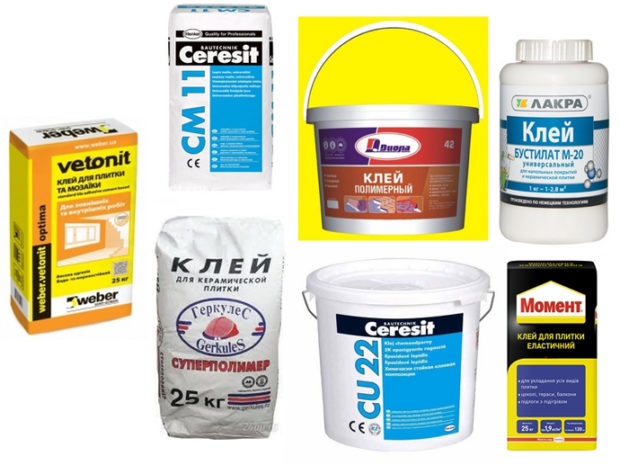 By its composition, the whole variety of mixtures can be divided into 3 groups:
- Cement based glue. It can be used for gluing tiles to drywall, since, in fact, we will mount on thick paper, and not on the gypsum itself. But it is worth being extremely careful and not purchasing frankly cheap products. Pay attention to adhesives, which additionally include various plasticizers, otherwise an excess of liquid in a conventional cement-sand adhesive can lead to soaking and deformation of the surface;
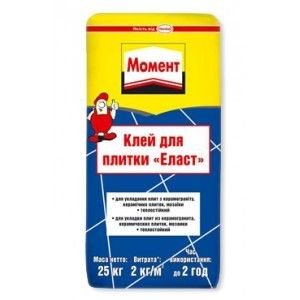
- Elastic glue. It is also made on the basis of ordinary cement, however, it incorporates various polymer additives, which makes its structure elastic even after complete solidification. This type of glue is recommended for use in buildings that are recently built and can still “float” a little. Due to its properties, the adhesive will respond quite flexibly to such shrinkage and compensate for stresses, and the tile will not peel off. Such a mixture can be sold both in dry form and already in the form of a ready-made solution. Its cost is slightly higher than the first variety;
- Liquid Nails. Due to its high cost, for the installation of tiles in the whole room, it is rarely used. Most often used to glue a single fragment, which was peeled off or to be replaced. If nevertheless you decide to use this particular type of glue, be sure to choose moisture-resistant compounds.

Ask the seller or read on the packaging about the toxicity of the selected composition and the possibility of it indoor applications. For direct installation of tiles, do not knead all the contents of the package at once, otherwise, if difficulties arise during installation, the composition may simply dry out. The packaging also indicates the maximum time during which the adhesive will retain its qualities. While you gain speed and adapt to work with this composition, stir so much that it’s enough for 1 square meter of the wall.
6. Proper foundation preparation
This paragraph implies not only that you should putty the joints of the sheets of drywall and the head of the screws, but also that to improve adhesion, it is required prime the entire surface special composition. Please note that it is not necessary to putty the entire surface of the sheets. After all, putty is used to repair defects or to remove a single plane, which in our case is irrelevant.
- It is very important to choose primers, on the packaging of which compatibility with GCR and with the selected adhesive are indicated;
- If the composition contains fungicidal additives, this indicates additional antibacterial properties of the soil, which is especially true in wet rooms;
- Soil can be sold in the form of concentrates or working solutions. The first must be independently diluted with water strictly in the proportions recommended by the manufacturer. The working formulations must be thoroughly shaken and can immediately be applied to the surface using roller or wide brush.
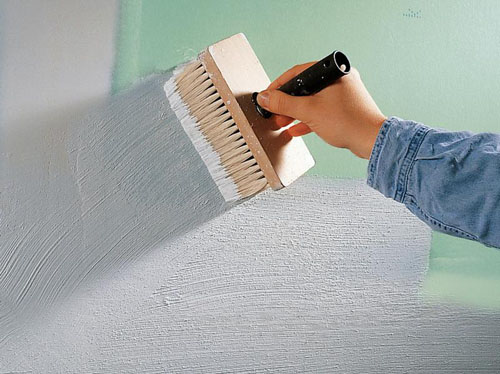
To achieve the formation of a tight, waterproof film, apply the primer in two layers. The second is applied only after the first has completely dried, and tile laying can only be done after the base has completely dried. When applying the solution there is no need to moisten the roller or brush to such an extent that the soil drains from them on drywall.  You need to wait until the excess liquid drains from the tool, and then with light movements, without much effort, spend on the surface.
7. Tools that will be required
Before proceeding with the direct installation of the tiles, you need to prepare in advance all the tools that you may need. Perhaps some of them will have to be brought into proper form, and some may be completely absent. Only after you make sure that you have everything you need, you can knead glue. So, prepare:
- The tile itself, which had to be removed from the packaging in advance and allowed to rest in the room where it will be laid, so that it regains the appropriate temperature and is not brittle;
- The required number of bags of glue, which is quite simple to calculate, focusing on the flow rate indicated on the package. In our case, the installation will be carried out almost on a perfectly flat surface, so the calculations can be done quite accurately;
- A container for kneading the adhesive and another container with clean water, where you can wash the whisk.This must be done so that the glue on it, which had time to crystallize while you were developing the solution, did not break off and did not get into the composition of the freshly mixed mixture. And at the end of the work it will be much easier to wash the tool;
- Corolla and low speed drill to prepare the mixture;
- Trowel for applying glue to the wall;
- Notched trowel for even distribution of the mixture and removal of its residues. The height of the teeth is selected depending on the size of the tile. For tiles of medium standard sizes, for example, 25 × 40 cm, a tooth height of 6-8 mm is sufficient;
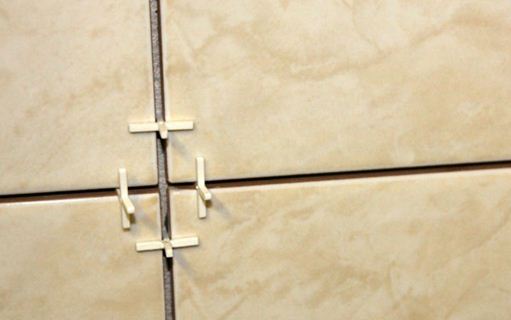
- Plastic cross-shaped stakes and wedges for keeping even and identical seams. Crosses can have different thicknesses, but the thinnest, the thickness of the ends of which is only 1 mm, is not recommended. Especially if your tile is not clear geometry. Yes, and it will be more difficult to wipe seams of this thickness, since trowel may not fill them out completely. So the masonry tightness will be broken. Thin and neat seams will be obtained with crosses, 1.5 mm thick;
- Smooth wooden plank or piece of aluminum profile;
- Screws and screwdriver;
- Tile cutter or grinder;
- Grouting composition;
- Rubber spatula.

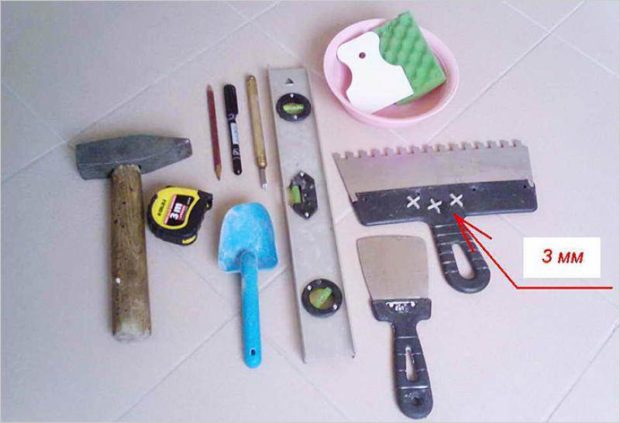
We will need the last two positions at the very end, when the work is finished, and the glue completely hardens.
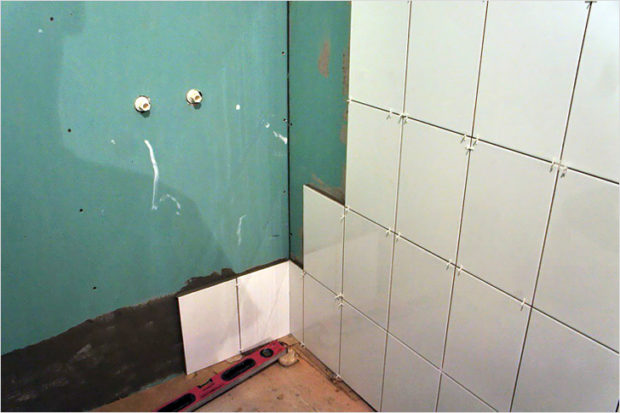
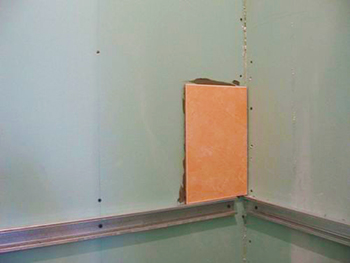
8. We lay the first row of tiles
The most critical stage of all work, on which the final result directly depends, is the laying of the first row of tiles. Indeed, in the future he will set the position of all other tiles and will serve as the main guideline. You need to start with a clear markup:
- Usually the first is the row that will be located directly above bath, since many believe that in this place, and not under the ceiling, a whole tile should be visible. If you are of the same opinion, then measure the height of your bathtub taking into account the height of the frame on which it will be installed and transfer the mark to the wall;
- Next, using the building level, draw a strictly horizontal line at a given height through the entire wall;
- If it does not matter for you how much the bath will cover the tile, then orient yourself from the ceiling and draw a line that will correspond to the penultimate row from the floor. Do not forget to add the thickness of the seams;
- Focusing on the line, screw a bar or profile to the wall, which will serve as support for the first row, will allow you to keep the horizon and prevent the tiles from slipping;
- Lay the first tile in the corner, moving from left to right. Remember that the most visible corner should be the most beautiful and not have a trim;
- Lay two more tiles hardly, setting crosses between them;
- Now move up;
- Lay 3-4 tiles without first in a vertical row. Do not forget about the crosses;
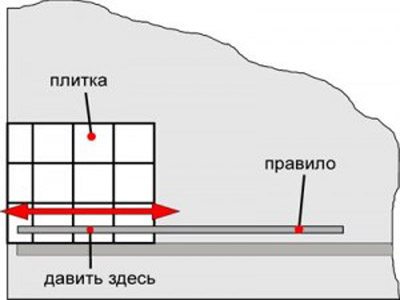
- Periodically check the smoothness of the masonry rule;
- Finish laying the horizontal row to the next wall and take a break.
You need to take a break every 4-5 hours of work. The interval should be 30 min-1 hour. During this time, the stresses that occur in the base under load will be removed, and you will rest a bit. If you have a laser level, you can draw lines on all walls at once and fix the guide rails. In this case, laying can also be done in a circle around the room. Immediately remove excess and traces of glue from the surface of the tile with a damp cloth.
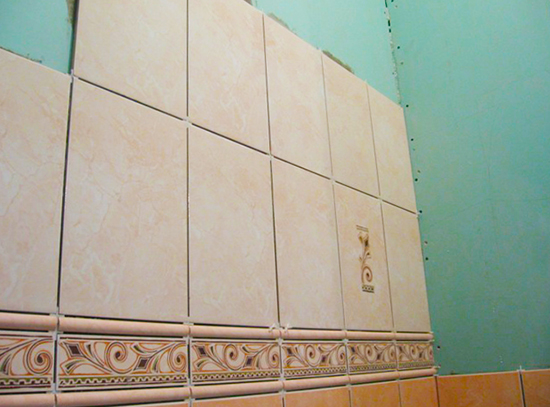
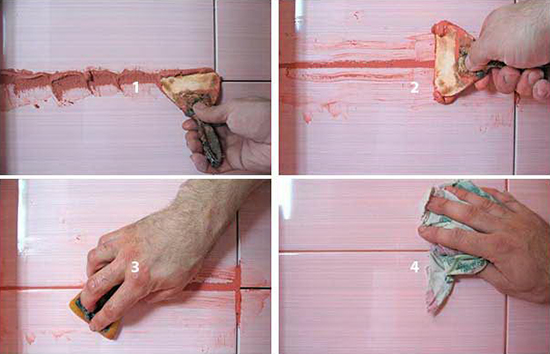
9. How to grout seams correctly and quickly?
After the glue has dried, you need to complete the final part of the facing work - wipe the seams with a special waterproof composition. Fortunately, the choice of manufacturers and colors is quite large. 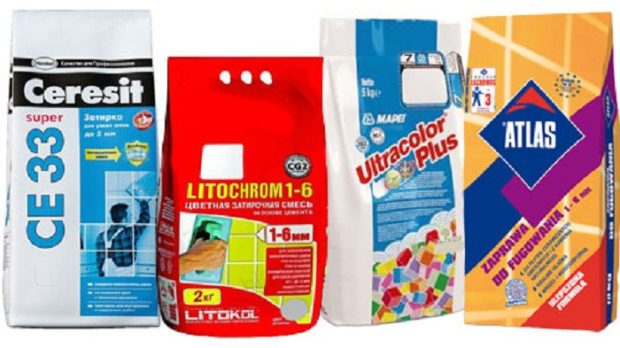
- Do not immediately knead a large amount of grout, as it tends to harden quickly;
- When breeding, you need to achieve a consistency that will resemble thick sour cream;
- You can grout using a small rubber spatula, after cleaning the joints from the glue with a wooden stick;
- Movement should be directed at an angle relative to the seam. About 45 degrees. Firstly, it will be more convenient for you. And, secondly, so the composition will penetrate deeper into the seams;
- The most important thing - fill the space between the tiles to the very bottom. Only then the grout will not crack over time and fall out in separate pieces. And only under such a condition, it is possible to achieve complete tightness;
- If the seams are wide, you can push the composition into them with the end of the spatula until they are completely filled;
- When the seam is completely filled, swipe it from top to bottom or from left to right to level the surface and remove excess mixture from the tile;
- After 15-20 minutes, the tiles can immediately be wiped with a damp soft cloth. So it is much easier to wash off the traces of the composition than after it has completely dried;
- At the end, wipe the surface with a dry cloth;
- To protect the joints from dirt and excessive moisture, you can additionally cover them with a special water-repellent sanitary sealant. It can be both transparent and white.


 Do-it-yourself bathroom waterproofing
 Do-it-yourself laying laminate flooring. Stages of work
 4 ways to align walls for interior decoration
 6 tips for choosing a wallpaper for the bathroom
 5 Tips for Putting Tiles on a Wooden Floor
 10 materials suitable for wall decoration in the bathroom
 9 materials for finishing the ceiling in the kitchen
 Laminate ceiling. How to fix the laminate to the ceiling
 10 materials for decorating the ceiling in the bathroom
 Wall decoration with decorative artificial stone