7 Tips for Choosing a Dimmer for LED Strip
The interior of a modern home is already unthinkable without the use of led strip. This element has found application in many corners of our home and is capable of performing both a practical and a decorative function. Perhaps the most striking example of the use of LED strip is the arrangement of the illumination of the working area in the kitchen or the decoration of the muted illumination of the TV zone in the living room. Of course, these are far from all possible applications. tapes in the interior, but in this article we will talk about such a functional addition to it as a dimmer. With the help of this small element, you can radically change the mode of operation of the tape and create completely new images of a particular room, set clearer light accents or create the desired atmosphere. We will consider the main differences between dimmers, their types depending on the type of control and method of placement and give 7 tips for choosing a dimmer for LED strip.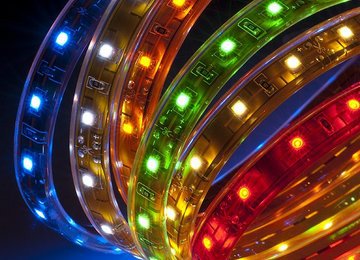
1. What is a dimmer and what is it used for?
A dimmer or dimmer is nothing but power adjuster and light intensity. I would like to draw your attention to the fact that a dimmer for an LED strip and a dimmer for an LED lamp are two completely different deviceswhich are not interchangeable. Also, there is no universal dimmer model that fits any type of lamp and inclusively under tapes. Dimmers are selected in strict compliance to the type of lamp. Otherwise, a quick failure of the light source is inevitable. This is due to the fact that different devices operate at different modes of direct current and its values.
If it is necessary to select a dimmer for the tape, you should look for only those varieties that work with the same voltage as the tape itself, that is, 12 or 24 V. When assembling the LED tape connection diagram, the dimmer should be placed only between the step-down transformer and the tape itself and in no way otherwise. Only in this case, the dimmer itself will work stably, and will be able to control the brightness level of the LEDs.
- Dimming LED tapes most often used only when they act as sources of primary or secondary lighting. Especially if several diode lines are used. Lighting designers with the help of this technique create voluminous, comfortable interiors and skillfully set light accents. This is especially true when the room has the columns or other elements of architecture that I would like to pay special attention to;
- In addition, it is not always necessary to use lighting in a room at maximum brightness. For example, when you receive guests, of course, the lighting should be bright, but when in the same room you just want to relax and unwind, it is the dim light that creates the comfortable atmosphere;
- If the child is afraid to fall asleep in the dark, instead of the usual night light, you can use the tape, simply by setting the intensity of its glow to the lowest possible level;
- At stair lighting sometimes it happens that the bright light of the diodes can blind a person. To avoid injuries that are not uncommon in such conditions, it is advisable to make the backlight more muted;

- By the same principle, you can adjust the brightness level of the floor lighting.
In a word, whenever there is a need to organize a more muffled glow more pleasing to the eye, you can use a dimmer.
2. Advantages and disadvantages of using a dimmer
Any device has both obvious advantages and disadvantages. Start with positive sides of using a dimmer:
- First of all, the capabilities of LED strips are instantly expanded;
- This makes it possible to abandon the compelled purchase of several fixtures that would provide a different level of illumination in the room and replace them with several dimmed tapes;
- This will greatly to save cash;
- Savings take place when using the tape in low brightness mode. Electricity costs quite possibly in that case to lower 30-35%;
- Many argue that when operating diodes in low-brightness mode, their service life is significantly increased;
- You will be able to change room interior depending on your mood and need for a particular situation;
- Some models of dimmers in addition to the ability to adjust the brightness of the diodes have a number additional interesting functions. For example, the regime of flickering, light music and other similar visual effects that will help create a real dynamic party at home and support any holiday;
- And the most interesting - with the help of minimal backlighting, you can create an imitation of a person's presence in the home. Which is very important in private or country houses, if you are often on trips or spend most of the day at work.
Now about disadvantages:
- When setting the minimum brightness, the blinking of the diodes may become clearly visible. This is manifested when using frankly cheap Chinese dimmers, which cannot constantly keep the resistance at the same level;
- The voltage at the output of the dimmer has a non-sinusoidal shape, because of which lowering transformers may not work correctly;
- Sometimes interference may occur while using, for example, a dimmer and a radio receiver;
- Also, when lowering the brightness of the tape, its hue may change, which may not always correspond to your idea.
3. Signal conversion methods
Depending on the method of signal conversion, dimmers can be of two types:
- Analog - which provide diode tapes with a constant stable supply current. Their advantage is the low power loss value. However disadvantage more significant - analog dimmers contribute to significant heating of the LED strip, which significantly reduces its service life and can lead to local burnout of the diodes. Also, high temperature noticeably reduces the quality of lighting. Because of this, the shade and temperature of the glow may not correspond to the declared by the manufacturer. This minus is noticeable on both monochrome and polychrome tapes;
- Digital dimmers provide stable current and minimal power loss. However, the operating conditions of the diodes in this case will be close to ideal. Also, the possibility of distortion of the shade of the glow and its temperature will be excluded. Disadvantages can be observed only when using low-quality digital dimmers, which provoke flickering of diodes. This can cause headaches, irritation, eye fatigue and poor performance.

thereforesave on the purchase of a dimmer not worth it. By the way, the cost of the device will directly depend on the manufacturer and the maximum output power.
- Compact models that are designed to control only one color and a maximum power of 36 watts have average cost from $ 8.
- More powerful single-channel models with remote control can cost from $ 20 to $ 40.
- The most expensive are dimmers, which are able to adjust the intensity and shade of the glow of RGB ribbons. The cost of such a dimmer of average quality starts at $ 40.
4. Types of dimmers by control method
In order that each user had the opportunity to choose the most convenient way to control the dimmer, there is a fairly wide selection of models for this feature:
- Push-button or push - are very similar to conventional circuit breakers. In this case, control is performed by pressing or holding a key once. When pressed, the tape is turned on and off. When holding, adjust the intensity of its glow;
- Swivel - consist of one controlled element, which is made in the form of a regulator. All manipulations with light will be controlled by turning the knob to the right or left;
- Push-button - combine the capabilities of the two previous types and are one of the most convenient. In this case, the device is turned on after pressing the regulator. And brightness control by turning it. On the controls of some models of dimmers there is a corresponding scale, which helps to navigate in which direction you need to rotate the element.
The above varieties relate to the mechanical control method and are the simplest. There are no obvious disadvantages of such models, but their cost is the most affordable. The following control methods are more convenient and expensive:
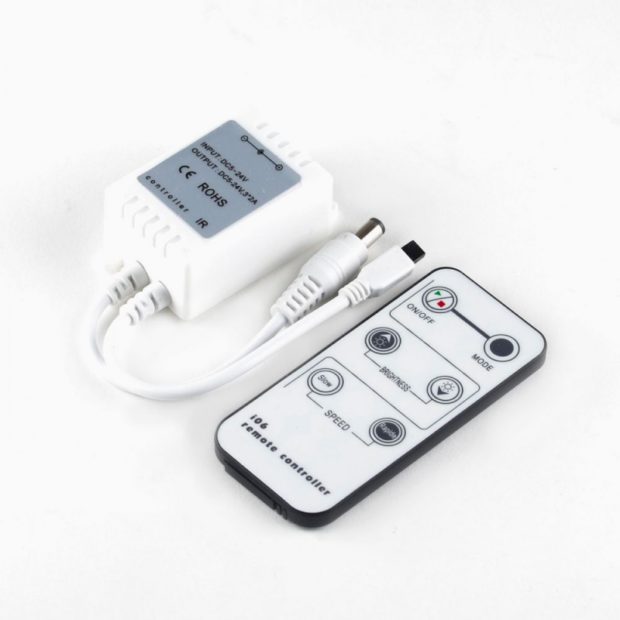
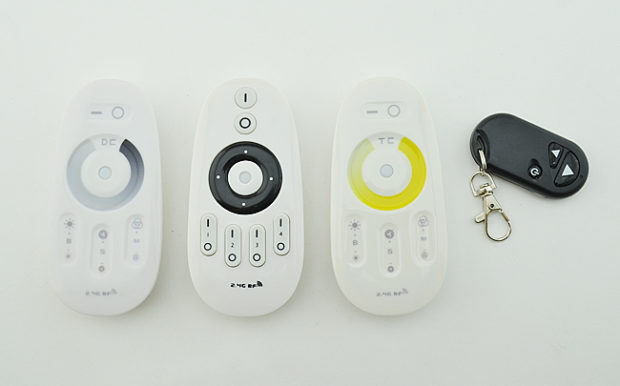
- Remote - in this case, the control of the modes occurs with the help of a small remote control known to all. The remote control is often included. Remote control can be performed either by transmitting a command signal using infrared ray or using a radio signal. In the first case, control is possible only with the exact pointing of the remote control at the sensor and is limited to one room. In the second case, control can occur not only from another room, but also outside the house. Dimmers controlled with using a radio signal, have a significantly higher cost. Also, some models have the ability to connect to a PC or smartphone and are controlled via a wireless network. Wi-fi
- Sensory - in this case, the control takes place under the influence of a light touch on the control panel. In fact, this is the same manual control, but a more modern look;
- Acoustic management carried out using a sound sensor integrated in the system. It responds to any sounds or noises that exceed the user-set or default limit. You can activate the device with a loud pop, speech. On the one hand it is very convenient. On the other hand, if your house often hosts noisy parties or you are just a music lover who prefers to listen to music at high volume, be prepared for the incorrect operation of the system. It will turn on at any loud sound, whether you want it or not.

5. Types of dimmers by installation method
The dimmer can be installed in different places, which makes it possible to make this element less noticeable or its use more comfortable. There are several options:
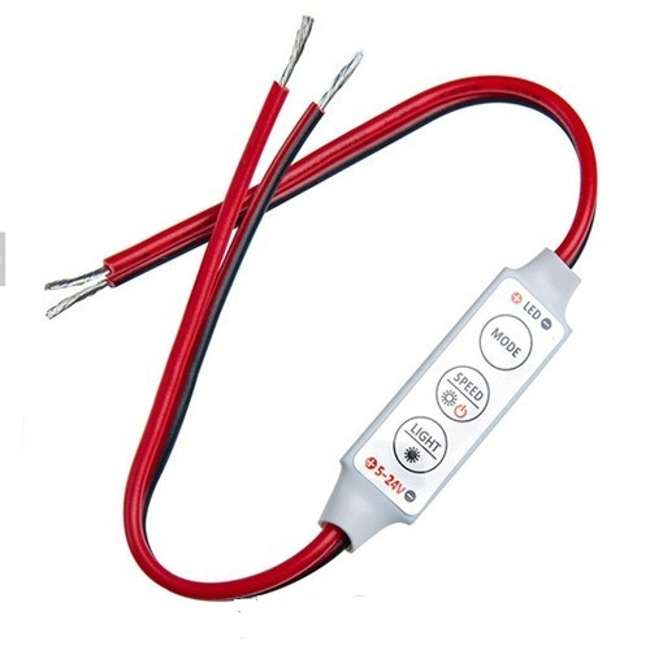
- Miniature - The most compact dimmers, which are a small insulated board or module with wires. They are connected by soldering the wires of the transformer and the tape and have several buttons on the body that adjust the brightness. It is recommended to choose this type only when there is constant access to the tape and the management process is not complicated;
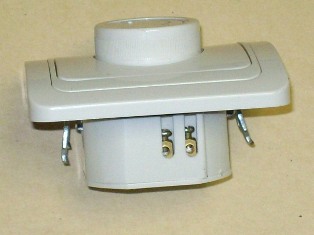
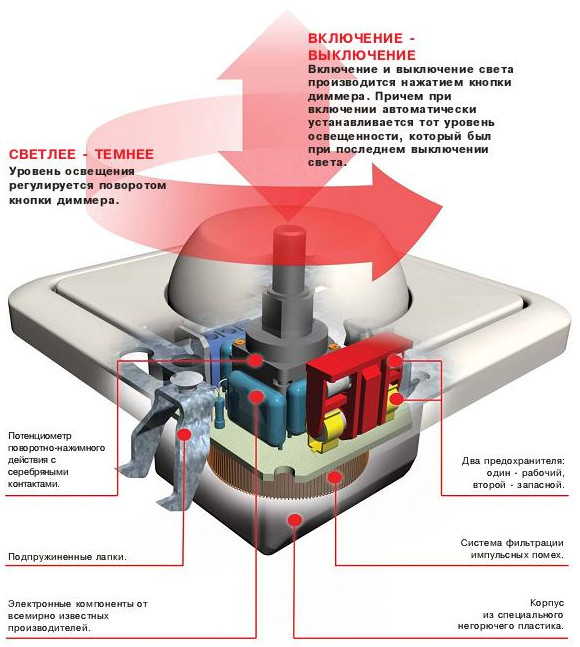
- Overhead - The simplest devices, which, both in form and in appearance, are similar to a conventional switch, which, in fact, they will replace after installation. Often the control of such dimmers is mechanical or touch;
- Embedded - designed for installation in a specially equipped niche or junction box. When choosing this type, make sure that the niche will be completely isolated from moisture and condensation will not accumulate in it;
- Modular - are a modular system, which is designed for installation directly in the distribution panel. These are more powerful models with which you can adjust the glow intensity of not one specific tape, but several lines within a large room or all the lighting in the apartment.

6. Tips for choosing
The fact that it is necessary to select a dimmer strictly in accordance with the voltage consumed by the lighting device, we have already said. Also, when choosing, you should take into account that the tapes are either monochrome, or RGB, RGBW. Accordingly, dimmers can be:
- Single channel;
- Multi-channel;
When connecting a multi-channel dimmer to an RGB tape, you will have the opportunity to not only adjust the overall brightness of the diodes, but also each color individually. It is also necessary to determine feature set which you need. It could be:
- Exclusively dimming;
- Dimming and flicker mode, color music, support for the DMX protocol, the ability to control multiple lighting zones.
 After that you need decide from power reserve which you will need:
- If in the future you do not plan to increase the length of the LED line, then the power reserve of the dimmer should be at least 20-30% higher than the power of the tape;
- If an increase in the length of the tape in the future is not excluded, then it should be understood that at the same time its power will increase. Therefore, to the above 20-30%, it is necessary to add another 20-50% as a reserve. In the event of a lack of power, the device either simply will not turn on and, therefore, perform its functions, or premature wear and failure of the entire line will occur.
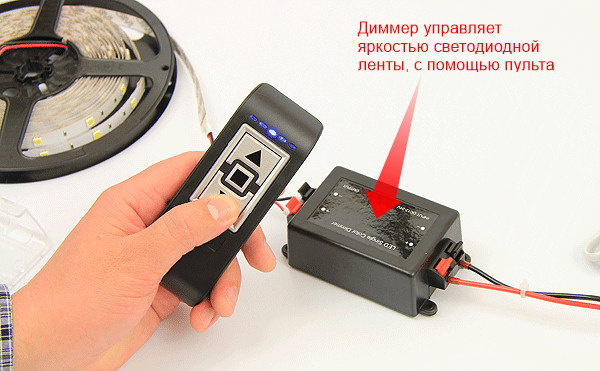
In addition, do not forget to decide on the preferred way to control the dimmer. If finances allow, it is better to prefer models that have the ability to control a remote control. This will make the operation as comfortable as possible.
7. Connection diagrams depending on the quantity and type of tape
After we have considered all the possible varieties of dimmers and selected the most suitable, you need to figure out how install correctly of this item. Schemes in each case may be different depending on the type of tape and its length. We will give an example of typical circuits, with a different number of tapes.
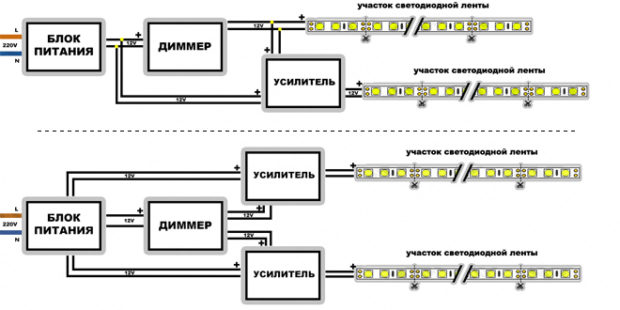
- The most simple circuit will be when connecting a dimmer to a single color ribbon. In this case, it is connected after the power supply in front of the tape itself. If the dimmer power was not selected correctly, that is, insufficient, an amplifier can be additionally included in the circuit. The total power of the tape segments must not exceed the power value of either the power supply or the dimmer.
- After calculating how much power you can get, you can use several amplifiers to connect two pieces of tape as shown in the diagram.
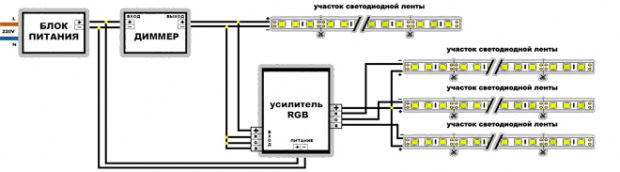
- To be able to simultaneously adjust the brightness four monochrome tapes You must additionally use an RGB amplifier.
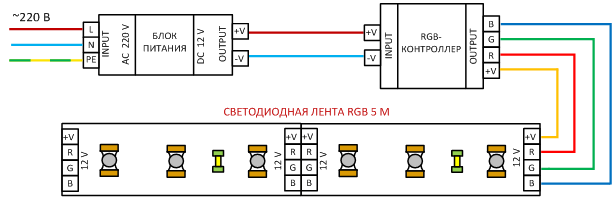
- To adjust the brightness RGB or RGBW tape and each of its colors separately, only a dimmer is not enough. You will need to supplement the circuit with a controller that is suitable for the type of tape, and a similar amplifier.

 10 tips for choosing an LED strip
 Choosing LED Fringe for Street Decoration: 8 ...
 TOP 14 LED Strip Manufacturers
 LED strip in the interior: 45 ideas for ...
 8 tips for choosing LED street lights
 4 tips on which lights for a stretch ceiling to choose
 6 living room lighting tips
 6 corridor lighting tips ...
 9 bedroom lighting tips
 9 tips for lighting the bathroom: design, choice ...
hello, I would like for a teapot like me to clarify the last scheme for connecting an RGB tape of 5 m: is the tape, controller, power supply, and where is the dimmer itself? to put it in front of the controller or is it still in front of the power supply or does the controller function as a dimmer? Thanks for the answer.