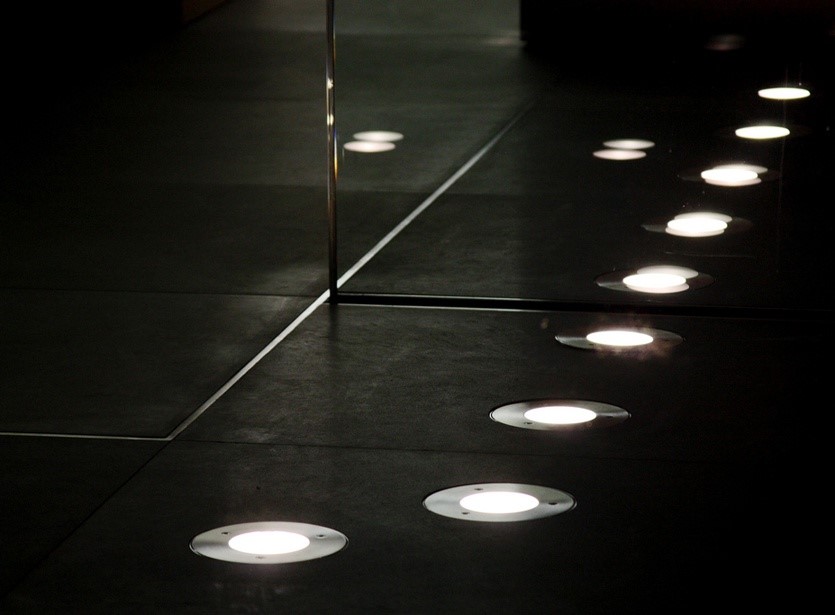
Highlighting the floor: 11 tips for organizing
The organization of the illumination of the floor within an ordinary apartment or house every day becomes an increasingly popular technique. We specifically emphasized the moment of application of illumination in residential premises, since earlier floor lighting was used only in public places - galleries, airports and other large objects. This was done more for safety than decorative. While at home, floor lighting can only be an element of unusual design. In this article we will figure out which rooms are appropriate floor lightingwhich lighting fixtures to choose, how to reduce energy consumption and give organization tips this interesting design decision.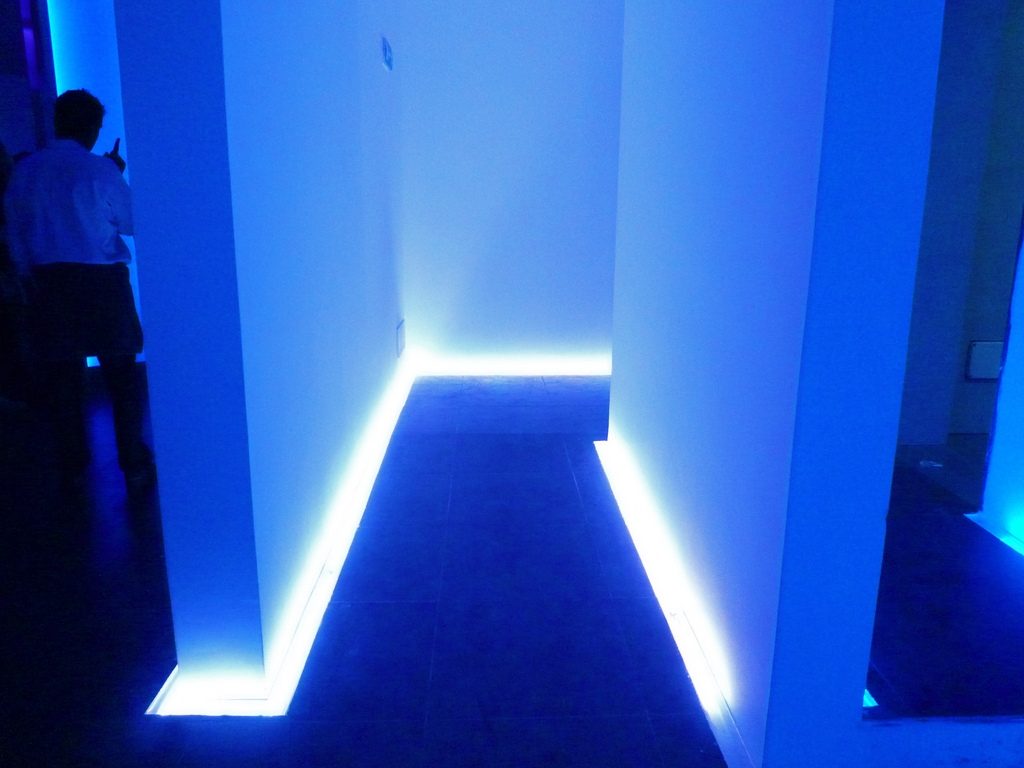
1. Lighting requirements
If you liked such an extraordinary solution as arranging the illumination of the floor in your apartment, before proceeding with the choice of lamps, you need to understand that requirements to them will be completely different rather than to ceiling. Naturally, this is connected both with the method of their installation and with the fact that at any moment you, your children or pets, can touch the surface of the lamp and many other factors. 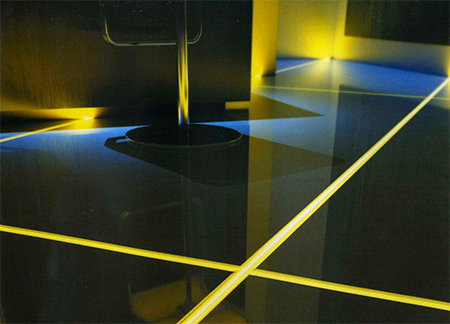 In details:
- First of all, do not forget that the floor is that surface that is constantly exposed to wet cleaning. It follows that to prevent the lamp from breaking down or, even worse, the occurrence of a short circuit, it is necessary choose devices with a moisture resistant housing. The package of any modern lamp must indicate the degree of protection against moisture, which corresponds to the numbers and letters "IP". Ideally, the value will be IP 44 - 67;
- You also need to choose lamps with rugged, shockproof housing. For example, if the lamp is mounted on the floor in the hallway, then it can easily be damaged by stepping on its surface with a heel, something heavy can fall on the floor in any other room, etc .;

- Since the light flux in this case will be directed from the bottom up, it wille should be too bright and blind or discomfort. This is especially true for lighting in hazardous areas such as flights of stairs. Backlight purpose - only indicate boundaries or set a direction, but in no case act as an additional light source. Therefore, quite low-power devices with diffusers;
- A very important condition is fire safety. Sometimes, if the device does not meet these requirements, reflow occurs skirting boards, in which it washes to be mounted, which leads to more dangerous consequences;
- TOthe luminaire housing should not be heatedotherwise, after an involuntary touch you can get a burn;
- Among all the proposed variety of floor lamps, it is still worth giving preference to LED light sources. They are not only one of the most affordable, but also consume the least amount of electricity. Plus, we can say that their installation is quite primitive.
2.In which rooms is floor lighting appropriate?
The beauty of this type of decorative lighting is that it is really appropriate in all rooms. And in some, even preferred:
- IN the bathrooms and bathrooms, the area of which can be called modestly modest, floor lighting will help to visually make the room more spacious. Especially successfully combines lighting with hanging items of plumbing. The effect of soaring is amplified at times, and the room creates a soft, pleasing to the eye, especially at night, lighting level. In this case, be sure to choose the fixtures with the highest degree of protection against moisture, especially if they are located near sinks or bathtubs;
- Actual lighting and in hallway. It is in this room, first of all, that the guests of your house enter, therefore many designers call the corridor the hallmark of the house. Its interior should not only be concise and functional, but also meet aesthetic requirements. Often, the corridor in apartments with a standard layout is a long rectangle. In this regard, often only ceiling lighting it’s not enough. Of course, if spotlights are not located along the entire length of the ceiling with a small pitch. It is recommended to use a multi-level combined lighting system. For example, several light points on the ceiling, backlight wardrobeif there is such a floor lighting. This approach will not only allow you to fill the entire room completely, but also make it more spacious;
- Muted soft backlighting is also relevant. child room, especially if your child is afraid to fall asleep in the dark. Various nightlights or projectors can involuntarily concentrate on themselves, thereby preventing you from quickly falling asleep, which can not be said led stripglued to the bottom of the bed or mounted in a floor plinth;
- IN living room or in an adult's bedroom, backlighting is more often decorative, however, it can be used as a method of light zoning;
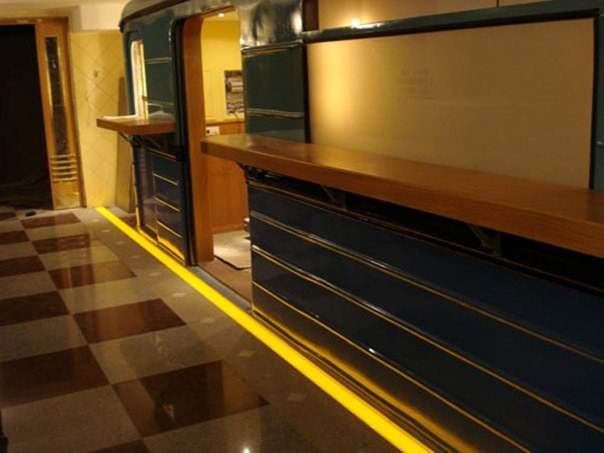
- A favorite technique of many designers is to highlight the floor on the kitchen using a diode tape mounted on the kitchen set. It looks really impressive, especially if you correctly select the color of the glow of the tape, and the interior itself is instantly transformed. In this case, be sure to consider the affiliation design a room to a particular style. Since such a solution is more suitable for modern styles than for classics.
3. An easy way to save on electricity
In the context of a constant increase in utility tariffs, almost everyone is trying to equip their housing in such a way as to minimize heat loss, water costs, etc. To save energy, special meters are installed called "day / night" and are used energy saving lamp types. In addition, lighting can be made “smart” and even lower electricity costs. To do this, equip the system motion sensors. 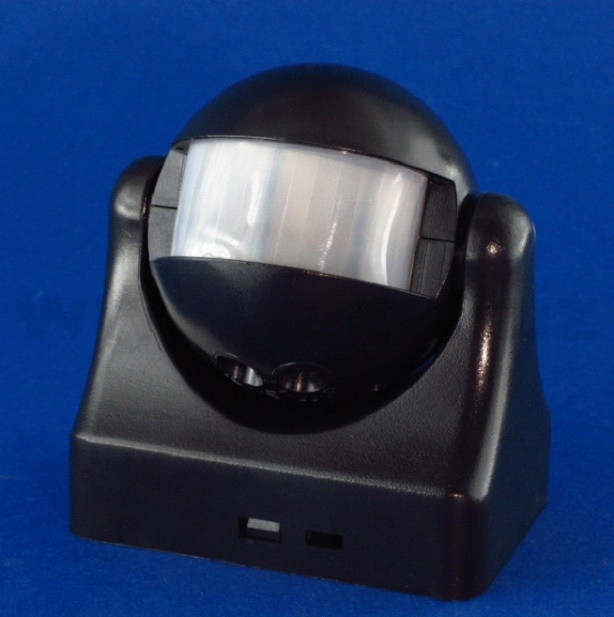 Thus, the light will turn on only if necessary. Motion sensors several types:
- Infrared
- Sound;
- Microwave
- Combined.
 Most comfortable and infrared models are accurate. They allow you to configure the work in such a way as to eliminate false positives. For example, when moving pets. Also for home use, combination sensors can be considered. Their cost is much higher due to the presence of two types of signaling devices in the system. But with their help, you can eliminate the risk of false positives almost completely. The remaining two types are in most cases used for installation outside buildings.
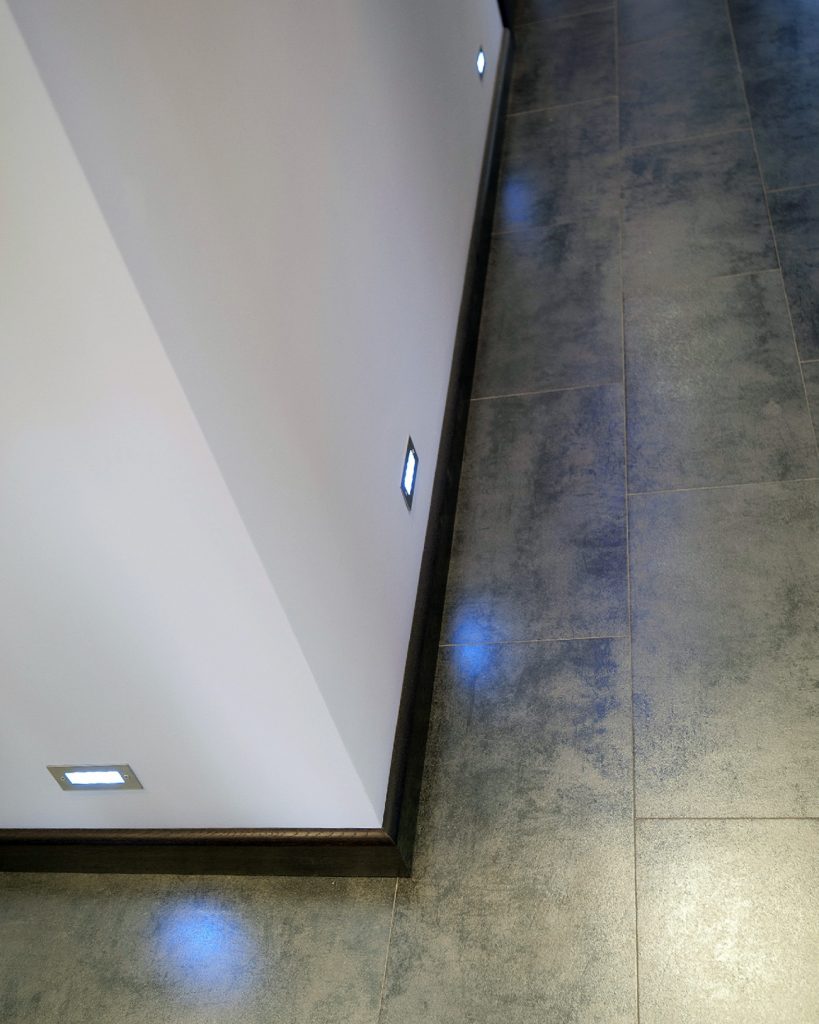
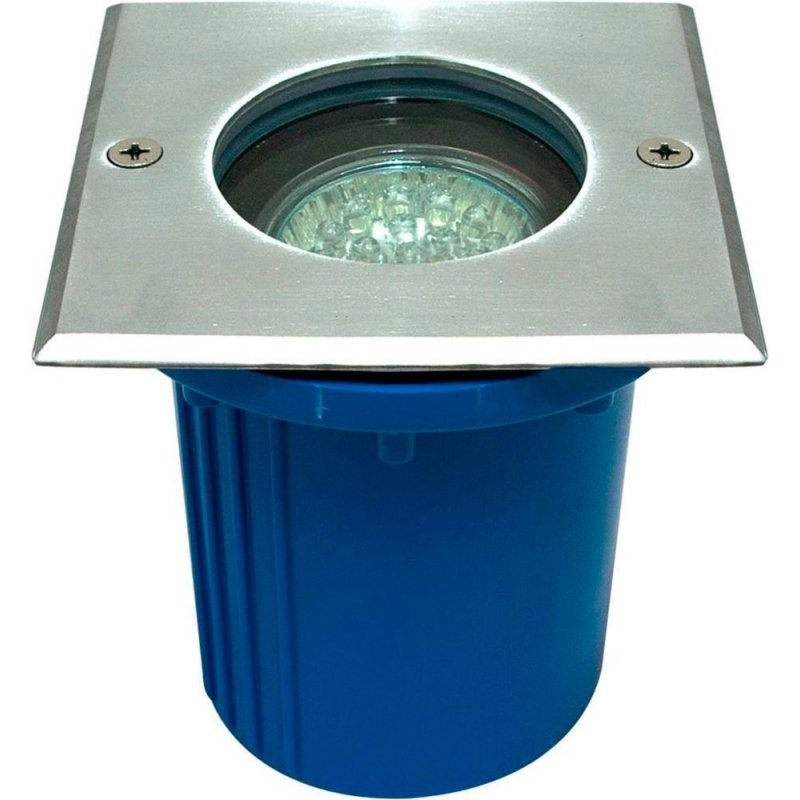
4. Backlight with help spotlights
The use of spotlights makes the process of arranging floor lighting easier and less costly.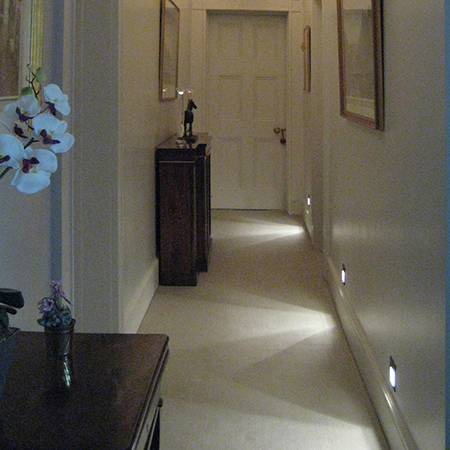 pros point elements are obvious:
- Affordable cost;
- A variety of design, style of execution and sizes;
- In addition, spotlights can become an adornment or highlight of the whole interior due to interesting lighting effects. This refers to how the lamp directs the flow of light. Indeed, some models can project various light patterns onto the base;
- Long term of operation;
- Compatible with economical lamp types;
- Tightness of the case;
- Impact resistance;
- The ability to purchase fixtures with a high degree of protection against moisture.
Disadvantage It is that with prolonged use, the lamp housing heats up to significant temperatures. Therefore, before giving preference to this type of backlight, think about how the lamp will be mounted and whether it will be possible to exclude the possibility of involuntary contact.
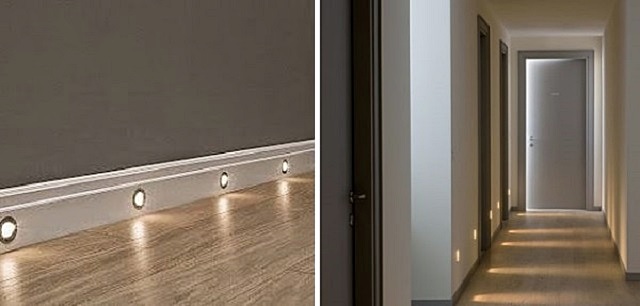
5. How to install spotlights?
There is several way to organize the illumination of the floor using spotlights. The difference will lie in the surface into which the lighting fixtures will crash.
- It could be wall plane;
- Plane gender
- Or furniture facades.
 The first case is rational to use if the idea of arranging such a backlight came to you after the floor was finished. It will be especially successful if your desire coincides with the need or desire to change the decoration of the walls. Indeed, in order to mount the lamps in the wall, first of all, it is necessary to ensure the supply of an electric cable to the installation site. That means you have to ditch the walls. It is best in this version to make one wide strob near the floor, lay the required number of wires in it, and then ensure that each wire is connected to a point. With this arrangement, the cable will require much less, and in the future you will be able to anywhere on the wall hang a shelf or a picture and not worry that it is possible to hammer a nail into the wire. But should not make a strob too low. Do not forget that for sure you will have to install the floor skirting.
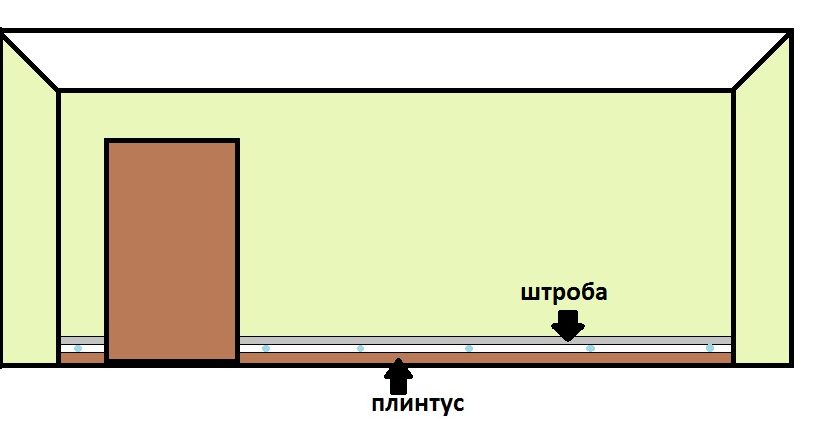 Accordingly, the strob should be higher than it:
- Move 5-6 cm from the floor, draw a line. This will be your baseboard.
- Make a mark with a pencil that will correspond to the number of fixtures.
Estimate their location and frequency. - Draw another line that will correspond to the lower edge of the lamp, and then the upper one - which will limit the installation area and will correspond to the height of the lamp.
- Now you can clearly see that the strobe is better placed above the light points and you will know exactly where.
An interesting way would be to install fixtures in niches specially equipped for these purposes. 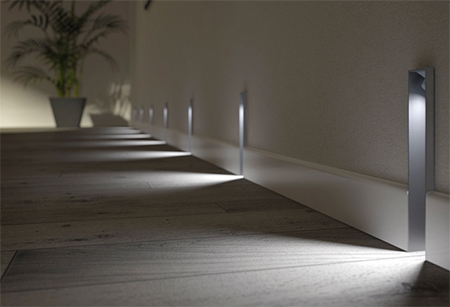 However, for this you will need to sew up one of the walls drywall. It is rational to do this if it is simultaneously required to insulate the room and if the usable area of the room does not suffer from this. If mounting will be produced in floor plane you need to think through everything in advance:
- In case of wood floors, wires should be laid under the lags, and where the light point will be located, a tap is made so long that it extends 10-15 cm above the floor surface;
- If the floor finish includes an arrangement phase concrete screed, then the wires must be laid under the cement mortar. First, make the wiring, then install special plastic or metal landing capsules for the fixtures. They can be fixed using the same cement mortar. At this stage, there is one very important nuance with which you must not lose. Capsules should be installed so that after the installation of fixtures in them, their surface is flush with the finish of the floor. To do this, take into account the thickness of the screed, in the case of ceramic tiles add tile thickness and adhesive layer, in the case of a laminate or parquet - the thickness of the boards + the thickness of the substrate;
- Further, as the finishing coating is laid, holes are made using round cutters for the fixtures.
Mounting fixtures in furniture case perhaps the easiest way that does not require drastic measures. Most often, the fixtures are installed in the mounting plate, which closes the legs of the wardrobes or kitchen unit. The advantage is that you can bring electricity to the right place using a conventional extension cord.
6. We use neon lamps
Quite often, neon lamps are used to illuminate the floor. Their main the difference the light flow will be very soft and pleasant. When using spotlights, the light will be more directional. Since the lighting system, in addition to the lamp itself, will include a special converter, it is better to choose a hidden type of installation, which will hide all unnecessary details. In addition, the main disadvantage neon lights is the fragility of their bulbs. 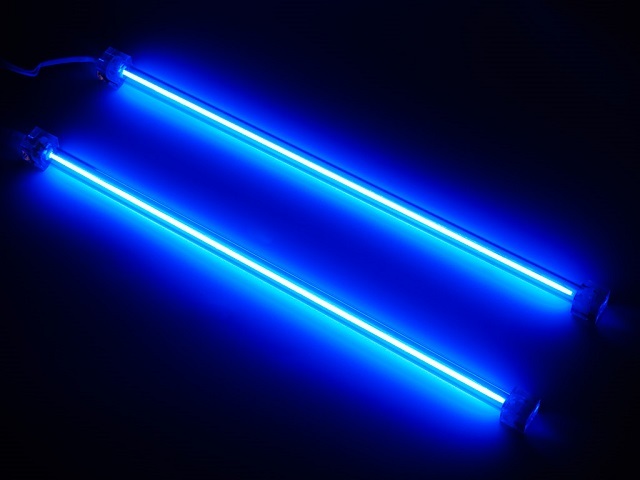 Therefore, installation in specially equipped niches will help protect the device from accidental impacts. TO the benefits can include:
- The term of operation, which can reach 10 years;
- A fairly wide selection of colors for the luminous flux;
- Pleasant to the eye, non-irritating lighting, which is uniform throughout the length of the lamp.
One more disadvantage can be called the high cost of neon lights and information that neon light has an adverse effect on the human body. Is this true, it is better to check with qualified professionals when buying. 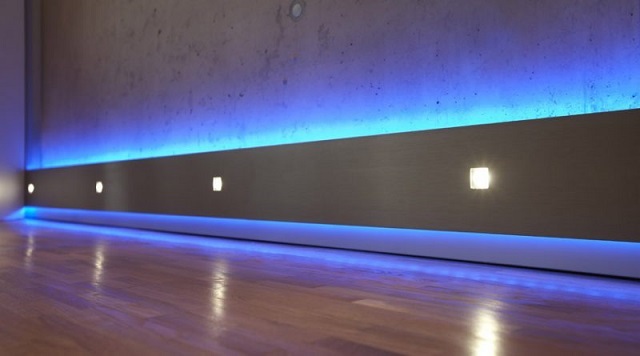 Often, neon lamps are mounted in niches and are mounted using special lights. During installation, you must be extremely careful not to break the flask. If possible, it is better to contact professionals.
7. LED strip for floor lighting
Perhaps the most popular way to organize decorative lighting is use led strip. 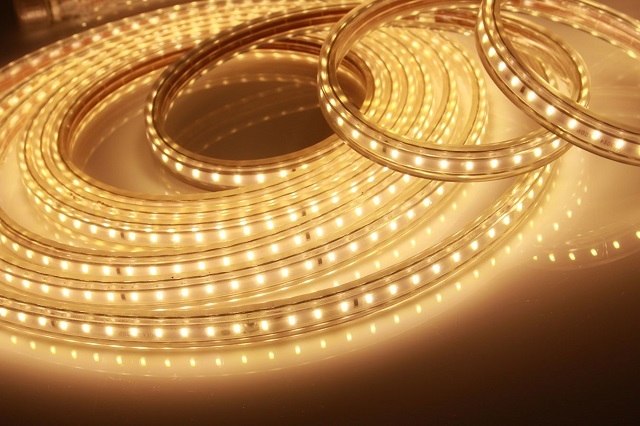 In its distribution of value, it is in no way inferior to spotlights. However the benefits the tape still has more:
- Its installation will require much less time and effort;
- Thanks to its flexible base, the tape can easily repeat the bends of decorative niches and other surfaces. Given this feature and showing a little imagination, you can create a truly stunning highlight;
- The tape does not have glass and other fragile materials in its design, so it is almost impossible to damage it;
- Long term of operation;
- It has high energy efficiency rates;
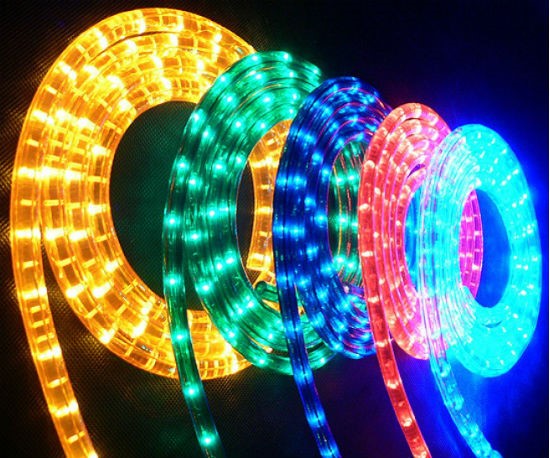
- The color scheme is quite diverse;
- The backlight can be mounted both hidden and open.
Using the tape, you can create the most suitable type of floor lighting - contour. But remember that the tape should not be too bright. Such light can dazzle and cause discomfort. 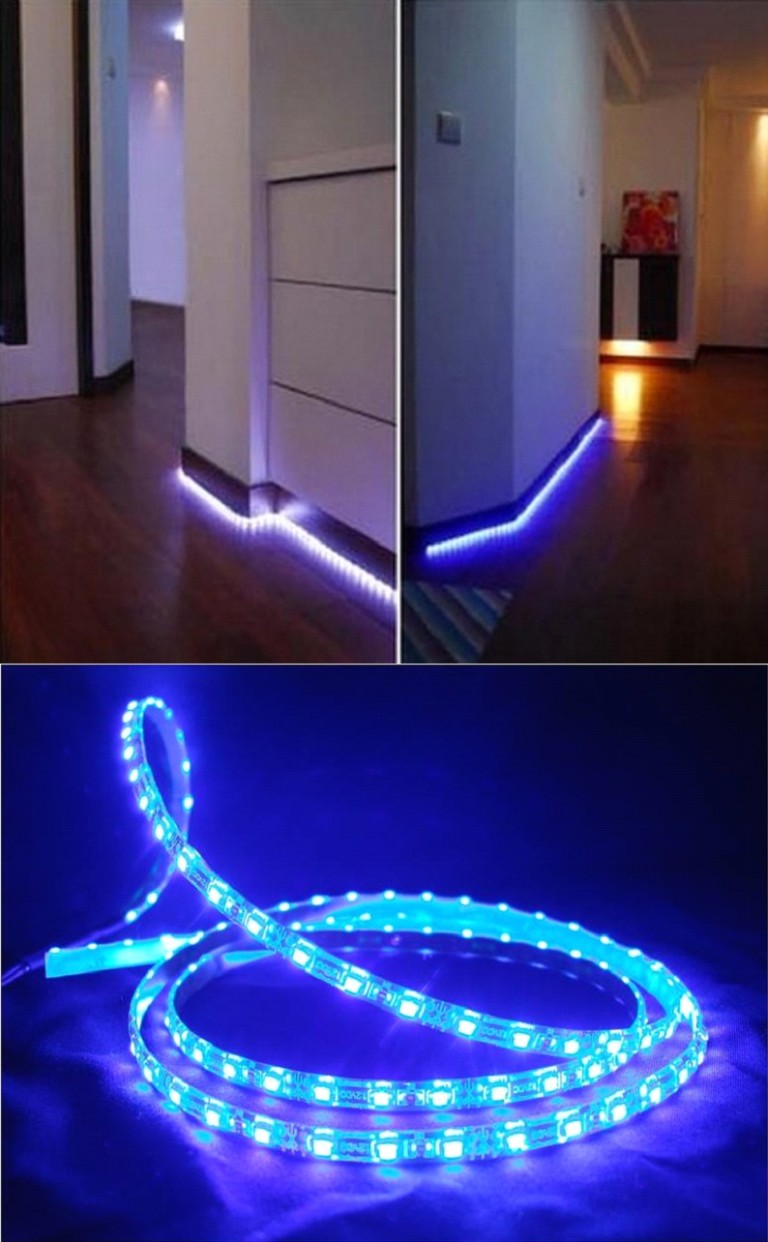 disadvantages may result from improper installation. It must be remembered that the tape needs heat removal, otherwise the moment is almost inevitable when the device overheats itself and fails.
8. Installation of LED strip
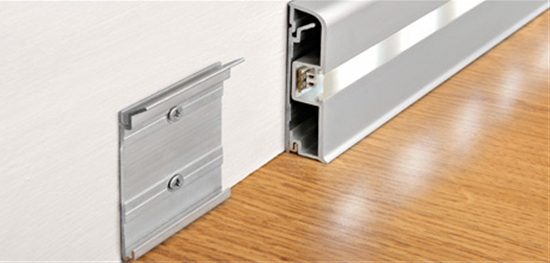
The most common way to mount a diode tape is to stick it in a special niche baseboards.
- It is made of aluminum, which ensures the proper level of heat transfer and protect appliance from overheating;
- These skirting boards can be found in any specialized store;
- Another feature is that the channel for laying the tape after installation is closed with special overlays made of opaque plastic. These elements not only give the plinth a finished look and hide the ribbon, but they are also diffusers. Thanks to this, the light becomes soft, pleasant and somewhat muffled;
- Plinths are mounted in the same way as plastic ones.
 Problems may occur when installing aluminum skirting boards close to uneven walls.If the plastic baseboard itself is quite soft and additionally has a small soft edge that allows you to repeat the curvature of the walls without gaps, then in the case of an aluminum product, the opposite is true. The slightest bump will immediately become visible. Of course, you can use force and pull the baseboard self tapping screw before eliminating the gap, however, firstly, the width of the gap plays an important role, and, secondly, the curvature of the plinth after the efforts will be noticeable. Because of this, many prefer not to bother, and glue the tape in cable channel ordinary plastic baseboard. If you have already resorted to this method, we advise you to glue the back wall of the channel cable with foil tape and use low-power tapes.
9. LED duralight
Another kind of LED strip is LED duralight. The principle and components are the same. Difference lies in the fact that the diodes are protected by a special flexible tube made of transparent PVC. 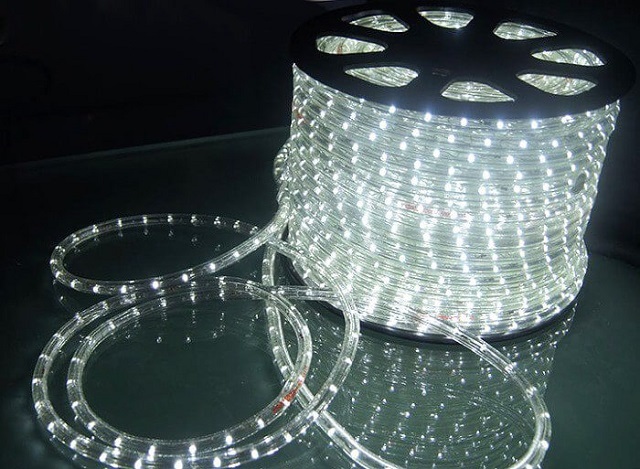
- This design is completely tight Immune to moisture and temperature changes. Therefore, it is ideal for use in the bathroom, in the kitchen and even outdoors;
- Duralight, like a diode tape, can be cut by special marks;
- The color scheme of the emitted light is very diverse, which allows you to choose the best option for any interior;
- The glow of duralight is very soft and pleasant;
- Power is possible both from a 12 volt power supply, and directly from the network. And some models can be connected via a USB connector;
Exist several modifications duralight. It can be two or three wire. For home use and self-installation, it is recommended to use the first type. Bycost this kind of diode backlight slightly exceeds the cost of an ordinary tape, however the use of duralight is still more convenient. When wet cleaning, you will not need to worry so that water does not get on the surface, even if the duralight is installed in an open way. Damaging it is quite difficult. Well, the ability to simply turn on the backlight in the outlet greatly facilitates the whole process. You only need to fix the device in the right place. We can say that duralight is something in between, more advanced between the tape and the neon tube.
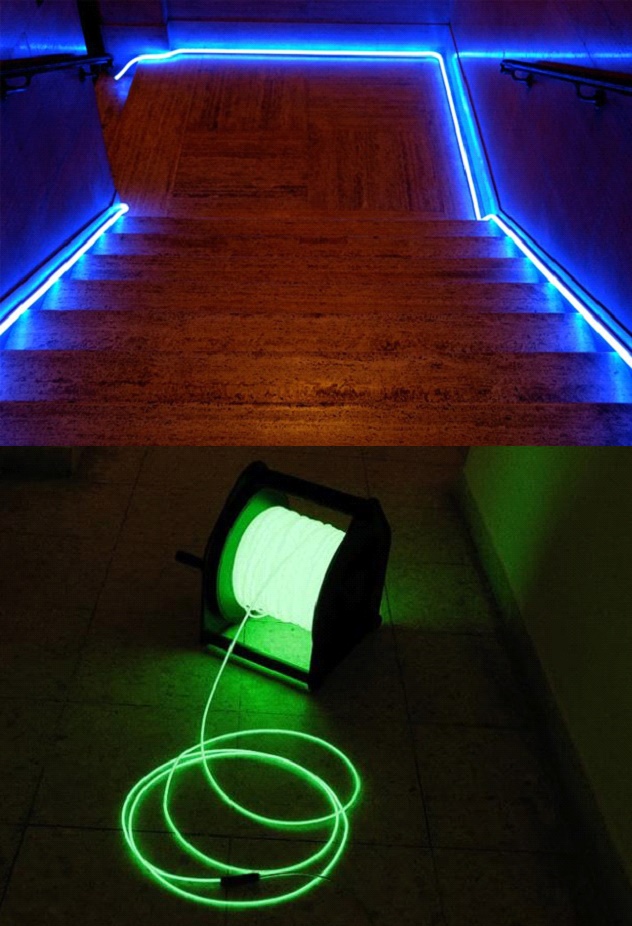
10. Use flexible neon
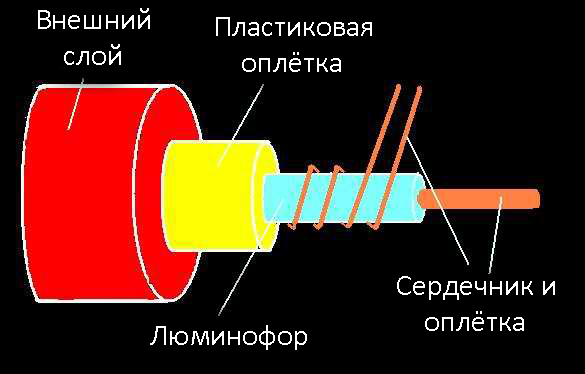
A very interesting option for organizing decorative lighting is flexible or cold neon. It can also be called something between a flexible tape and rigid glass neon tubes. Definitely, he is more is safe and convenient in terms of installation.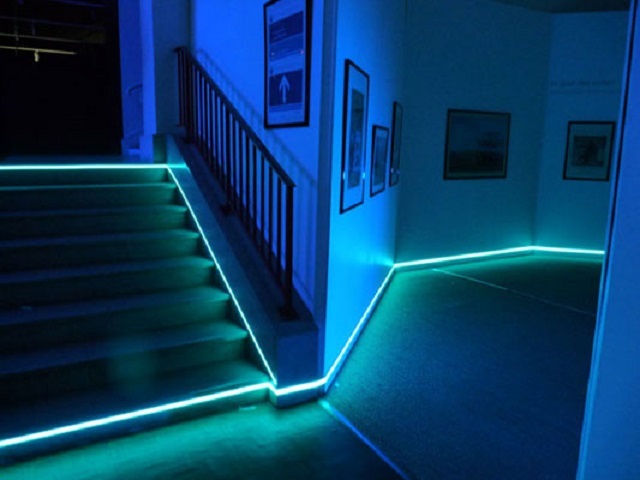 By constructions flexible neon is:
- Flexible tube;
- Inside the tube is a plastic braid;
- The braid protects the phosphor, which has another layer of braid and a core inside.
- Plastic braid is necessary to protect against external loads and to give density to the cord.
- And the outer braid gives the cord a certain color and also acts as additional protection.
TO the benefits flexible neon can be attributed to:
- Flexibility;
- Pleasant uniform light;
- A variety of colors;
- Possibility of self-assembly;
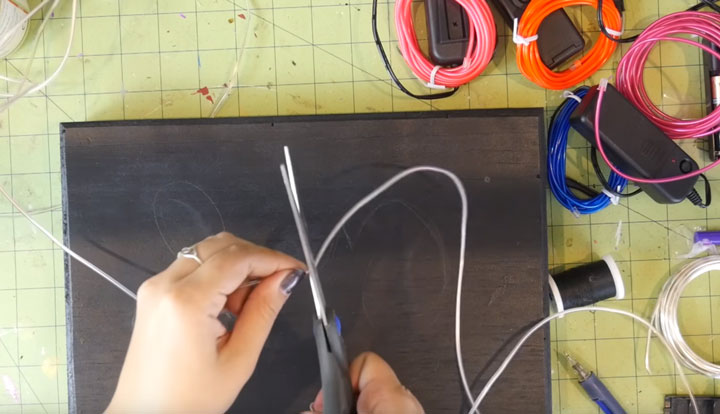
- Ability to cut anywhere on any length.
You can even tie a neon cord into a knot, and cutting is done with ordinary scissors. Works cord according to the following principle:
- The current from the power source is supplied to a special driver;
- The device converts the current and delivers it to the core;
- The current entering the electromagnetic field of the core causes the phosphor to glow.
To choose neon cord can be by two criteria:
- Color - absolutely any shade is available. In this case, the tone does not affect the brightness;
- Diameter - is much more important. The larger it is, the less flexible the cord becomes. The brightness of the glow also decreases due to the thicker layer of the braid. But there are positive aspects to this.The thicker the cord, the better it is protected from mechanical stress, and also its glow will be softer and more diffused.
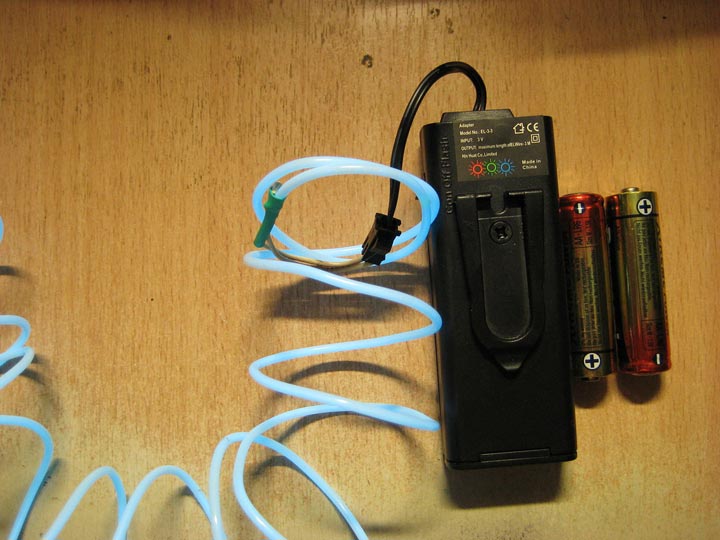
Main question - how to power neon cord? If everything is clear with LED strips and duralight, then in this case everything is completely different, and the artist requires skills in working with a soldering iron. To connect the cord to a power source, you must purchase the so-called driver. For home use, choose models that connect directly to the network. If the backlight is any specific, you can choose a model that provides battery operation. Also note that in the instructions for each driver, the maximum length of the connected cord is indicated. It is better to choose models with a margin of about 20% of the total length. Now regarding connection:
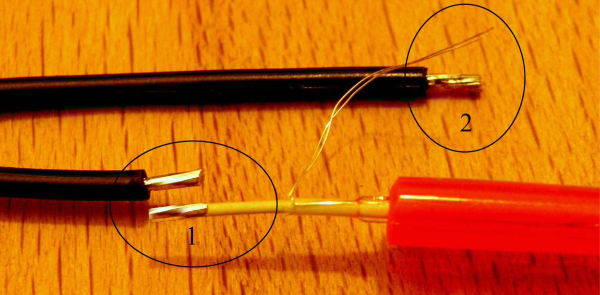
- To begin with, on one side of the cord you need to perform insulation. To do this, you need to expose the 5-7 mm core by cutting a protective whip with a sharp knife. It is very important not to damage the contacts - thin wiring;
- Now you need to determine the polarity of the contacts. This is necessary for the correct connection with the driver;
- You can do this this way - attach the contacts one by one to the included driver. The correct position is when the cord is on;
- Now you need to clean the phosphor from the core and solder the contacts to the connector that comes with the driver;
- Check if the cord lights up. If yes, then a drop of sealant should be applied to exclude the possibility of contact of the contacts with each other. After the sealant has dried, insulate the area using tape or a heat-shrink tube;
- Apply a drop of glue or sealant to the free end of the cord.
11. Backlighting using light modules
Elements such as light modules cannot be discounted. They are mounted directly on the floor plane. mortise method. With their help, you can create whole pictures and luminous jitter. But you should not use a large number of modules in small rooms.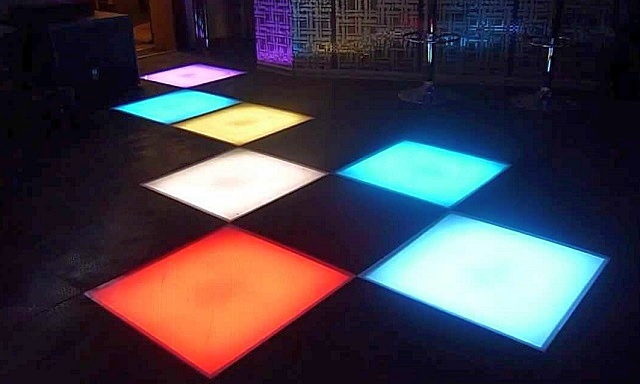 The surface of the modules is quite resistant to mechanical stress and moisture. But still, at home, this option of floor lighting is used extremely rarely.

 7 tips for choosing architectural fixtures
 6 living room lighting tips
 6 corridor lighting tips ...
 7 hallway lighting tips
 9 tips for lighting the bathroom: design, choice ...
 6 Garage Lighting Tips
 9 bedroom lighting tips
 7 Tips for Lighting a Kids Room
 Solar-powered lamps for summer cottages and gardens: ...
 5 tips for choosing a street lamp for the home, ...
Good and informative article, thanks to the author.
I'm glad that the information came in handy)