5 Tips for Putting Tiles on a Wooden Floor
Many of us at choosing flooring For your home or apartment, you are guided by several basic criteria, namely practicality and durability and affordable cost. Tile is fully compliant with these key requirements. Its price range allows you to choose the right option for the most different budget. At the same time, it is still possible to provide good aesthetic qualities of the finished coating. Self laying tiles on the floor also a workable process. However, there are situations when it is necessary to lay a coating on top of a wooden floor. At first glance, it seems that this is an almost impossible and unjustified undertaking, but after understanding all the intricacies of the process, you will see that in practice this is not at all the case. In the article we will give 5 Tips for Putting Tiles on a Wooden Floor and ensure the durability of the finished coating, as well as answer the question of whether it is possible to equip a warm floor on a wooden base with tiles and how to do it.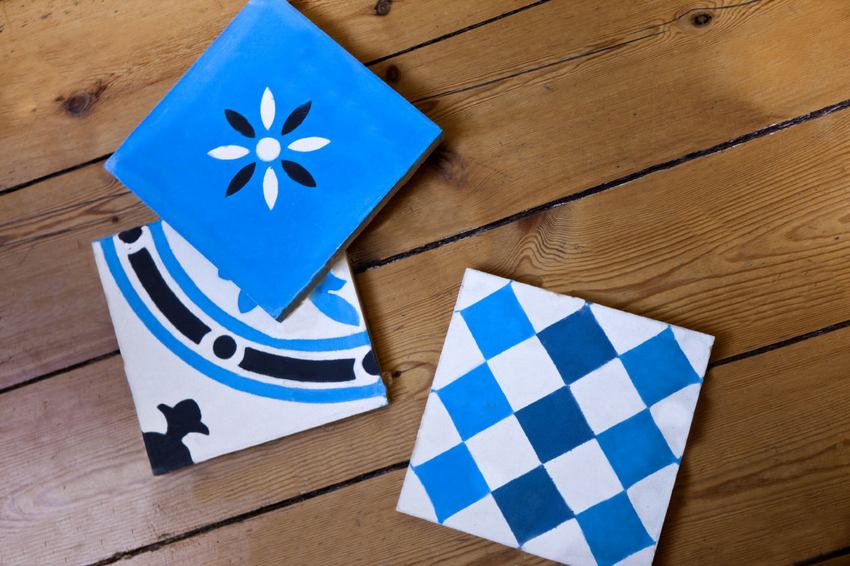
1. The main difficulties
Before you begin to work, and even more so to the procurement of materials, it is necessary to understand what difficulties may arise in the process, what is their nature and why this happens in general. Answer to all causes of occurrence the following defects there will be one - completely different nature of the origin of materials and their properties.
- Ready tile may crack break off, exfoliate and form gaps at the seams. This is due to the fact that wood is prone to linear expansion under the influence of various factors - temperature and humidity. The higher the moisture content in the air, the more it will increase in size wooden plank. Conversely, if the air is too dry, it can dry out. In any of these cases, something happens that is not compatible with the tile coating — the movement of the base. Tiles require a static base. In this case, our task is to provide such a layer between these two materials that will be viscous on the side of contact with the tree, thereby leveling all kinds of movements, and on the side of contact with the tile - rigid and stable. We will tell you in detail about how to do this a bit later;
- Tile Dips. This often occurs when a wooden base has become unusable due to its age or installation errors, and the tile has not served even half of its operating period. Premature rotting of wood can be caused by improper or poor-quality organization of waterproofing from the side of the base on which the wooden beams are laid. You also need to understand that when a tile is laid on top of a tree, the adhesive mixture under it forms an absolutely airtight layer. As a result, excess moisture is not ventilated and causes wood to rot. Therefore, firstly, it is necessary to provide steam and waterproofingand, secondly, qualitatively and thoroughly process all wooden elements special solutions. And do not forget about antiseptics, which will protect against damage by various insects;
- Another reason peeling tiles can be laid on "fresh" floors. If your new wooden floor is less than 2 years old, do not rush to do the cladding.You will not notice this, but the floors will gradually shrink, which will lead to the destruction of the tile;

- Failures tiles are inevitable in the event that, before installation, the audit of all wooden elements was poorly performed. For example, you saw a cracked lag, but decided that it is still quite strong and can easily withstand the load. Or, conversely, you did not notice a crack or other defects;
- The coating may crack if too heavy a tile has been selected and made too thick screed under it. Keep in mind that for laying over wooden floors it is recommended to choose as thin tiles as possible;
- Before arranging the screed, you need to carefully level the wooden plane, otherwise, in order to level the bumps, you will again have to make the screed too thick, which is extremely undesirable. The weight of the cement-sand mixture + the weight of the adhesive composition + the weight of the tile itself can be unbearable for a weak warp.
After we figured out all the possible troubles and their causes, we can conclude that with a proper approach all this can be avoided. Immediately, we note that the process of laying tiles on a wooden floor is actually very time-consuming and costly, as it includes additional costs for the purchase of insulation, waterproofing materials, mastics and antiseptics. Now more about the order of work.
2. Assessment of the condition of the wooden floor
The key to a successful result is always careful preparation. And in the case of laying heavy material on a lighter and more unstable, it is imperative to perform competent audit of the basis and make a partial restoration, if necessary. Theoretically, a correctly made wooden floor should include the following layers in its construction:
- The substrate and the layer of waterproofing material;
- Lags, they are beams. This is the supporting part of the structure across which the rough boards are laid. Between the logs, insulation material can be poured. Most commonly used expanded clay or mineral wool;
- Draft coating. Most often it is made from boards or chipboard;
- Substrate of their plywood, cement-cement or gypsum-fiber sheets. The substrate is necessary for leveling the surface before laying the coating;
- Finishing material - linoleum, parquet, laminate and etc.
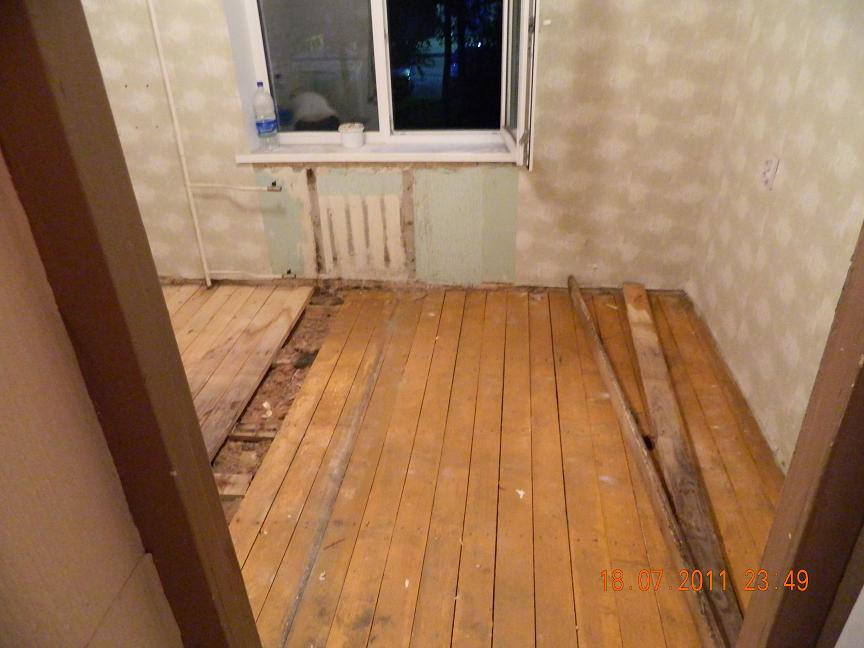
 An indication that the floor is clearly defective will be the presence of a characteristic creak and deflection when moving around it. But, even if there are no extraneous sounds, it is still necessary inspect the wooden parts.
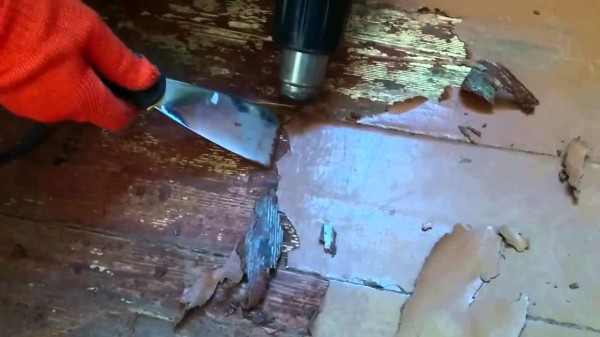
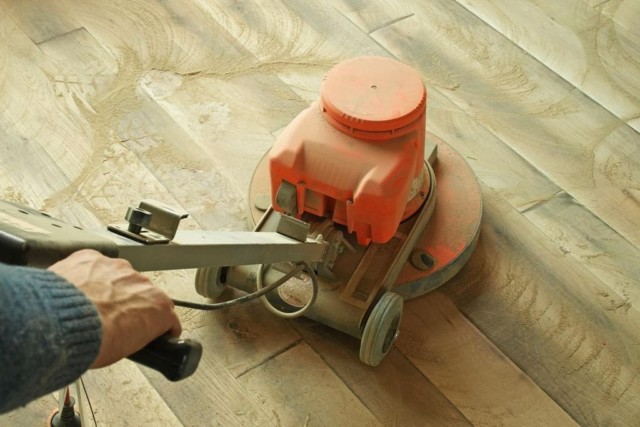
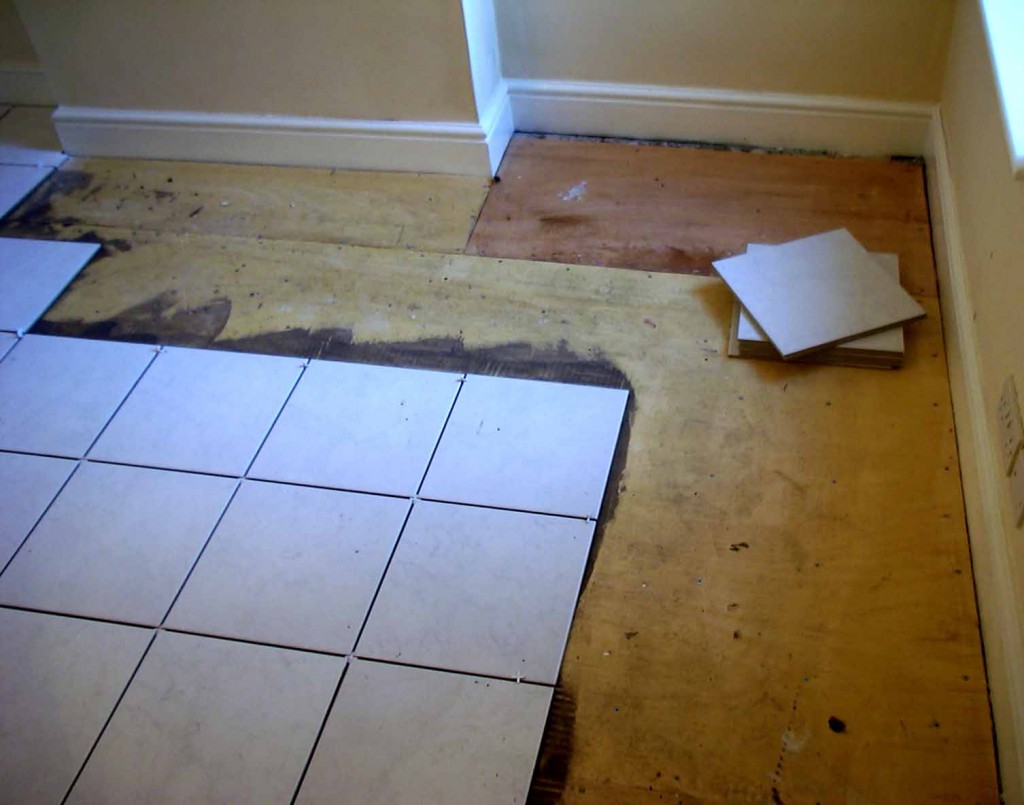
- To do this, remove the topcoat, as well as remove paint from the boards. There are several ways to do this. The simplest thing is to apply special ready-made washes according to the type of coating. You can also use a grinder, but be prepared that in this case there will be a lot of dust. Or heat up the old paint construction hairdryer and remove with a spatula;
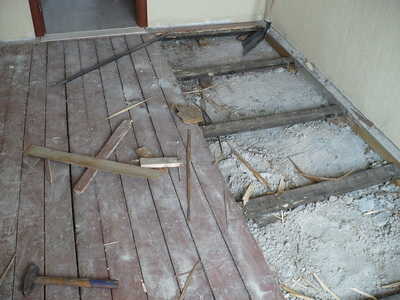
- If you knowingly suspect that the rough boards are in a deplorable state, then you should not waste time cleaning them, since they will still have to be replaced;
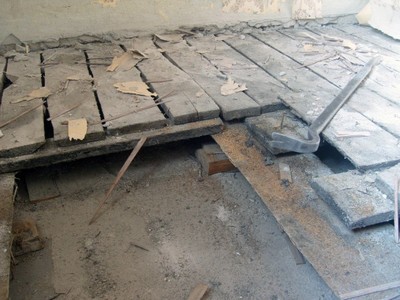
- After this, you need to assess the condition of the rough boards. Even with a quick inspection, you can notice the main disadvantages. These are places affected by dry or wet rot, as well as traces of bark beetles. In addition, each shot of the rough board must be inspected for cracks;
- After this, proceed to assess the condition of the beams. Everything that causes doubt in its strength is dismantled and exchanged for a new one;
- In addition to the state of the wood, it is necessary to evaluate the reliability of the wooden frame as a whole, since after the completion of all work it will have a considerable load;
- An important indicator is the step between the lags. If the distance between the elements exceeds 60 cm, it is likely that such a base will be too weak. Will have to redo the frame to meet the requirements;
- After the revision of all boards, it is necessary to update the protective coating and apply it for the first time on new boards. To make the composition of your choice penetrate deeper into the wood, you need to sand the surface;
- Many experts argue that the most reliable and durable coating creates drying oil. To enhance its properties, the composition is recommended to be applied in a warm form. At this stage, you must be very careful. It is better to apply any composition in several layers, waiting for each previous layer to dry;
- After the boards have dried, you can reassemble. Around the perimeter of the room is advised to leave a small gap to compensate for the expansion of wood. If there are strong gaps between the boards, or there are voids from knots on the surface of the boards, such places need to be putty and then cleaned;
- Installation is done using screwsthat are screwed through a draft board into each transverse beam along the entire length and two screws on the edges of the board;
- After assembly, it is very important to evaluate the evenness of the new, durable wood floor. If in some places there are large differences, you need to eliminate them with a planer, chisel or circular machine, as you prefer.

After such a time-consuming stage, you can proceed directly to the preparation for laying the tiles.
3. Preparation of the wooden base
At this stage we have the two most main tasks:
- Provide reliable waterproofing;
- Provide a flexible and at the same time static base for the tiles.
Run waterproofing layer actually very simple:
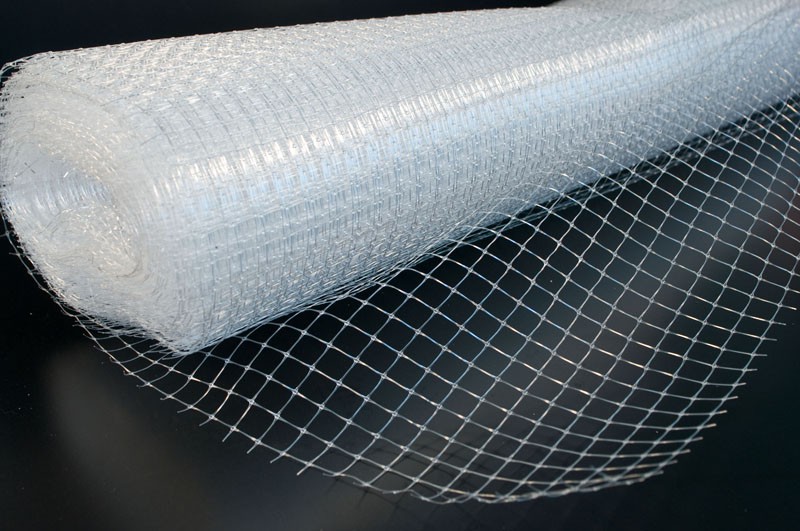
- A proven method is re-coating the floor surface with hot drying oil and laying on top of the dry composition of the fiberglass mask;
- The modern method of waterproofing involves the use of synthetic impregnation on a latex basis with the subsequent laying of a paint net;
- Please note that the grid overlaps the walls above the estimated level of finish;
- In both cases, to compensate for the movement of wood, as well as to provide natural ventilation, it is advised to lay damper tape around the perimeter.
In addition, modern membranes can be used as waterproofing materials, which can pass air from both one and both sides at the same time. Rolled materials such as roofing, ruberoid, glassruberoid. They provide the necessary conditions and have an affordable cost. You can also use a plastic film, but not perforated. By the way, some experts say that after drying the waterproofing you can start right away to tile laying. And to ensure a higher level of adhesion of the adhesive composition and the paint net, a composition based on river sand and silicate glue. You can cook it yourself:
- To do this, take 2 parts of coarse sand, rinse it and dry it;
- Mix with 2 parts of silicate glue (water glass);
- Mix thoroughly and apply to the surface.
 After drying, you will get a rough surface that resembles a "concrete contact". Actually on it and you can glue the tiles. However, most experts still do not recommend this method of installation. Since the intermediate layer is still not thick enough and strong, it is likely that the coating will peel off or crack. They recommend equipping the screed with a small thickness, provided that the wooden base is strong enough.
4. Methods for arranging screed on a wooden floor
In total, there are three ways to arrange the screed on a wooden base. Each of them has both its advantages and disadvantages. Let's start with the traditional way.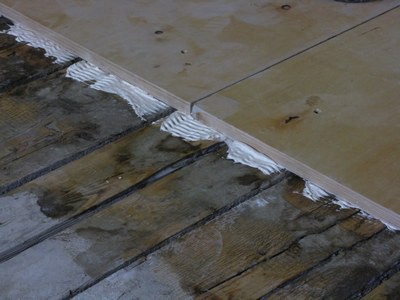
Wet screed
A screed based on a cement-sand mixture familiar to everyone can be used for leveling wood base. The main thing to adhere to the basic rule - the screed should not be too thick. Optimum thickness - 3 cm plus minus 0.5 cm. If the solution layer is thicker, the base may not stand. If it is thinner, the screed may simply crack. Work sequence following:
- As in the previous embodiment, waterproofing of the wooden base is performed;
- A damper tape is necessarily laid along the perimeter;
- For additional reinforcement, you can use a metal mesh, which is laid out across the floor and fixed with screws;
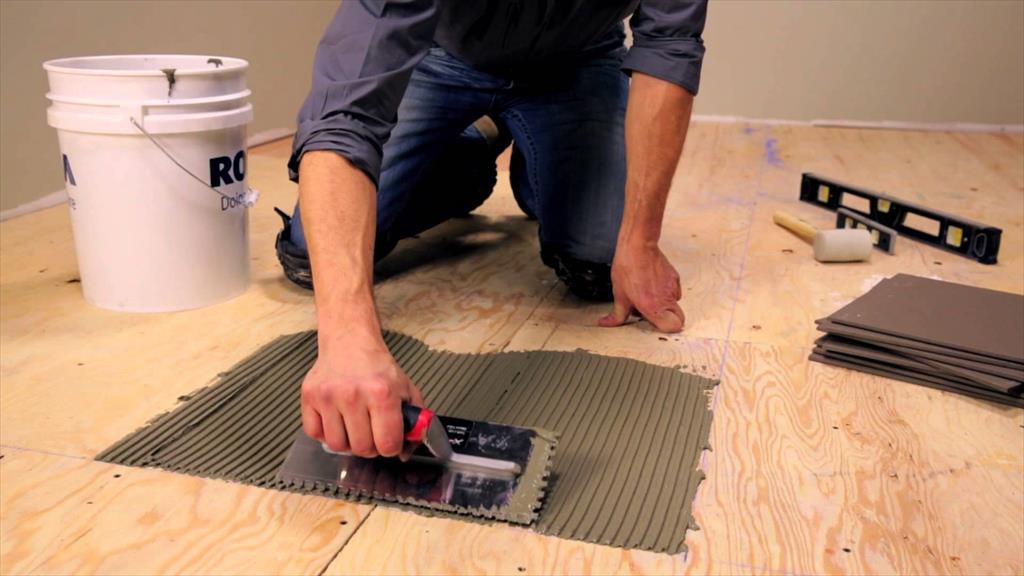
- Next, a regular cement screed is prepared. To give it elasticity, you can add fiberglass to the composition. It also protects the surface from cracking. You can buy immediately ready-made polymer mixture for pouring screeds. Focus on your budget;
- To maintain evenness, you can install paint beacons, then it will be much easier to maintain a single plane. Lighthouses should be installed at a distance from each other, equal to the length of your rule;
- Fill the screed, distribute the composition with the rule and make sure that the surface does not dry out too quickly.
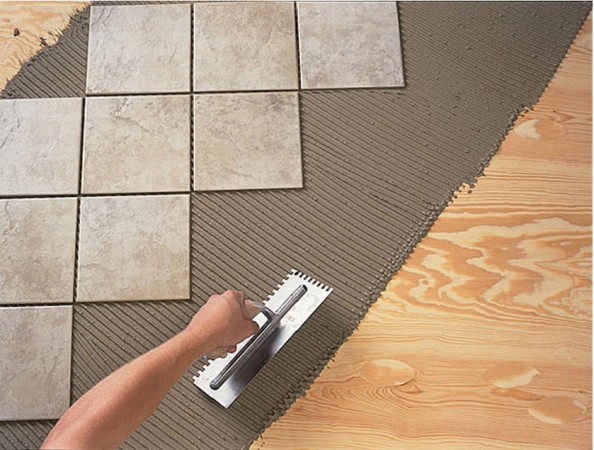
Only after the crystallization process is complete and after the cement has gained 100% of its hardness, can we start laying tiles using standard technology. In this case, you get a strong floating screed that will not respond to wood shifts. If your wooden floor is fairly even, you can use self-leveling solutions instead of a cement-sand mixture. However, the cost of such a screed will immediately increase. The advantage of this method can be attributed to the reliability and strength of the finished coating. TO disadvantages carry higher costs compared to other methods and raising the floor level. You will also have to wait a month before proceeding with the cladding.
Dry screed
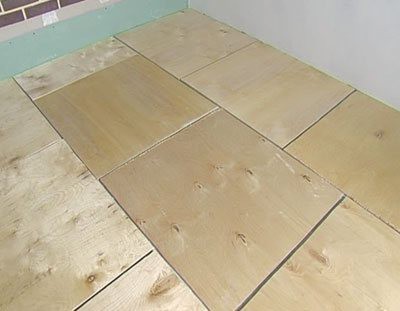
If you do not want or do not know how to work with liquid mixtures, you can perform a quick dry screed for tiles. 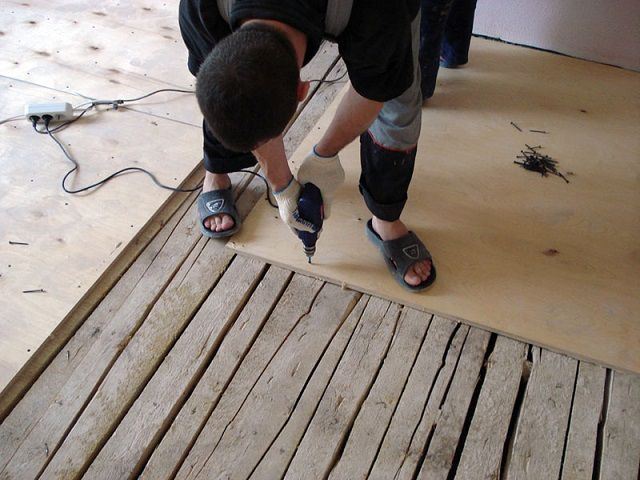 In addition, this will significantly reduce the time of work. Dry screed performed using plywood, moisture resistant sheets drywall or particle boards (DSP).
- In the same way, waterproofing the subfloor;
- After this, it is necessary to staggered in two layers to fix the sheet material of your choice on the floor;
- Highly important point - the joints of the sheets should not coincide with the lags, as well as with each other. That is, the second layer is staggered relative to the first;
- All joints are sealed - glued with a paint net and putty or filled sealant;
- Expansion joints around the room polyurethane foam, and after its crystallization, excess is cut off to the floor level;
- Now another layer of waterproofing is laid, similar to the first;
- After it dries, you can start laying tiles.
Sheets are best secured with self-tapping screws and in small increments. No more than 15-20 cm between fasteners. Make sure that the self-tapping head caps are recessed in a plane. Each cap must be putty before applying waterproofing.
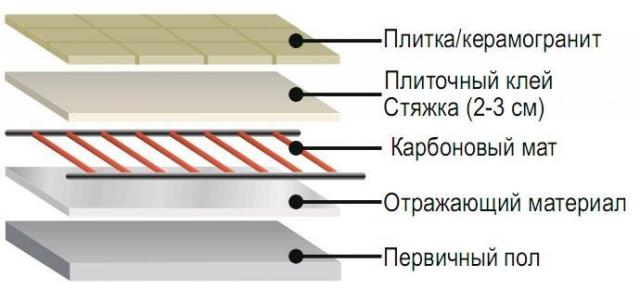
5. Arrangement of underfloor heating under the tile on the wooden floor
Many owners of private houses with wooden floors are interested in the possibility and process of arranging a warm floor in this case. After all, this is a great alternative to more economical heating of the house. Most tend to electric type of underfloor heating. In this case, they may to arise some Problems, related specifically to the properties of wood, namely:
- The possibility of ignition of the base with improper installation or non-compliance with safety measures, because the wood burns very quickly and well;
- Drying of the substrate due to constant exposure to high temperatures. And when overheated, all moisture in the material will evaporate, which will lead to cracking;
- Wood has a low coefficient of thermal conductivity. However, in our case, this is even a plus. Since heat will not escape through the base.And the tile, in turn, is an excellent heat conductor.
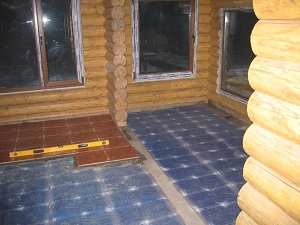 It is possible to lay electric systems of underfloor heating and heating cable on a wooden base, but nevertheless, for safety reasons, it is best to use the system water floor heating either infrared heat film. In the last version priority will be next:
- Base waterproofing;
- Laying thermal insulation material. It is better to choose foamed polyethylene or polystyrene;
- Heat film;
- Laying moisture-resistant sheets of drywall, plywood or DSP. When screwing sheets to the base, you need to be careful not to get into the film;
- Sealing joints;
- Primer base;
- Laying tiles.
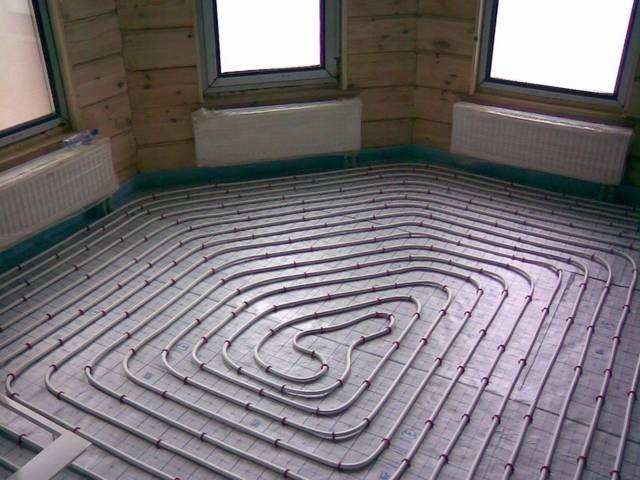
When laying the system water warm gender a special flooring system can be used, which eliminates the need for screeds.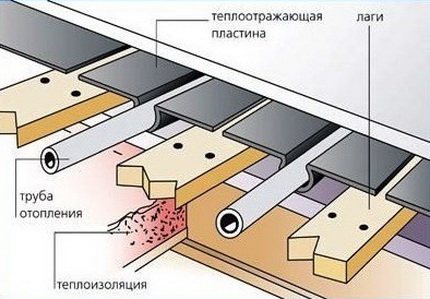
- In this case, between the boards of the subfloor it is necessary to leave gaps of considerable width, between which special thermal plates will fit, and in them the pipes themselves for the coolant;
- You also need to perform heat and waterproofing;
- After that, dry screed and tile laying is performed.
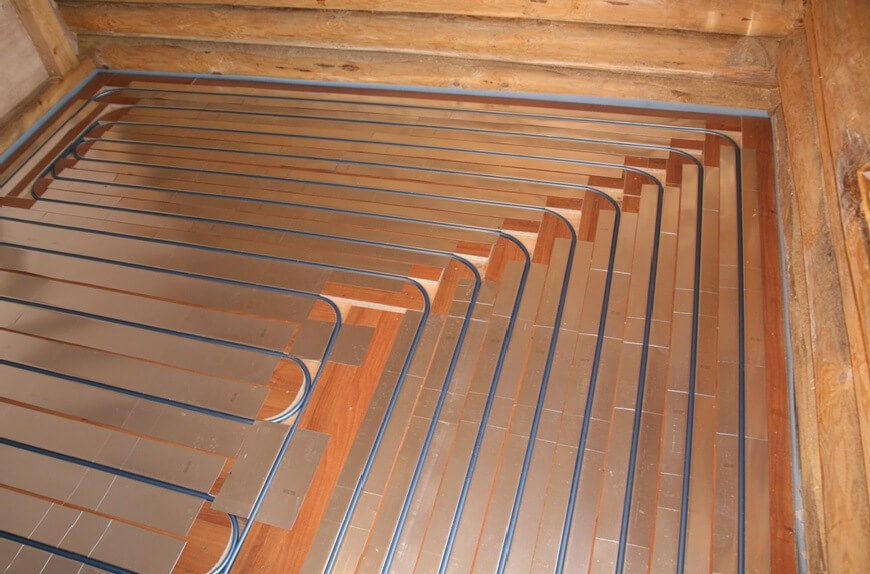
Another option for laying a water floor is laying pipes on special gutters.
- To do this, a second layer of boards is laid on top of the waterproofing;
- Milling is done in them according to the pipe laying scheme;
- On top of the pipe are closed with drywall;
- You can also fill individual strips of plywood, which will serve as guides or make gutters in the drywall itself.
The arrangement of the water floor is more time-consuming and complex, in addition, there is the likelihood of an uneven distribution of the coolant. So, the closer to the heating element, the hotter the water, and noticeably cooler at the farthest point. Accordingly, the room will warm up differently, which does not happen in the case of the film.

 5 ways to remove tiles from the wall and floor
 Do-it-yourself laying laminate flooring. Stages of work
 7 materials for finishing floors in the bathroom
 9 tips for choosing porcelain tiles for the floor
 10 materials for finishing floors in the kitchen
 10 materials for finishing the floor in the bedroom
 Larch floorboard: characteristics and ...
 Choosing a flooring
 15 tips for choosing ceramic tiles for the kitchen
 Tiles for garage on the floor: 7 tips for choosing
Under the tiles do not need plywood, you need DSP or GVL. Or first plywood, and then TsSP or GVL. On plywood with self-tapping screws, on boards floating in two layers.