Stages of apartment renovation
High-quality repair of any room involves following the specific stages of the repair work, the exact implementation of all instructions and requirements. All repair work should be carried out in a certain sequence: so, he begins with the development of the project, and ends with finishing and cleaning.
Interior Design Project

Any repair should begin exactlyfrom the manufacture of the design project future interior. Such a project contains data about wall decoration materials, floor, ceiling, lighting scheme, arrangement of furniture, etc. Such a project can be created within three months, but this time and costs are necessary, because otherwise, all the expensive repair work carried out may not produce the result that we would like. Development of a design project can be extended for a couple of months if redevelopment in the apartment is planned, a change in the location of plumbing or gas equipment, etc. Such changes require agreement with the relevant authorities.
The composition of the design project
The process of creating a design project consists of several mandatory steps, which are as follows.
- The first step is study of customer wishes to the future interior, its style, a discussion of the main details and the main concept.
- Then created preliminary design: all the wishes of the client are taken into account when creating a three-dimensional sketch, which shows the design decision and the location of the main elements in a room or apartment.
- After the outline design is completed, proceed to selection of building materials and furniture, and here a specific model of a particular interior item is already indicated.
- Then go to 3D visualization of space and the creation of working drawings. A working drawing is created on the basis of a preliminary design, but contains specific details for builders who will carry out all stages of work. The author of the compiled design project reserves the control over how his ideas and developments are embodied.
Programs for creating an apartment design project
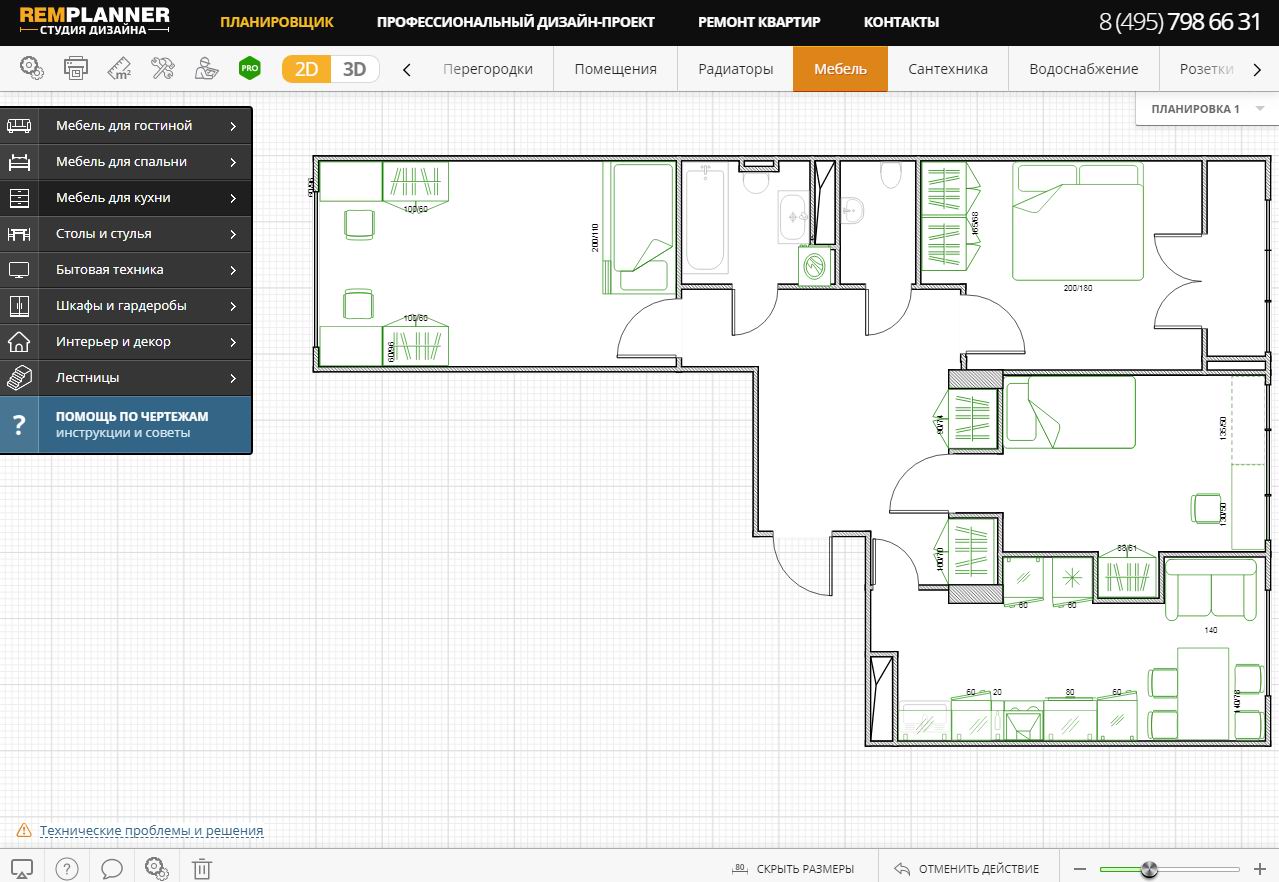
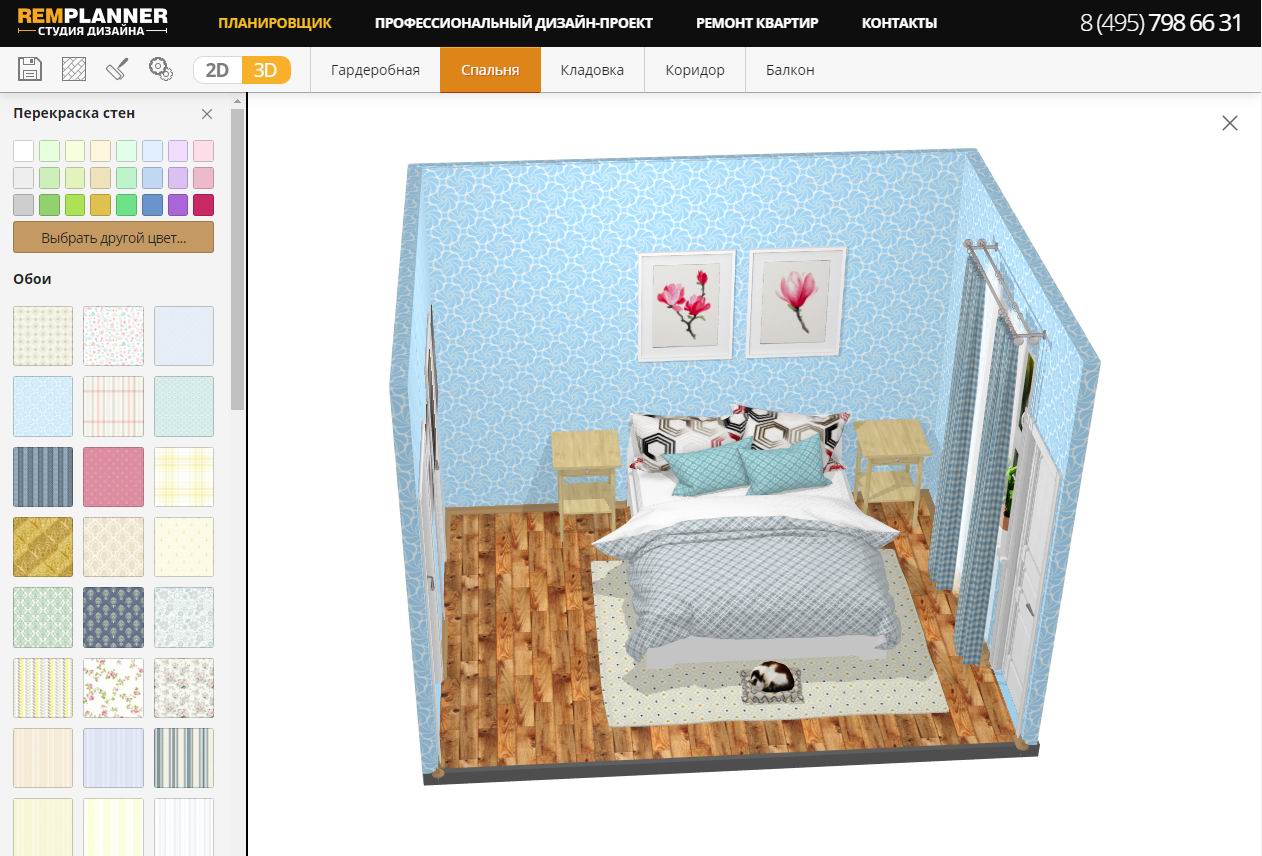
To draw up a design project, at the stage of visualization, designers often use special software with which you can present virtually the future design of a room or apartment. In such programs, it is easy to change the color of the walls, the width of the aisles, the size of the windows, move the furniture, change the layout of the rooms, etc. Some such programs can eventually produce a detailed drawing with all the necessary values and values for future implementation by specialists.
Let's look at a few examples of such software. It is worth noting that both free and paid programs are released and available. What are their main advantages we will understand further.
Free software
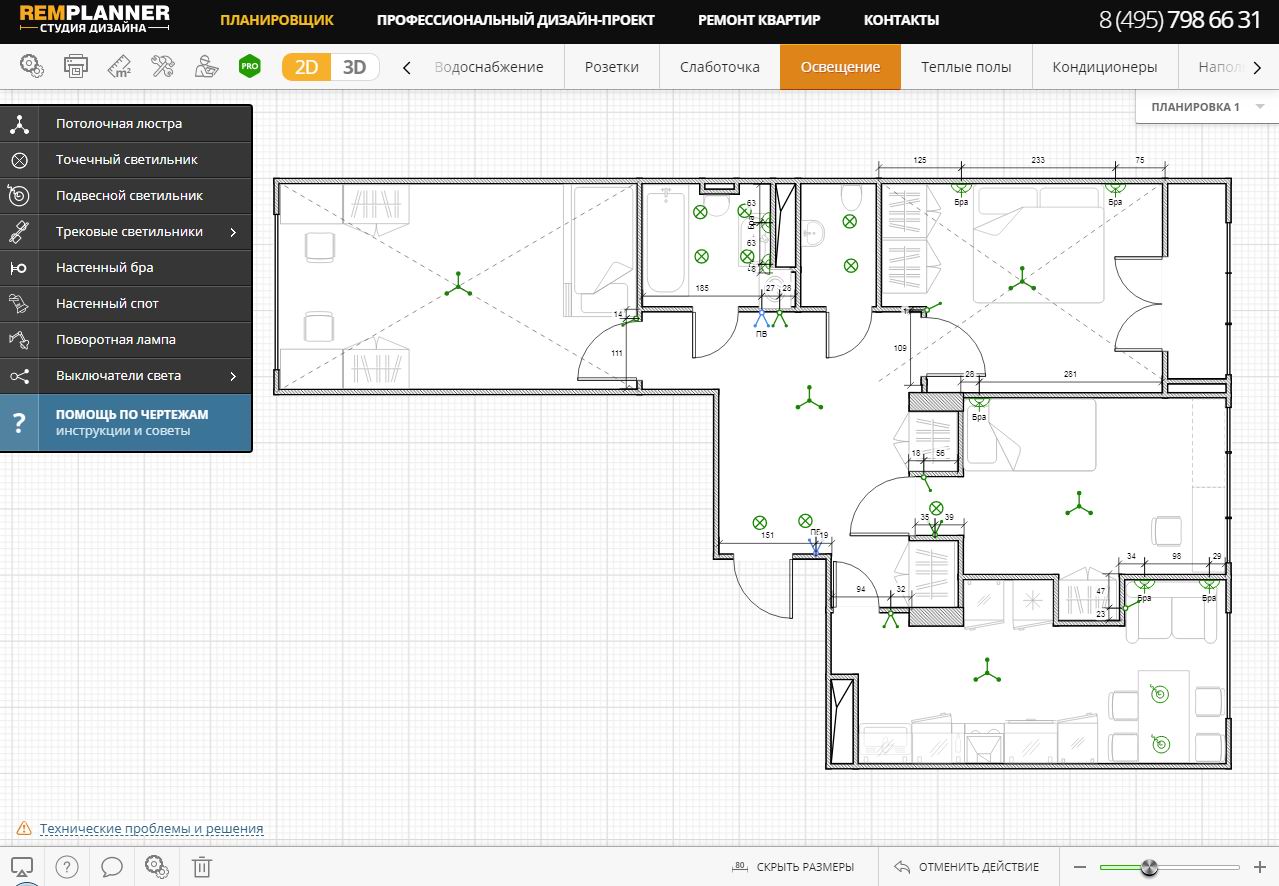
- The planner is easy to learn, and at the output it is possible to get 16 planning sheets, including a lighting plan, placement of plumbing, furniture, dismantling and walling, etc.
Also in the Scheduler there are:- 3D visualization of the project;
- Calculation of the volume of work and estimates for teams;
- Estimated calculation of the amount of rough materials for repair work;
- Ability to save drawings in pdf format and then print;
- Option to work simultaneously with multiple project / layout options.
- Aston Design - A program that allows you to easily simulate a future room. It is enough to set the parameters of the room, as well as the size and arrangement of windows and doors. The program has a huge set of furniture that can be used in it, which can be used in the design of bedrooms, living rooms, children's rooms, hallways etc. When all the parameters are entered, and the furniture is selected, it remains only to move it around the room and change the colors of the walls and floor, and then everything that we are trying to see is visually visible, moving the furniture from corner to corner and from room to room.
. - Google sketchup - A program that has two versions at once: paid and free. Interestingly, the free version has a fairly wide range of tools that you can use when creating a project. This program is easy to learn and will be useful for beginning designers, but, nevertheless, it gives the opportunity to get excellent results. Some elements can be additionally downloaded on the Internet, where you can find already created interior projects that can be used by some as a basis.
- Sweet Home 3D - A program that is quite easy to learn and use, which contains a lot of textures for floors, walls, doors, windows, furniture and accessories that can be used in a project. Such a program can quickly be mastered by any minimally trained person. The result of your design can easily be printed and mailed.
Download the program Sweet Home 3D (available in several languages, including Russian), as well as familiarize yourself with its capabilities on the official website of the developer.
Paid Programs
- PRO100 - A program that has wide functionality for moving furniture around a virtual room. Each item in this program has its own called menu, which makes it possible to select some characteristics of an element: color, material, texture, etc. The designer working with this program has the opportunity to view the created virtual interior in seven projections. When a change in one of the elements of a project occurs, this change is taken into account by other elements.
- Arcon eleco - A program that is designed mainly for professional architects, but it, unlike other paid programs, is not very difficult to learn, since it does not have an overloaded, intricate menu. The process of creating a project in the program is quite typical for programs of this kind: the dimensions of the room are selected, all furniture and accessories are placed, the decoration is selected, and then the designer receives three-dimensional models of the premises of very high quality, which is why this program is very popular in Europe, where more than 20 use it 000 specialists.
- Archicad - A program that is widely distributed among architects and designers. With its help, the most complex objects are designed, although it can be used to create projects of any complexity. The program has very high capabilities, which makes it almost the most expensive among similar programs. It is worth noting that in addition to the design of the premises, the program makes it possible to conduct all kinds of construction documentation. The video shows a project of a residential building developed in the ArchiCAD program.
Stages of repair finishing work
All repairs are carried out in several stages, the main characteristics of which will be given below. It is worth considering a brief sequence of all work, so that the whole order of their implementation is more understandable. So, the main stages of work are as follows.
1. Preparatory work:
- dismantling and garbage collection;
- installation of interior partitions if necessary, as well as all the necessary drywall constructions.
2. Rough finish:
- stucco ceiling and the walls;
- laying of all cables and wires: electricity, internet, etc .;
- waterproofing device, and also, if necessary, sound insulation;
- floor screeding;
- installation of sewer and water pipes;
- if necessary installation of new heating radiatorsmoving risers for heating and water supply;
- front door installation;
- preparation of pipes and outdoor unit air conditioner;
- laying of a warm floor, if provided;
- installation of a dryer for towels;
- installation of frames for plumbing items that will not stand on the floor;
- installation of windows and window sills.
3. Fine finish:
- laying tile flooring;
- installation of drywall constructions or stretch ceiling;
- priming the ceiling and walls;
- installation of reinforcing mesh on the walls;
- performing puttying of the ceiling and walls;
- installation of sockets;
- laying the ceiling skirting;
- execution of finishing work on the walls;
- preparatory work for laying flooring.
4. The final stage:
- final ceiling painting and wall decoration;
- laying flooring and skirting boards;
- setting sockets, switchesfixtures and electrical panel;
- door installation;
- installation of batteries and towel dryers;
- installation of all plumbing;
- installation of air conditioning and floor heating controls, if necessary;
- installation of accessories and decorative elements.
5. Renting an apartment to the owner:
- removal of all construction debris and tools;
- cleaning.
Dismantling work
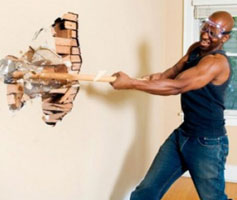 It is with dismantling that the entire process of repairing the premises begins. So, all the old trim, and this is the wallpaper, parquet or laminate, tiles, various partitions, are removed, preparing the surface for a new coating. At this stage, it is necessary to achieve the maximum amount of dismantling of the old finish, otherwise all further work may not bring the desired result.
Dismantling the partitions
Partitions in an apartment can be cleaned safely, since they, unlike load-bearing walls, do not take on any load, but serve only to separate the space. Between the partition and the ceiling, usually, a small gap is provided, which ensures its integrity during the shrinkage of the entire building. This gap is filled with tow, which must be removed. After that, the partition itself is dismantled: you need to do this from top to bottom. So, for a brick wall, dismantling consists in gradually disassembling it along bricks. It is worth paying attention to protecting the floor from falling particles of a destroyed partition.
Floor dismantling
 For this rather dirty procedure, you need to take care of the presence of gloves, a hat and special clothes in order to avoid injuries and negative health effects. It is better to store construction waste on a cart or something similar, as garbage bags often tear under the weight of the old floor covering. To dismantle the tiled floor you will need hammer drill, a sledgehammer and a chisel, and so much force is not required to use a wooden floor. If replacement of the flooring is not required, carefully close it to prevent damage.
Dismantling window and door blocks
 To dismantle the door unit, you must first start with the door, which is not so difficult to remove. It will be more difficult to remove the door jamb from the wall, especially since it can be installed in the supporting wall.After the door block is removed, the doorway can be changed in size depending on what parameters the new jamb will have. If replacement of windows and doors is not expected, then you need to carefully remove the cracked paint, preparing the surface for applying a new coating.
Dismantling wall and ceiling coverings
 Plaster is removed from the walls layer by layer, starting from the top of the wall. Wallpaper is torn off in pieces, and those that are firmly attached to the wall are soaked and removed with a spatula. Paints and enamels that are used in the coating of the ceiling can be removed with a spatula, starting from the places where cracks formed, and whitewashing You can simply rinse off until a layer of putty appears.
Partition device
 When all dismantling work is completed, you can proceed to the installation of new partitions according to the prepared project. Partitions can be made of various materials: brick, foam blocks, drywall, etc. All these materials have their pros and cons, but in most cases each partition requires a small gap between it and the ceiling, which is necessary in case of building shrinkage.
Types of interior partitions
Naturally, a screen or a sliding door can serve as an interior partition, but still many people prefer stationary partitions, which can be of different types. It is about them that we will discuss further.
Overview of stationary interior partitions of various materials
Brick partitions
Such partitions are often erected in modern apartments, including bathrooms. The reason for this popularity was the virtues of bricks, which consist in its moisture resistance and high ability to soundproofing. However, the brick is not without its drawbacks: for example, the construction of brick partitions requires a lot of time compared to interior partitions made of drywall and foam blocks, and also have significant weight.
Partitions from tongue-and-groove plates
Such partitions Suitable for use in any room and in any conditions. Their advantages include fire resistance, moisture resistance, breathability, environmental friendliness. Partitions of this type are relatively easy to install, and inside such partitions you can hide, for example, an electric cable if the partition is single, and even a sewer or water pipe if it is double.
Foam partition walls
Such partitions are a kind of concrete partitions, and therefore have such properties as fire resistance, high ability to heat insulation and sound insulation, excellent load-bearing ability. The negative side of this type of partition is its low breathability, but it doesn’t makes foam block less popular to use, as it is now considered the best solution for organizing interior partitions. Such partitions are strong and strong enough even to hang on them a kitchen, TV, loaded shelves, etc.
Glass block partition
This type of partition is useful for unusual design ideas. Glass for such partitions is strong enough and has a width of up to 10 mm, and can also be decorated with any pattern, which makes this material invaluable for creating an interesting design. In addition to design, the advantages of such a material can be written in their heat and soundproofing, fire resistance, strength and reliability, as well as the ability to transmit light, which is beyond the power of other types of partitions. Of course, it is impossible to nail shelves to such a partition and lay electrical wiring in it.
Drywall partitions
Such partitions are often used to create frame structures. Due to the fact that the drywall itself does not have sufficient strength, it is mounted on a finished metal frame.With a small mass of such a partition, it has good soundproofing properties, it is vaporproof and fireproof. Drywall, however, has some disadvantages: for example, it is not very durable, breaks easily, is able to be saturated with moisture and deform. If you need to attach something to such a partition, then you need to remember that it does not support a lot of weight, and it is better to fix some structures to a metal frame.
Wooden partitions
Such partitions may vary in design, but they are all natural and have properties such as strength, good sound insulation and thermal insulation. But, in addition to these positive characteristics, wooden partitions have several drawbacks: they are able to absorb moisture and do not withstand fire well.
Plastering work
 After installing all the necessary partitions, go to the plaster. Most often, gypsum plasters are used for this. Performing such work, you should carefully approach the process of applying and drying the layer of plaster. So, a layer 6 cm thick can dry from 15 to 20 days, depending on temperature. Do not do it apply plaster in several layers, and especially, even if necessary, make long intervals between applying layers of plaster. Although it dries for a long time, it hardens quickly, which can lead to the fact that after the repair is completed with a slight vibration impact on the walls, the plaster can simply break off in pieces due to the fact that its adhesion to the previous layer is very weak. Therefore, it is better to apply the plaster with only one layer or, if it is absolutely necessary, apply the first layer evenly with flip-flops, and immediately after that proceed to the second.
Plastering work can be carried out manually or using special devices.
Machine plaster
Plastering by machine is carried out using a special plastering machine in which the solution is prepared and with which it is applied to the walls. The main advantages of this method are the high quality of the prepared solution, the simultaneous application of it on the wall, which allows to obtain a high quality result, speed of work, as well as a price that is one third lower than manual work. Machine plastering will be useful mainly for those rooms that have a large area, standard non-necklace forms, and where a distinctive aesthetic effect is needed.
Hand plaster
Manual plastering requires the use of hand tools such as a spatula and trowel. Such plastering takes much longer than mechanical, but it is it that is most often needed in small rooms, apartments, other rooms, especially if they have a rather complex surface: they have arches or columns, etc.
Installation of water supply and sewage systems
 All installation works of the water supply system are carried out simultaneously with electrical work. These works require a clear understanding and understanding of where each of the plumbing items should be. Naturally, this stage of repair work also presupposes the presence of all plumbing products that must be installed. Also at this stage, water supply and sewage pipes are laid.
Installation of heating systems
 After all the plastering works are completed, water supply and sewage equipment are equipped, you can proceed and to the installation of the heating system. In most cases, this step is in replacing old heating radiators to newer and better models. Also, shut-off valves can sometimes be installed near the battery, which will make it possible to regulate the flow of the body, saving money, resources, and creating a comfortable microclimate.
It is worth noting that when will glued wallpaper and other finishing work may be needed, the batteries may need to be temporarily removed.
As for, for example, the equipment of the heated floor in the bathroom, it is advisable to perform it at the stage of work on screeding.
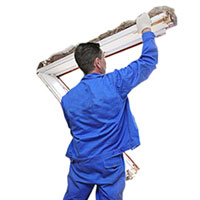
Installation of air conditioners
 When the main elements of the air conditioner begin to be mounted, it is necessary to clearly know where it will be located and what type of air conditioner will be installed. This stage involves the installation of equipment such as an outdoor unit, drainage system, air conditioning routes, etc. Nevertheless, indoor units are installed already in the process of finishing.
Electric installation work
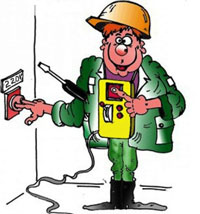 Immediately after plastering, almost at the same time as the installation of plumbing, electric installation work. Here you need to clearly know where and how much to arrange outlets and switches, you need to know the number and location of the main consumers of electricity. After all this is done about the load on the power grid and wiring is carried out according to a certain scheme.
The order of electrical work
It is very important to carry out installation work on the electrical wiring precisely after the plastering of the walls. Indeed, in this case, the accuracy of the location of the switches and sockets is increased, future decoration is not damaged, and the chance of damage to the wiring is also reduced. In addition, it is thanks to the implementation of electrical work after plastering that there is a chance to correct some miscalculations without resorting to the destruction of the already completed plaster.
It is worth emphasizing the importance of accurately representing the future interior of a room or apartment so that you can know exactly where the outlets will be needed, because when they are installed thoughtlessly, this often leads to not very pleasant results. Therefore, you need to make a plan in advance of the location of all sockets and switches, and then discuss it with a specialist in order to agree on some details or eliminate possible miscalculations. After the location design has been agreed, it is necessary to make a working electrical project, on which rough electrical installation work is performed. They consist in laying wiring, installing socket boxes and an electric shield. But all the other elements, sockets, switches, lighting, are installed after all the finishing work.
Floor screed
 The floor screed is performed after all the plastering works have been completed, as well as communications. Screed needed to create smooth surfacesthat are needed at the stage of finishing the premises. There are a lot of requirements for the implementation of such works, which are the nuances of the work, the materials used, the drying time, etc.
There are several types and methods of laying floor screed. We will consider them further.
Types and methods of applying a screed
Wet concrete screed method
This is by far the most common method. Such a screed is carried out using a very liquid sand-cement mixture, which can be reinforced for additional strength with a metal mesh. The thickness of the screed layer made in this way is usually about 3 cm. This is a cheap and reliable method, which, unfortunately, is not without some disadvantages:
- drying time (for individual finishing materials - up to 30 days),
- the possibility of deformation and cracking,
- getting an uneven surface
- the ability to pass water.
This method can be used to reduce the cost of work, but now it is gradually being abandoned.
Dry floor screed
This method is increasingly used by modern specialists, and most often - it is in private homes. Such a screed eliminates the use of any wet processes, which is its main advantage. At its arrangement it is used expanded clay, GVL sheets and glue. However, this method also has drawbacks, among which the main one is the cost of work, as well as the need to wait for the so-called maturation of the floor.
Semi-dry floor screed
This method is the most affordable for the price and quality of work performed. The main advantage is the ability to start laying finishing materials on the floor already 10-14 hours after work on the screed device has been carried out. This screed is performed using a semi-dry solution with polypropylene fiber. The result is a flat surface that is resistant to cracks, deformation and other damage.
Mechanized floor screed
The peculiarity of such a screed is that the solution for it is prepared in a special apparatus, which, after its preparation, passes through the hose to the place where the screed must be filled. Such a screed quickly becomes durable: so, already on the fourth day you can perform finishing work. The screed allows you to get a flat surface, and the mechanical screed is well suited for large rooms of simple geometry - in them the screed can be completed very quickly.
Plasterboard works
 Work on creating drywall constructions, usually performed after the screed dries well and settles. A great option for use in many rooms, especially in the bathrooms, is moisture resistant drywall. Next, we dwell on the specific types of drywall and their characteristics.
Types of drywall and its properties
The following types of drywall are distinguished:
- wall: its thickness is 12.5 mm, it is used very often for wall cladding, as it makes it possible to create a smooth surface without plaster. It is also used to equip partitions, and sometimes for ceiling lining;
- ceiling: used in ceiling cladding, especially when it is planned to use suspended ceilings. Its thickness is 9.5 mm to facilitate the ceiling structure;
- arched: the thickness of this drywall is even less - 6.5 mm. It is used to create arched structures of different sizes.
Drywall is also divided according to the place of use for a number of characteristics. So, they produce a moisture-resistant gypsum board, which is practically not able to absorb moisture, and is often used in bathrooms and kitchens, fire-resistant, which is recommended to be used, for example, in the area near the fireplace.
All types of drywall have such positive properties as thermal insulation, good sound insulation, environmental friendliness, the ability to carry out clean, "dry" construction work with its use. Partitions made of drywall can be subjected to any finishing work, drywall is perfectly connected with almost any material.
Disadvantages of Drywall
Despite all the advantages listed above, it is important to note that drywall has some disadvantages. So, the main disadvantage of drywall constructions is their low durability and inability to withstand large loads and shocks, which is manifested in the inability to fix a cabinet of moderate gravity on such a wall, etc. This makes drywall impossible to use in some rooms. Cracks can form on the drywall over time due to vibration and sheet displacement relative to the joints.
Drywall also causes some difficulties in installation and the need for a special approach, especially for ceiling structures.
The use of drywall is also associated with a decrease in usable area: metal frames take up space and reduce the height of rooms. By the way, in the space between two sheets of drywall rodents can start, as well as mold develop. It is worth noting the low breathability of drywall, which affects the microclimate of the room and questions its use by people with respiratory diseases.Drywall is hygroscopic, and therefore, when exposed to moisture, it can deform over time.
All these qualities of drywall make it not the material that is used in the repair of the elite class, since very often its behavior under certain conditions cannot be predicted. Although, the popularity of such designs remains at the same high level.
Tiled work
 Tile laying must be performed as accurately and carefully as possible, since it is the quality of its installation that largely determines the overall impression of the repair. Naturally, the finished tile coating directly depends on the quality of the tile itself, which is almost impossible to predict - its quality becomes known only when the time comes to lay it, and it still arrives at the place of work.
It is worth noting that the most difficult to lay tiles, which has a complex pattern and various decorative elements: the more such elements, the quality of laying becomes lower, and the complexity is higher. It is also more difficult to lay tiles that are elongated in length.
Painting works
 Painting works include a whole range of finishing work. So, painting work involves the installation of painting corners, priming walls, their filling and grinding, the sealing of joints between sheets of drywall, and painting walls, Wallpapering (more about choosing wallpapers, what wallpapers are).
As for the ceilings, then the painting work begins with priming the surface, installing a painting corner and sealing the joints between the sheets of drywall. Then they go on to gluing the glass canvas and its primer, filling and grinding the ceiling, which can be performed in two stages. All painting work on the ceiling is completed by its painting.
Plumbing Installation
 Usually, they begin to install plumbing after all the facing works have been completed: painted walls, executed outdoor and ceiling covering. At this stage, install all the necessary and provided by the project plumbing products: bath, shower stall, washbasin, toiletbidet heated towel rail. Sometimes, when this is required by the designed design, some of the facing work is carried out after installing the plumbing. So, sometimes it is necessary to lay out the tile exactly along the edge of the shower or bath.
When installing mixers, which is also included in the list of works on installing plumbing, it is important not to scratch the chrome parts, so you need to use special tools. Also, do not forget about the need to seal the joints of sanitary ceramics with cladding.
Flooring
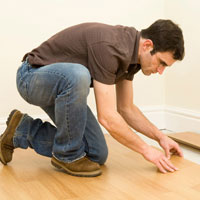 It is best to start laying flooring when all other finishing work has been completed, i.e. it is a floor covering that is better to complete all stages of finishing. The same applies to the doors, as well as the stairs, which are provided by the project for installation.
Each type of flooring has a number of requirements for their implementation. For example, laminate flooring on foamed polyethylene, and the parquet requires laying on a concrete screed covered with plywood, after which they carry out all the necessary painting work, at the end of which they lay the coating itself, fixing it to the plywood with nails. In order not to get dirty, it is usually covered with paper or cardboard on top.
Finishing work
Such works include all finishing works, which include decorating the decoration of the room. In addition to the painting works themselves, the finishing work also includes the application of complex-type decor to walls and ceilings. So, it is this stage that provides for the implementation of Venetian plaster, the application of texture paint and other textured coatings. It is this repair phase that often takes a sufficient amount of time, since it requires a serious approach.
Installation also includes finishing work. skirting boards and cornices, ceilings with various panels, etc.
Electrical connection
 After all the painting and finishing work has been completed, they begin to complete the installation of electrical equipment that was started earlier. So, this stage provides for the final arrangement of sockets and switches, as well as the installation of various types of lighting devices: lamps, chandeliers, sconces, etc. At this stage, various electrical devices are also connected.

 Bedroom Repair Steps
 Hallway repair steps
 TOP 9 tips for repairing an apartment in a new building
 Stages of repairing a children's room
 Bathroom Repair Steps
 Where does the repair in the apartment begin?
 Kitchen repair steps
 10 tips for remodeling and combining a bathroom
 The best projects of one-story houses and cottages
 Construction control: objectives and procedure
A lot of useful information. Thanks.
Everything is described in great detail. Those who start repairs should read the article.
It is not clear what partitions are better for an apartment. Probably it is worth giving preference to partitions from foam blocks and wooden.
Correctly in the article about drywall, it is noted about its shortcomings. Indeed, it will be impossible to hang anything on such a wall because of the fragility of the material itself. Such a design will be good only for dividing the space of the room and no more ...