Stages of repairing a children's room
A child from an early age needs personal space, so it is so necessary to equip his own room, and carry out repairs for all requirements for this room. It is necessary to use only high-quality building materials and materials that are as safe as possible for the child’s health, which, in addition, can withstand decent loads and active games of the child. In preparation for repair, it is worth taking an interest in the tastes and wishes of the child, if he is already old enough for this. In what sequence to carry out repair work in order to finally get a dream children's room?
Project creation
Carrying out any more or less large-scale work requires a plan that is easy to build, if you clearly know the ultimate goal. This is exactly what you will need design project of a children's room. You can make it on your own, and this will require a minimum of skills. First you need to accurately measure all the parameters of the room of the future nursery: height, width and length, determine the size of window and door openings and their distance to the walls. In the presence of non-standard architectural elements, additional measurements are necessary. According to the received data, a room plan is compiled on a sheet or in a special application.
Now you can begin to plan the organization of space, think over where the main pieces of furniture will be located, lighting, in what style the nursery will be decorated, etc. Such planning will help to avoid possible errors in the placement of furniture and allow you to better imagine the future interior and, if possible, correct it even at the planning stage.
When creating a project for a children's room, you need to consider A number of specific requirements for this room:
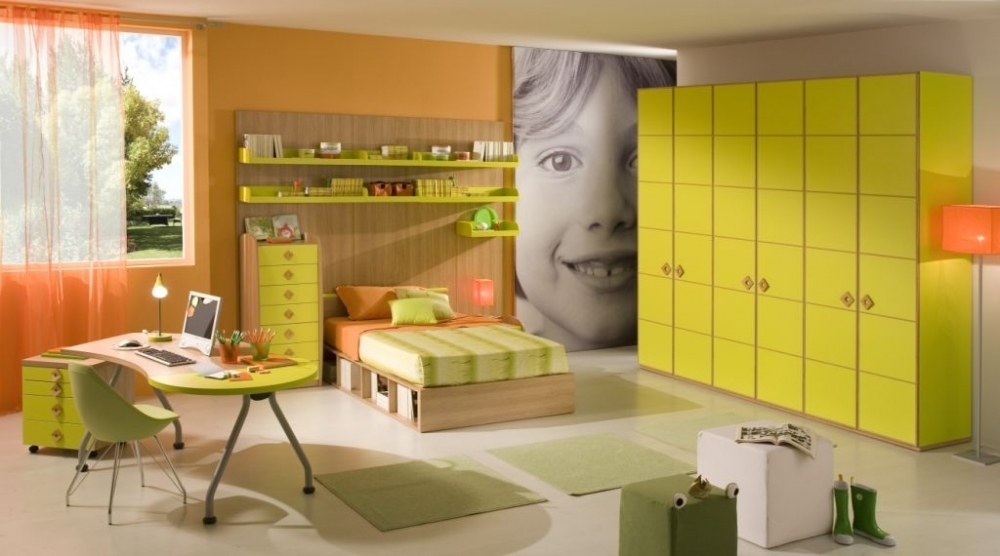
- space should be zoned, and the room should perform many functions. It is necessary to highlight a recreation area, a working and a gaming zone, as well as a storage area for things. Each of these parts may require original decoration, so it is so important to determine the location of the main zones in advance;
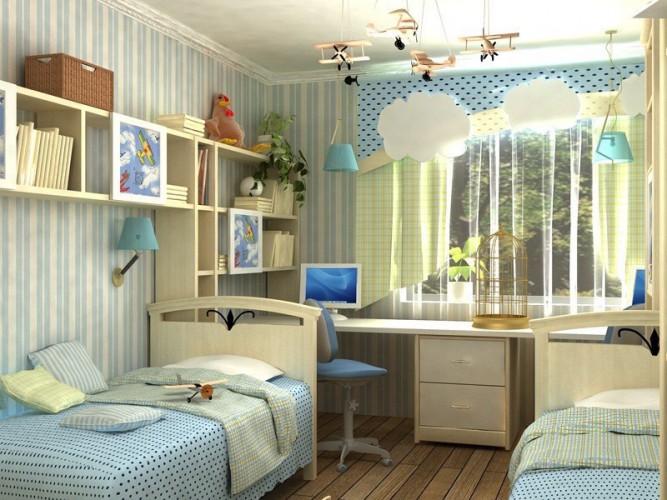
- if the room is for two children, it is important to highlight in it a common and personal space. Each of the individual zones can be decorated in a specific style and color.
After the project is completed, you can determine the list of necessary works, their sequence, evaluate the repair budget and determine the necessary materials.

Dismantling work
First of all, all the furniture and appliances are taken out of the room, and then they begin to get rid of the trim that needs to be replaced. If necessary at this stage also all unnecessary partitions are demolished, but it should be agreed in advance in the relevant authorities. If, for example, the floor covering does not need to be dismantled, then it should be reliably covered with a film during repair.

Depending on which finishing materials were previously used, the method of dismantling them will differ. So, if the walls were papered, then you can remove them with a spatula, after soaking the wallpapers themselves a little. Paint is better to remove. using special solvents, and whitewashing they are removed from the ceiling in several stages: first, they are washed off with warm water, then they are cleaned with a spatula, and then they are also wiped with a damp sponge. FROM floor dismantlingAs a rule, there are no problems: linoleum and laminate, which are used most often, can easily be removed with your own hands.
Installation of electrical wiring
If the nursery is planned wiring replacement, then it’s worthwhile to carry out all the work at this stage, because, most likely, you will need to perform a wall chipping, which makes sense only before finishing work. At this point, it is necessary to clearly visualize the interior of the future children's room, and it is better to rely on a pre-compiled project, where all lighting points and places of use of objects of technology.
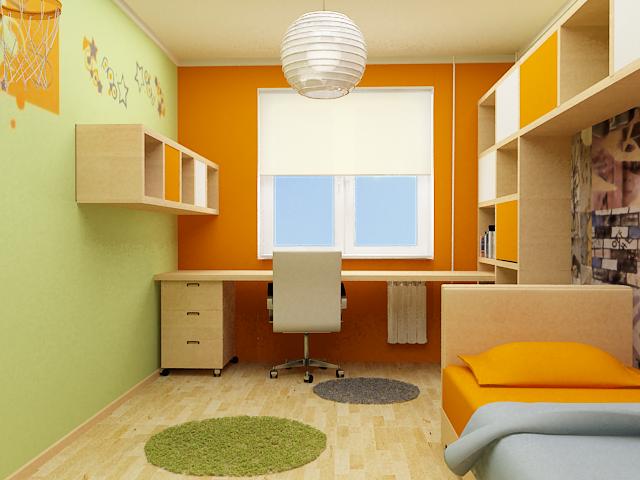
Lighting in the nursery should be multi-level: you need to provide for general light, work, lighting in the recreation area, as well as lighting near the bed. The lighting built into the ceiling is excellent for children's rooms: such lamps cannot be broken even when playing active games. The only negative of such lighting is the need to use suspended or ceiling tension systems. It is also possible to use a chandelier for general lighting, preferably with a plastic lampshade. Do not forget about the need for lighting near the bed and desktop, as well as the possibility of using decorative lighting.

If a computer is located in the room, several outlets at the intended location. Also, sockets must be placed at all points of the possible connection of electrical appliances, and sockets with overlays are suitable for a children's room.
Rough finish
If necessary, build partitions or some unusual architectural elements, they are being built at this stage. Next thing is for wall alignmentso that the fine finish is perfect. You can smooth the surface of the walls with putty or plastersbut before that it’s better to process them primer: the process of preparing the solution is simple, but it needs to be prepared in a volume sufficient for half an hour of work so that it does not freeze.

Plaster is recommended to be applied on lighthouses, to get a flat surface, and some masters advise using stucco mortar only where there are impressive cracks on the walls, while others talk about the need to cover the entire surface with mortar. If you chose putty for leveling, then after it has dried, you need to sand the walls with sandpaper. The alternative to all this dirty wall alignment work is - drywall sheets: The installation process is clean and fast, and the result is perfectly smooth walls. Some drywall parents make interesting volumetric decisions that give the child a special atmosphere. The only minus of this option is the need to build a frame, which means that you will have to lose a part usable area.
Ceiling also needs careful preparation, especially if it will be covered with paint or plaster. As a rule, a gypsum solution is used for leveling, which, after application, is cleaned and primed. If you plan to use suspended structures or suspended ceilingsthen there is no need to bring the main ceiling to perfect condition.

Floor before finishing important to align. If the irregularities are global, then it is better to use a cement-sand screed, but in most cases you can do without using self-leveling mixture, which is perfect especially in cases where the repair is done by yourself. Before using such a solution, it is necessary to make sure that the main surface of the floor is strong, clean and free from stains from paint and oil.
After cleaning and cleaning the floor surface, it is advisable to apply a primer on it, and only then proceed to the preparation of the solution.When preparing it, you must strictly follow the manufacturer's instructions, and when filling the floor with a mixture, make sure that in the thinnest place the thickness is at least 5 mm. In parallel, the self-leveling mixture is leveled so that it can evenly fill the entire surface of the floor. After the mixture is poured, several times every 40 minutes you need to walk with a roller so that all excess air can freely escape. Drying time is about a couple of days. For children's rooms, it will be appropriate to use the system warm floorsso that even in winter, games on the floor are not a source of the common cold. Underfloor heating should not be laid under furniture, and the project created in the first stages will help determine its exact location.

Windows installation
Window - This is another important detail of the children's room. If the old can no longer fully perform their duties, then care must be taken to replace them. It is recommended to use modern double-glazed windowsthat will not allow drafts, let in noise, cold or heat from the street. To ensure normal ventilation indoors, pay attention that the window is equipped with a special valve or ventilation mode.
At this stage, you can also replace the doors, if necessary. After installing a new door, it is better to close it with polyethylene and masking tape, so as not to get dirty during the finishing work.

Fine finish
Recommended starting finish from the ceilingso as not to stain the finished walls and ceiling. For decorating the ceiling in the nursery There are many interesting solutions.
- Most popular - painting, but you need to use only safe materials, and you can decorate the monophonic surface of the ceiling with the help of painted stars or glowing stickers.
- Alternative to painting - decorative plaster, which is a natural and completely safe material.
- You can also use it to decorate the ceiling. wallpaper: both simple monochromatic, if there are so many bright elements in the room, and bright, with the image of clouds or cartoon characters.
- Another alternative is whitewash: the option is the most budgetary, well suited for children's rooms, but not very durable.
 Today more and more often they use for children's rooms suspended ceilings and suspended structures. They are mounted quickly, are not accompanied by dirty work, so they are performed after the walls and ceiling are finished. Such ceilings open up huge scope for imagination in the field of lighting, and stretch ceilings can have not just any shade, but also any image you like.
 Today more and more often they use for children's rooms suspended ceilings and suspended structures. They are mounted quickly, are not accompanied by dirty work, so they are performed after the walls and ceiling are finished. Such ceilings open up huge scope for imagination in the field of lighting, and stretch ceilings can have not just any shade, but also any image you like.
Wall decoration material It should be as environmentally friendly and safe, easy to maintain and durable.
- Often used for wall decoration in a nursery wallpaper but not all of their types are suitable. You need to choose from those that are made from natural materials and allow air to pass through. The easiest and budget option - paper wallpaperthat have a huge assortment of colors and patterns. Also suitable non-woven, cork wallpaper, serpyanka-based wallpaper and wood veneer, as well as all those that are produced using plant material, such as bamboo, cane, straw, jute, etc. Do not forget that wallpapers can be combined with each other, adding a twist to the interior and highlighting individual areas of the room.
- In addition to wallpaper, you can use painting, and the priority is water-based paints, as well as formulations that indicate that they are intended for children's rooms. In some places of the room you can use magnetic and slate paint to create entertainment areas for the baby.
- Also suitable for wall decoration decorative plaster and the clothbut the latter is best used as a decoration.The main finish can be an unobtrusive calm color, and you can decorate the walls with vinyl stickers: as the child grows and his tastes change, these stickers are easy to replace.
 Often used for wall decoration in a nursery wallpaper but
 To the finish of the floor it is worth taking maximum care, because the child will spend a lot of time playing games on the floor. Finishing material It should be safe, preferably natural, warm, easy to care for, moisture resistant. There are many options that meet these requirements, and the choice depends on the budget and vision of the future interior.
- The most natural and warmest material - tree, but constant care of him will not suit everyone.
- An alternative to solid wood - parquet board, multi-layer different wood, or laminate – budget replacement parquet, which has excellent aesthetic and operational properties, can be complemented by soft small floor mats.
- Excellent material for the floor in the nursery is considered bung: This finish is warm, eco-friendly, non-slip and durable.
- Linoleum and PVC tiles can also be used in the nursery, only they need to be purchased from trusted manufacturers that provide a safety certificate for their products.
- Often in children use carpet - a soft and pleasant to the touch coating, always warm, non-slip, but the reverse side of the coin is the ability to accumulate dust, which is an allergen.
- In addition, for decoration also use carpets and Self-leveling floors.
 An alternative to solid wood -
 Furniture Installation
When all repairs have been completed, the job remains the most pleasant - the choice and furniture installation. Nevertheless, this issue requires a careful approach, because the furniture should be safe, convenient, ergonomic and fit into the interior of the room. Among the necessary items, it is worth highlighting a bed, a desk, a bedside table, a system of shelves or a cabinet for storing everything you need. In addition, it is necessary to equip sports section or a play area, and for older children you can choose a sofa and poufs.
The best material for furniture is wood, but you can use MDF. If the budget is limited, then you can pay attention to the elements from particleboard, but be sure to look at the quality certificates: for the formaldehyde emission, such structures should belong to the class E0 or E1. Also, plastic and wicker furniture are suitable for a children's room, but it is better to refuse glass elements.
For upholstered furniture, it is better to choose natural upholstery, the mattress should be orthopedic. Do not forget about textilewhich can give any children's room the necessary atmosphere. Cute pillows and bedspreads, curtains, carpets can be made in a variety of ways and create the mood of the room. Do not miss the decor elements: they should not be many, but they make the interior interesting and develop the imagination and taste of the child.
In conclusion
Repairing a children's room will be a tireless and creative task, if you immediately clearly determine what result you need to come to and highlight the main stages of work. You can design a child’s space in an original and tasteful way in a variety of different ways, and if the child is already old enough and has his own taste, then it does not hurt to ask his opinion about the design of his space. After all repairs have been completed, the room should settle for a couple of days before the child constantly dwells there.

 6 useful tips for arranging furniture in a nursery
 Bedroom Repair Steps
 7 Tips for Lighting a Kids Room
 TOP 9 tips for repairing an apartment in a new building
 Hallway repair steps
 Kitchen repair steps
 7 design tips for a small children's room + ...
 6 materials for wall decoration in the children's room
 Choose curtains in the nursery: fabric, color, design, features
 Bathroom Repair Steps