Hallway repair steps
The hallmark is that repair her at the very last turn, because it is somehow illogical to carry building materials and rubbish through an already repaired building. Often, after a tiring and time-consuming decoration, all the rooms of the apartment to repair the hallway have neither the strength nor the finances left. This is a critical mistake, because the entrance hall is considered to be the visiting card of the apartment. That is why it is so important to plan repairs in the entire apartment, and in particular in the hallway in advance. Easier immediately highlight all the stages of repair of the hallway, decide what it should be in the end, in order to get what you want.
No. 1. Project drafting
Any important task involves the preparation of an action plan, and when it comes to repair, then the presence of a clear course of action is a necessity and the key to a successful resulta. In advance yet before repair workshould be considered arrangement of basic furniture, determine their size, choose the style of the interior, as well as determine the lighting fixtures, their location, locations of switches and sockets. All this must be imagined not conditionally and in the imagination, but capture in the form of a diagramas complete and understandable as possible.
To make a plan for the future hallway, you need to measure its size, know the distance from the walls to the doorways and other nuances of the room. All this needs to be scaled to paper or recorded data in a special program. Now you can begin to move the necessary pieces of furniture according to the plan and experiment until the result is not to your liking. Using special applications is more convenient, since you can immediately see the result in three-dimensional space. If your strength and desire are clearly not enough to plan the interior and organize the space of the hallway, then you can turn to specialists.
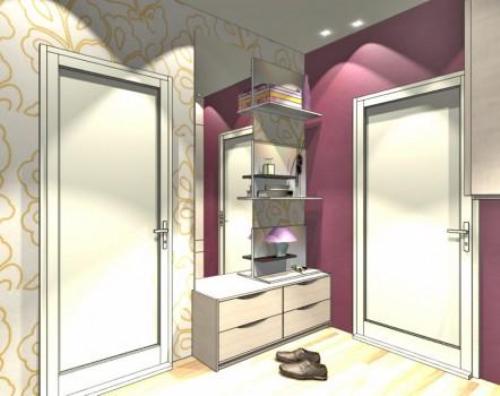
When creating a hallway plan is worth take into account some of the nuances of this room. This is in most cases the lack of natural light, small area and, of course, a permanent negative effect: dirt, sand, moisture from the street, temperature changes, etc. That is why it is not necessary to clutter the hallway with furniture and decor - there should be at least the necessary items so that the household can move around quietly here. It’s better to use light colors in the decoration, wardrobes help out with mirrored doors. Owners of spacious hallways can afford complete freedom in organizing the hallway space.
The compiled design project should be as detailed and detailed as possible, and on its basis the necessary building materials are determined, an estimate is made, the repair stages and their sequence are highlighted. At the main stages, we will stop.

No. 2. Repair Preparation
When the entire apartment is being renovated, it is unlikely that any furniture will remain in the hallway, but it will not be superfluous to recall that the first thing is to get everything out of it. Now it's up to the dirtiest process - demolition work. If walls were trimmed wallpaper, you can remove them with a spatula, and in case of difficulties - first moisten the wallpaper a little. The situation is more complicated with paint: you may need a solvent or building hair dryer. However, if painted wall surfaces or the ceiling is even and without any defects, then depending on the future finish, the paint layer can not be touched. As for flooringthen laminate and linoleum is quite simple to dismantle yourself, but you have to tinker with the tiles. It is important to correctly assess the condition of the flooring and if it is still quite normal, it is better to just lay the floor for the duration of the repair with a film.

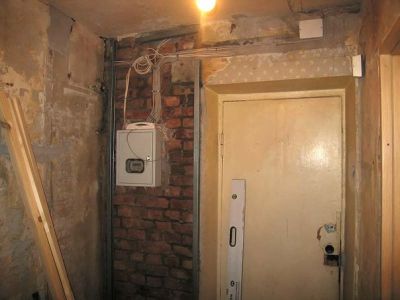
Often, small hallways are combined with a neighboring room, demolishing a partition. This is done precisely at this stage of the repair, but permission for such work must be taken long before that. If necessary, at this stage also perform the installation of partitions, arches and other elements.
Overhaul, as a rule, also provides wiring replacement. If it is necessary, then at this stage of the repair the walls are chipped, which is necessary for safety and aesthetics. At this point, it is already important to know the plan of lighting the hallway and the location of outlets in it, so that in the future it will be possible to avoid the use of extension cords and laying wires on the surface of the walls - all this will not add beauty and accuracy.
No. 3. Rough finish
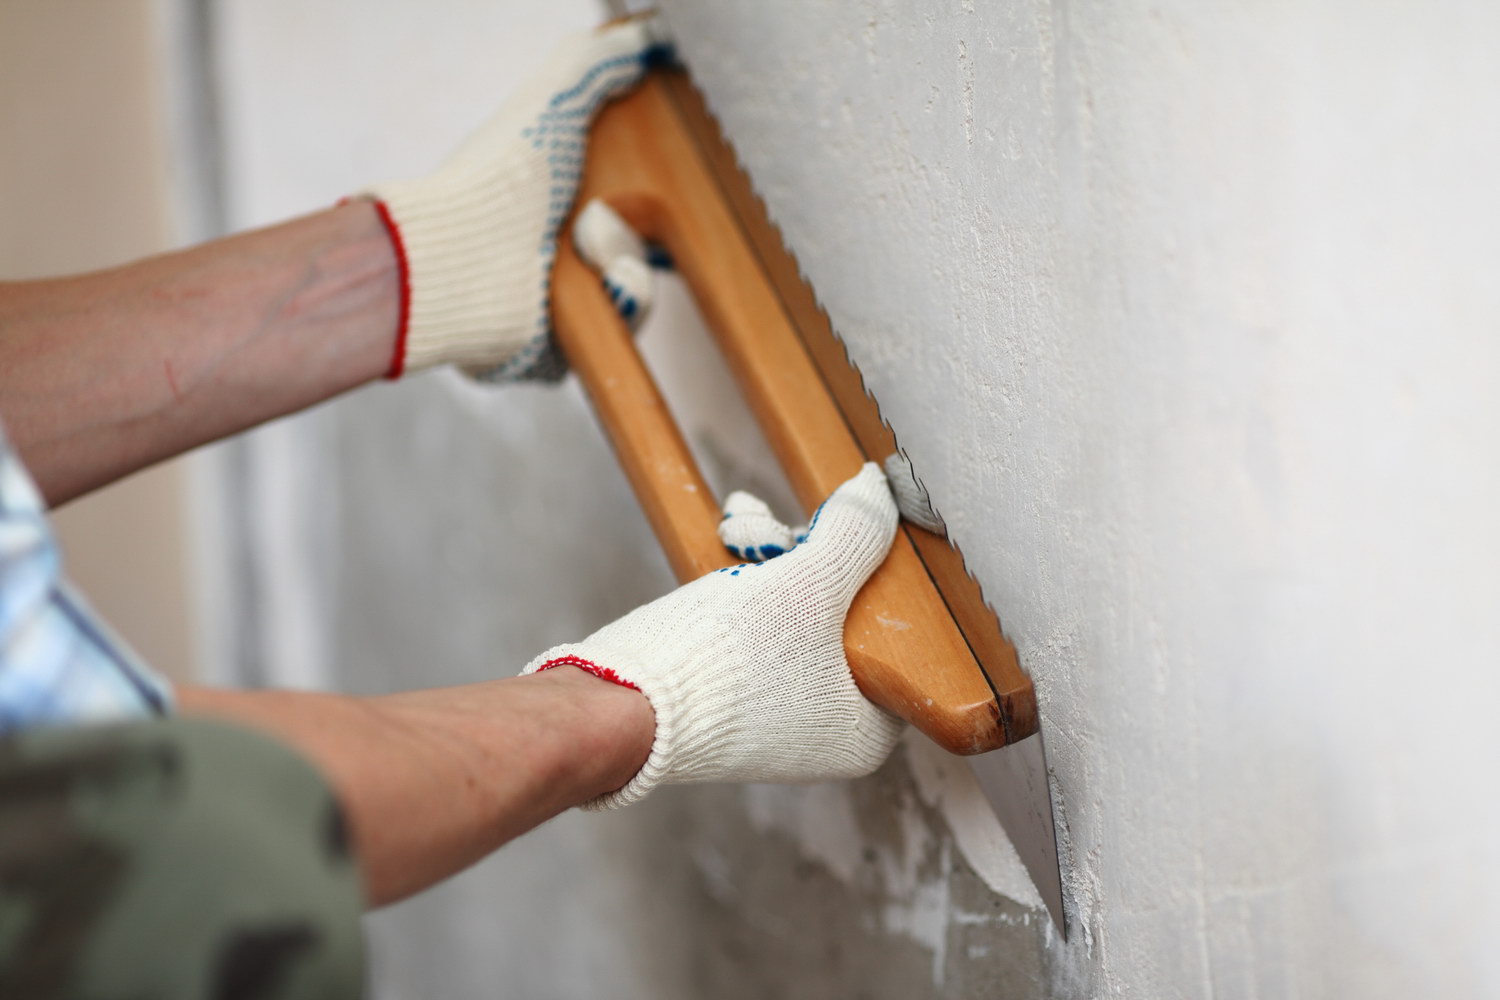
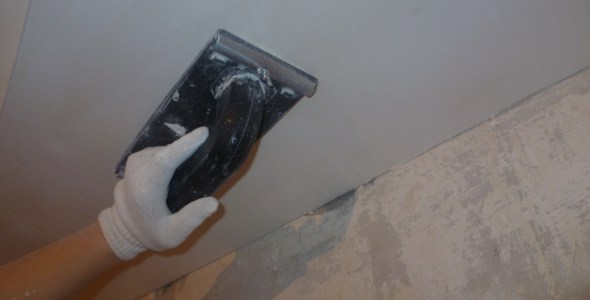
It all starts with wall alignmentbecause their ideal surface is already half the success. Often used gypsum plasterswhich have a number of advantages. It is worth noting that they will not dry very quickly, and at this time it is better not to start the next stages of work. Apply plaster preferably in a single layer, since when applying the second it is necessary to wait for the complete drying of the first. After that, it would be nice to prime the surface. Instead of plaster, many use putty, which after drying is sanded with sandpaper.
The lengthy and dirty process of leveling the walls can be simplified if you use sheets of drywall for this. But this solution is far from suitable for all halls, because their area is often tiny, and to reduce it due to drywall constructions nobody wants to. This option is great for owners of spacious hallways.
Level the ceiling It is also necessary, because painting becomes a frequent decision of its decoration. An exception - tension and suspended structures that hide the surface of the main ceiling, and therefore to achieve perfect evenness and the absence of any defects is not so important. To level the ceiling, a gypsum solution is often used, which, after drying, is peeled and primed.
If floor has elevations then it is necessary to level and its surface. Cement and sand screed It is used when everything is very bad, and in some cases it is more appropriate to use a self-leveling screed, which is easy to do on your own. First, the floor surface must be thoroughly cleaned of dust, dirt, grease stains, primed, and only then proceed with the preparation of the solution. Following the instructions on the packaging, this is not difficult, and when pouring the floor, make sure that the thickness of the screed is not less than 5 mm.

After completing these works, you can proceed to door replacementif provided. When the new door leaves are installed, it is better to cover them with a film, so that during finishing they will not get dirty or damaged.
Number 4. Fine finish
They approach the decoration of the entrance hall and the choice of materials with all responsibility: the room every day takes a serious blow when the household and pets bring dirt, moisture and sand from the street. All materials must be resistant to such influences, easy to care for, but also attractive.
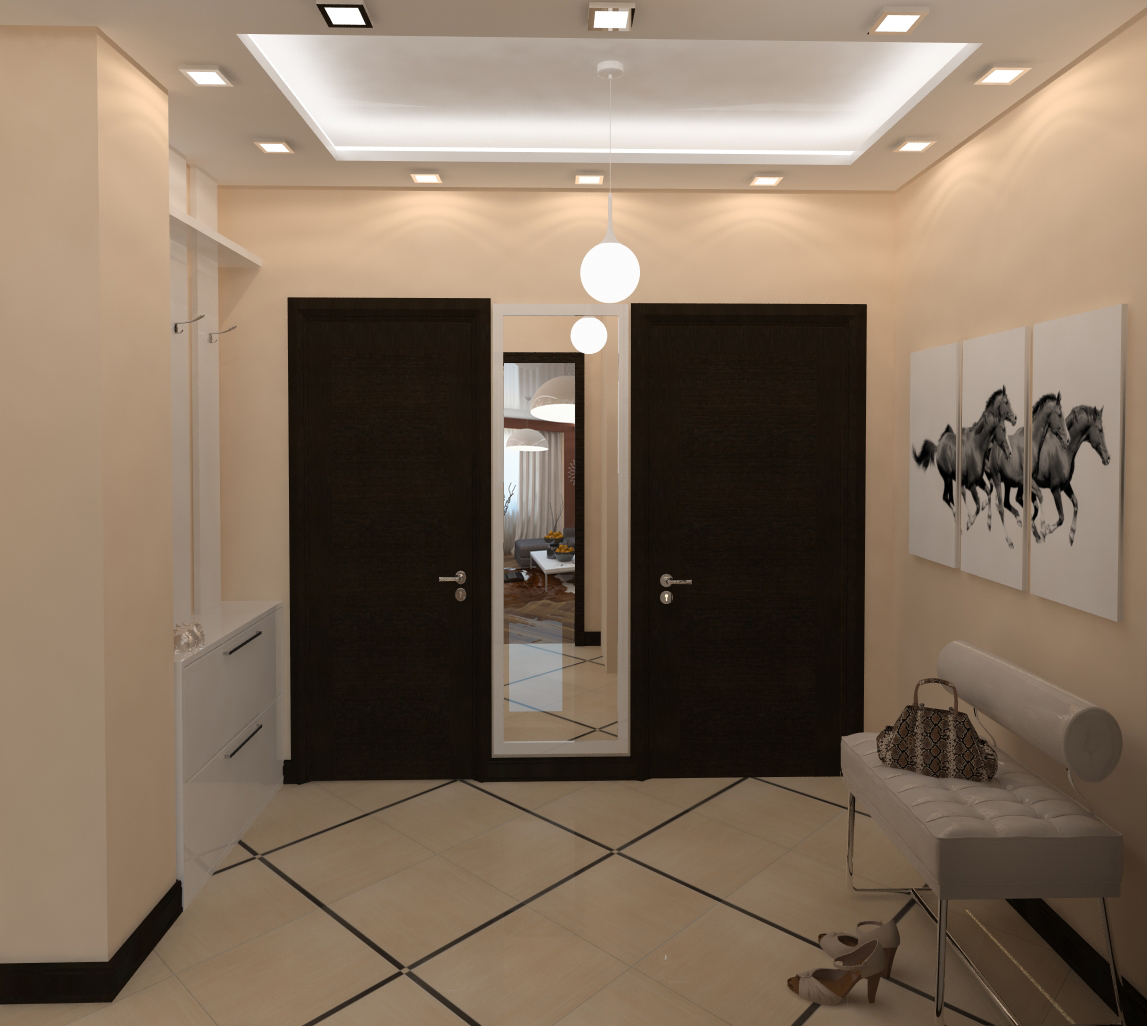
Accepted start finishing ceiling decoration, because otherwise on wall finish and gender drops of paint or plaster will drip when decorating the ceiling. The most common way to organize your ceiling space is to paint it: there are many shades, the price of materials is low, you can cope on your own. Less commonly, but still used to decorate the ceiling. wallpaper and polystyrene tiles. An interesting option is becoming decorative plaster, but whitewashing almost no one uses it.Mirror tile will make the hall bigger and add a twist to it, but it’s much more used glossy stretch ceilingswith reflectivity as well drywall structures. In the last two options you can equip a unique lighting system.
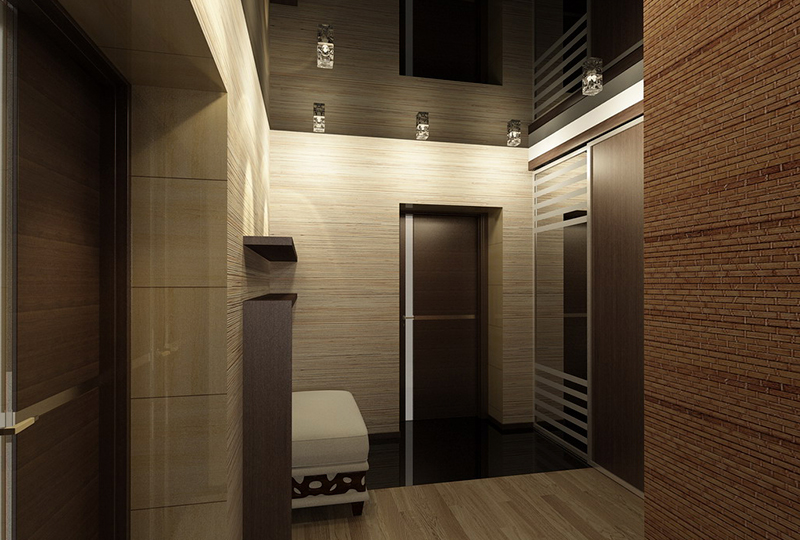
If the ceiling doesn’t so often suffer from dirt drops falling on it, then walls take a huge hit. In order not to repeat the repair often, use the most practical materials. it washable paints, decorative plasterswhich are impossible to scratch, and some types of wallpaperincluding cullet, liquid, quartz wallpaper and washable vinyl. One of the most durable and reliable options for the hallway becomes decorative rock, can use also MDF panels. It shows itself perfectly and ceramic tile, but this option does not fit well into every interior style.
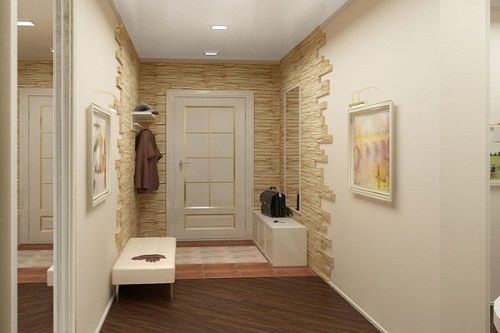
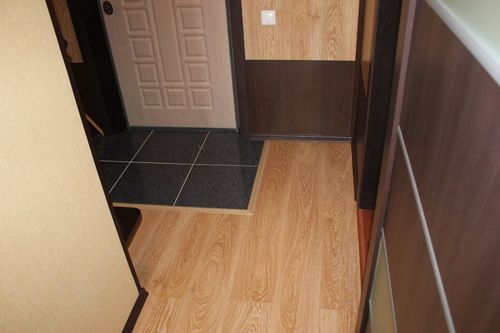
The best option for flooring is tile or its combination with other material. So, near the threshold you can use ceramic tilesand in the rest of the hallway laminate or even parquet. Alternative to tiles - porcelain tile, whose performance is so high that many even doubt the feasibility of its use in the hallway. In addition, for this room you can use linoleumwhich is very easy to care for, and bulk floor, which has continuous advantages, but at the same time, and a high price.
Lighting can be installed at this stage. Do not forget that for the hallway is better provide for several types of lighting: in addition to a common light source, it is necessary to use a local one to illuminate the cabinet, mirror and other elements. Sometimes decorative lighting is also appropriate.
No. 5. Furniture and decor
Number and size of furniture must match the parameters of the hallway. Someone can afford a few pieces of massive furniture, and at the same time there will still be enough space, but there are few such lucky ones. Most often the hallways are small, and you have to think a lot about the arrangement, because you need to organize a storage system for the most necessary things, hang a mirror and leave enough space in front of it.
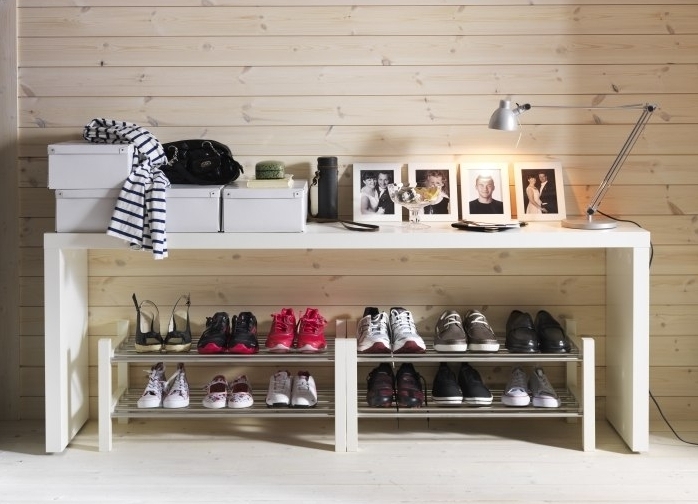
Of course, hall cabinet - one of the most important elements. If a closet is placed, then you are incredibly lucky, otherwise you can place small narrow cabinet with mirrored doors. If there is so little space that even a small cabinet does not fit, then they can help out floor hangers or a wall bracket with several hooks and a shelf. A variety of galoshes and shelves are intended for storing shoes: there are so many options that it is not difficult to choose the one that is suitable in style and size.
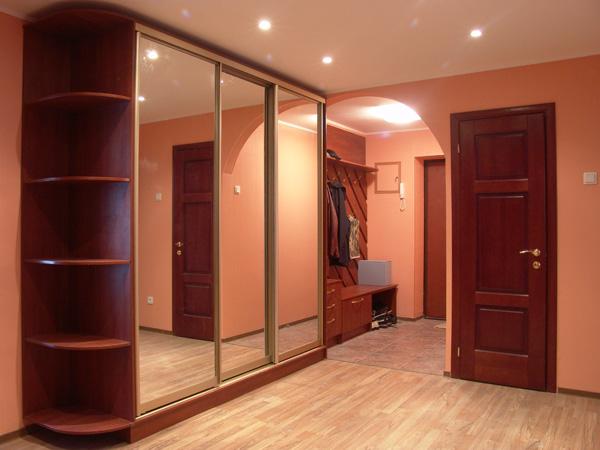
What touches the mirror, it is better that it be in full growth, but for a separate mirror of this size, the place is not always found. The way out is the glass cabinet doors or a small mirror above the chest of drawers. Do not forget to light it correctly and leave room for changing clothes.
It’s also good for the hallway to foresee useful accessorieslike a stand for an umbrella, a key holder, a box for all kinds of little things, so that they do not lie everywhere and litter the space. In the hallway there is a place for decorative thingsbut they should not be too many. Pictures, a few photos or a vase will be enough.
In conclusion
Want to save time, money and nerves when repairing in the hallway? Then you cannot do without a clear plan and sequence of actions.It is better to spend a couple of days thoroughly considering all the details and drawing up a design project than to solve the problems that arise during the repair.

 TOP 9 tips for repairing an apartment in a new building
 6 options for arranging a small hallway with a photo
 Bedroom Repair Steps
 6 tips for choosing and placing mirrors for the hallway
 7 hallway lighting tips
 What furniture to choose for the hallway: 8 tips
 Stages of repairing a children's room
 Where does the repair in the apartment begin?
- 9 hallway ceiling materials
 What tiles to choose for finishing the floor in the hallway