4 ways to align walls for interior decoration
Highly few apartments They boast perfectly even walls - in most cases they have hollows and other defects, or even significant vertical deviations. On such walls is difficult stick wallpaper, it’s almost impossible to decorate decorative stone or tiled, and even regular painting will not look very aesthetically pleasing. On uneven walls finish will quickly lose its original appearance, and will have to again undertake repairs. To save time and money, it is better to immediately straighten the walls with high quality. What is the best way to level the walls and how to carry out all the work?
Assessment of wall surface roughness
All methods of leveling walls are divided into two fundamentally different groups:
 use of mixtures (plaster and putty);
- dry leveling (drywall is more often used).
 use of mixtures (
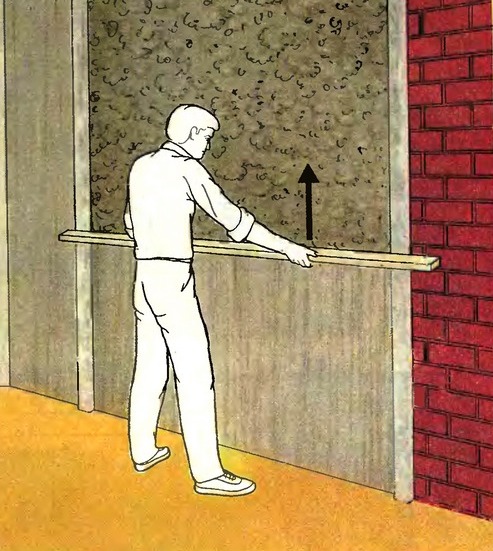
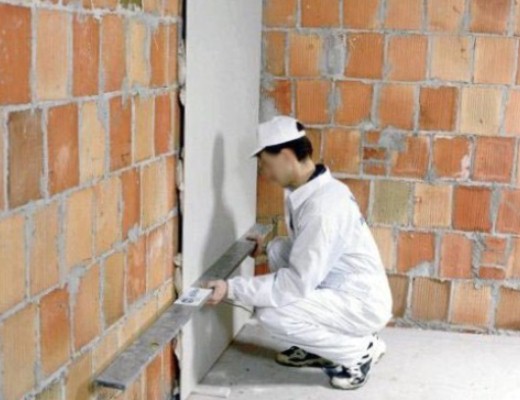
One way or another choose, given the degree of unevenness of the wallsTherefore, this stage is especially important. How uneven the walls can be measured laser level or ordinary building level.
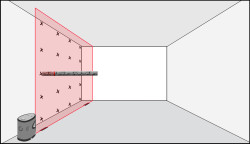
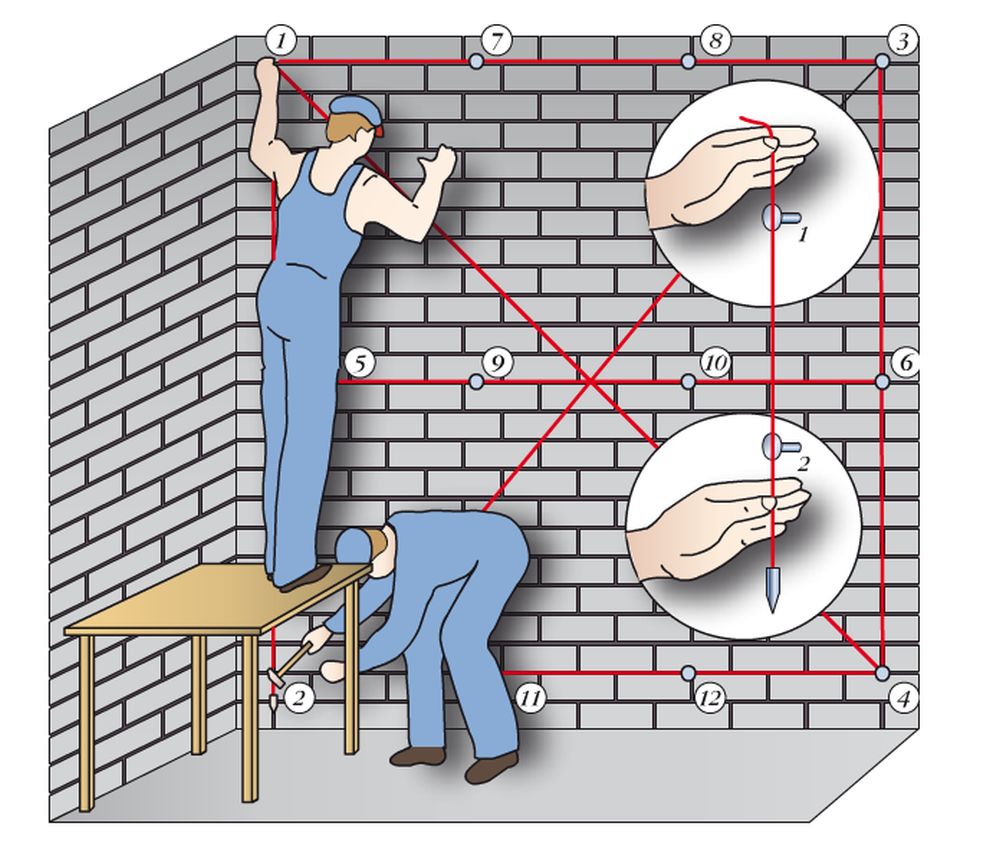 The easiest and most popular way is use of plumb bob. First thing in one of the top corners of the wall a nail is driven in, and so that 2-3 cm are left on its surface. A plumb line can be made of a long thread and nut or other load. The finished plumb line is tied to a hammered nail, the weight should almost reach gender. When the thread with the load ceases to stagger (i.e., the plumb line forms a strictly vertical line), you can drive a second nailso that the thread and the nail head are on the same level. The same procedure is done on the opposite side of the wall. Four nails are connected by a cord and form a strictly vertical plane, which allows you to understand the degree of deviation of the wall level from it.
We evaluate the irregularities and choose the alignment method:
- troughs and irregularities up to 0.5-1 cm can be leveled with putty;
- differences up to 3-5 cm are better aligned stucco mixtures;
- Swings greater than 5 cm are easier to align with drywall sheets mounted on a specially constructed frame.
No. 1. Plaster wall alignment
To align the walls using gypsum and cement plasters. Plaster compositions allow you to achieve the optimal microclimate in the room, but are afraid of water, therefore they are suitable for bedrooms, living rooms and children’s. Cement plasters can be safely used to align walls in rooms, where humidity will be constantly increasedto.
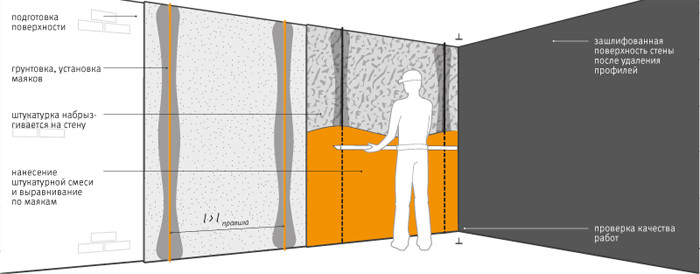
Work sequence looks like this:
- surface preparation of the walls. In order for the leveling mixture to hold, the wall must be properly treated. First, all the remnants of the old coating are removed, then primed for better adhesion with a layer of plaster. For cement compositions use a primer from a solution sand, cement and water, the so-called cement milk, for gypsum plaster it is better to use a special primer;
- if the layer of plaster is more than 2 cm, then at this stage it is better to use reinforcing plaster mesh, which will not allow the composition to crumble.It is worth noting that if you use a ready-made factory stucco mixture, you should pay attention to the composition: some manufacturers use polymer additives that increase the strength and adhesion of the solution so much that the mesh may not be needed;
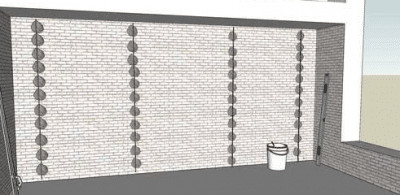
- installation of beacons. As beacons, which become a reference point for creating a flat surface, use wooden battens or a perforated metal profile. The latter will be more convenient for beginners, since such beacons will not have to be removed after lightly hardening the plaster layer and then mask the recesses. First, two beacons are mounted at opposite ends of the wall, while used level, and the lighthouses are fixed with gypsum mortar of the required height until ideal verticality is achieved. Three cords are stretched between the two received beacons: at the top, in the middle of the wall and at the bottom, and when oriented on them, intermediate beacons are installed so that they lightly touch the cord. The step between the beacons depends on the size of the tool with which the plaster mixture will be leveled (usually the rule is used for this). In any case, the distance between the beacons should be 20 cm less than the length of the tool;
- plaster mixes a wide range can be found in hardware stores. At the construction site, it remains only to properly prepare the solution, following the instructions. Cement plaster mortar can be prepared independently: cement and sand are mixed in a ratio of 1: 6, then water is added to a creamy consistency. Some experts recommend sticking to a component ratio of 1: 2 or 1: 3, the finished mixture is more plastic, and therefore easier to handle. The finished solution is used for 1-2 hours, until it begins to solidify;
- plastering. To do this, you can use the "falcon" and trowel. The first is filled with a mixture from the tank, the second is thrown it on the wall in excess. The use of the “falcon”, a tool similar to trowels, but superior in size, allows you to increase the speed of work. Now you need the rule to evenly distribute the solution from the bottom up, leaning on the beacons. If the leveling layer is thick, then you can first apply a rough outline of the plaster, and after drying it, apply the main one with alignment along the beacons. If wooden slats were used as the latter, then when the mortar dries a little, they must be carefully removed, the cavities filled with plaster and leveled with a spatula;
- after drying the plaster we get a smooth but rough surface. In order to make it smooth, it is necessary to apply thin layer of putty, and then sand the surface with fine sand paper.

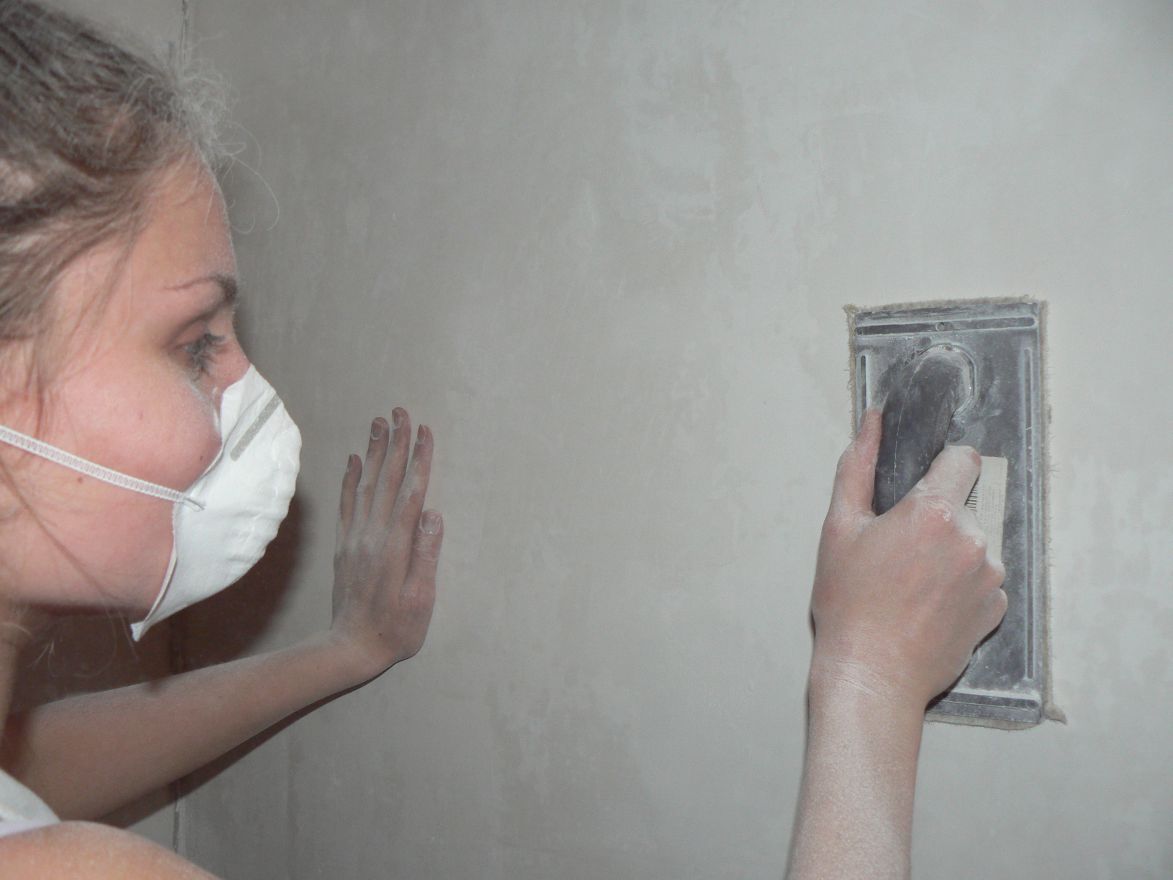
The main advantage of this leveling method is to maximize the preservation of the usable area of the room. Cons are the complexity of the process, the need to prepare the base and the presence of a large amount of dust.
No. 2. Leveling the walls with putty
Putty Suitable for finishing walls or for those surfaces where there are small differences in height, potholes and other irregularities. The puttying process is simple, and quite do-it-yourself. The sequence of actions is as follows:
- surface preparation: cleaning, treatment with antifungal agents, if necessary, and priming;
- putty can be either ready-made or in the form of a dry mixture, which is necessary dilute with the amount of water specified in the instructions and stir to a creamy homogeneous state;
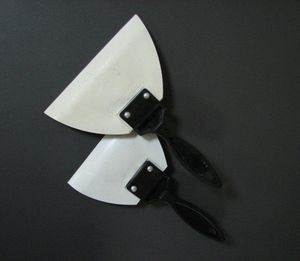
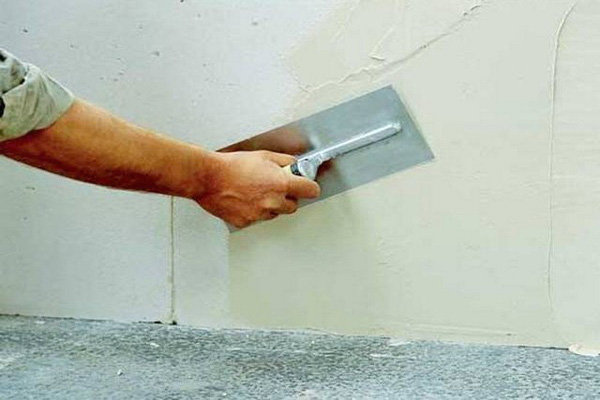
- work easier to do with two spatulas. One is small and serves to collect the mixture, apply it to the second spatula and to clean the latter. The second spatula is larger, its size depends on the degree of unevenness of the walls. They put the putty on the surface and level it.If there are not just irregularities, but also small deviations in the vertical, then it is recommended to level the putty building rule, in which a level is built in so that you can control the quality of the resulting surface. If the starting putty is performed in two layers, then between the layers it is better to use a reinforcing mesh, and the direction of application of the layers should be mutually perpendicular;
- if the surface requires application two layers of puttythen the first after setting is additionally treated with a primer;
- after setting the top coat, putty it lightly wash out with a primer solutionto get rid of possible irregularities, then polished with a sandpaper. If you do not plan to paint the walls, then you can do without a thin finishing layer of putty.
No. 3. Frame method for leveling walls with drywall
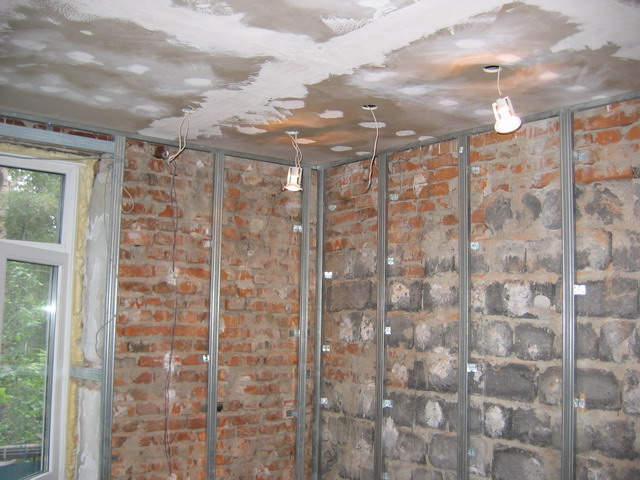 When it comes to the biggest irregularities and significant wall level differences, the best way to level the surface is to use drywall, and mount it in a frame way. In this case, this is the most simple, cheap and fast way to get a perfectly smooth and smooth wall surface. In addition, you do not need to spend a lot of time and effort preparing the wall surface - it with all its cracks, potholes and drops will be hidden behind the frame and drywall. Moreover, inside the frame, you can lay some communications or arrange additional heat- and soundproofing.
However, do not forget that this method of leveling the walls takes up a lot of usable space, and if it is already in short supply, then the room risks becoming a hole. The walls, sheathed with sheets of drywall, can withstand less load than those that were aligned with plaster. If we are talking about a room with high humidity, then moisture-resistant sheets of drywall should be used.
Work sequence:
- frame construction. It may consist of wood beam or metal profile. The beam does not allow to achieve the desired durability of the frame, it is subject to the influence of moisture and microorganisms, therefore, in most cases today are used guide and rack metal profile.
The first two profiles are fixed to the floor and ceiling.
On the floor, using a level, draw a straight line at a distance of 5-6 cm from the wall (more can be done if the curvature is large or communications must be hidden).
Using a vertical plumb line is transferred to the ceiling.
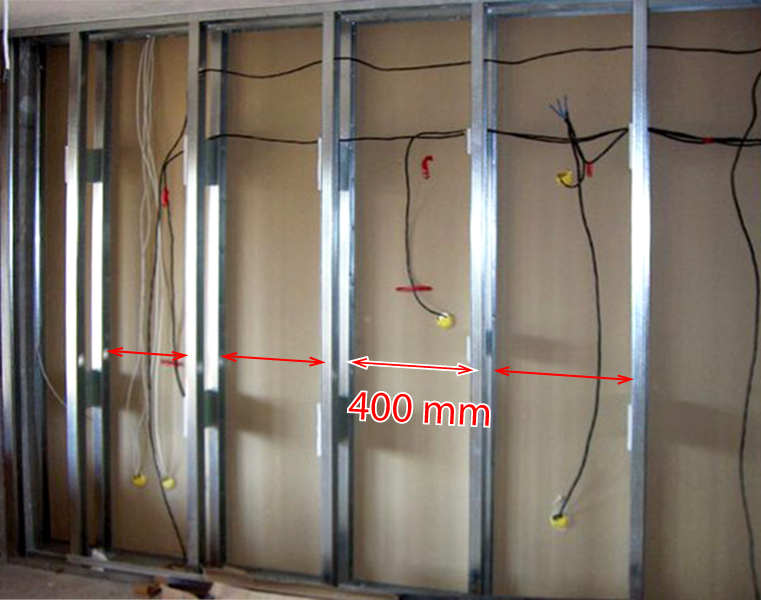
Guide lines are fastened along the lines obtained with self-tapping screws, constantly checking the evenness of their level with a plumb line. Between them, perpendicular to them, supporting profiles are fastened along the wall with screws. The distance between them is 40-60 cm for drywall sheets 120 cm wide; - filling the frame with communications, heat or sound insulating material, if necessary;
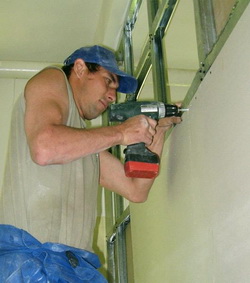
- installation of drywall sheets. Suitable sheets with a thickness of 12.5 mm. Installation begins from any upper corner, the sheets are fixed with screws, the fastening step is 30 cm, the hats are recessed by 1 mm, so that you can eventually achieve a smooth surface;
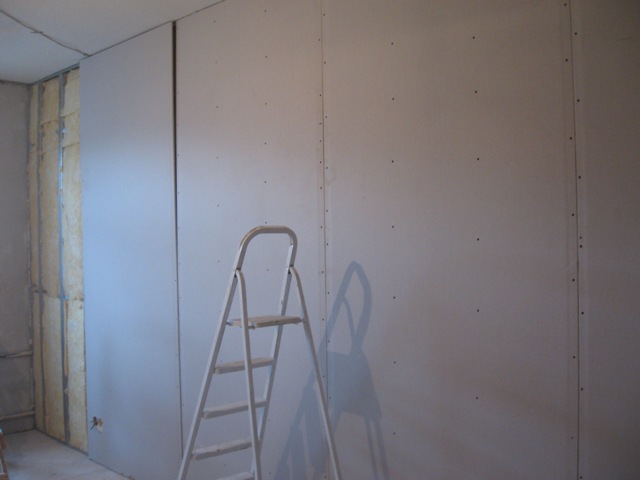
- when all the sheets are attached, hats and joints are plastered with plaster composition. After it dries, the surface is ready for further finishing. Experts do not recommend mount tile on drywall, but painting, decorative plaster and wallpaper can be used. If your plans wallpaperingthen take them off then it will be difficult with drywall, so it is better to putty not only joints and hats in advance, but also the rest of the surface.
Using a similar technology plywood alignment or plastic panelsconstructing a frame of wooden blocks. Often in this way the walls are aligned country houses.
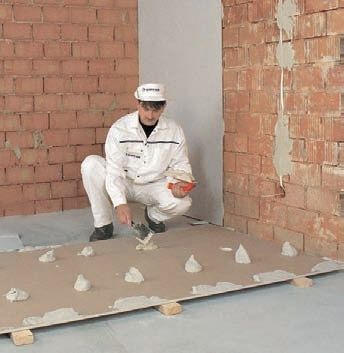
Number 4. Frameless wall alignment with drywall
As you might guess, in this case there is no need to build a frame from the profile, which greatly simplifies and speeds up the process. In a similar way, it is possible to level out both minor irregularities and differences in the level of up to 2-5 cm.
 Work sequence:
- foundation preparation, its dust removal and treatment with primers. The next step is started when the primer is completely dry;
- drywall sheet cutting. At this stage, calculations are carried out and it is determined how many sheets will be needed, and how they will be arranged. Does not interfere with cutting holes for sockets and switches;
- wall level determination. For convenience, at this stage it is better to the floor and the ceiling lines of the future level of the wall. This will simplify the process of mounting plates and help achieve better results;
- drywall installation. With minor irregularities, gypsum adhesive beds are applied on the gypsum board sheet along its perimeter and in the center with a step of 30 cm, the sheet is pressed against the wall, the level is set to it and, using light strokes of the mallet, the sheet is aligned vertically. Do not forget to focus on the drawn lines, otherwise at this stage the sheet can be drowned too much, and if there is a tubercle on the wall further, it will not work to achieve a flat surface. Installation begins from one of the corners, adjacent sheets are tightly adjacent to each other;
- for greater reliability in several places, sheets can be attached to the base with dowels;
- final stage - puttying with gypsum mortar of joints and fixing points for dowels.
Finally
Smooth walls - a guarantee that Decoration Materials will look as it should and will last as long as possible. Let the process of leveling the walls rather laborious, it should be treated with maximum responsibility, so that in the future you could only do cosmetic repairsrefreshing the atmosphere in the apartment.

 Types of dry plaster mixes: composition and ...
 DIY wall plastering
 How to prepare and paint the walls, which ...
 What wall decoration is better to choose?
 How to choose the right wallpaper, what they are
 5 tips for choosing a primer for walls
 Stages of repairing the living room
 7 tips on which putty to choose: types of putty, ...
 Do-it-yourself bathroom waterproofing
 5 ways to level the floor for decoration in an apartment or house
Please tell me ... My repairmen say that the walls are ready for wallpapering. And last night, I turned on the flashlight in the phone (the lamp burned out) and saw that all the walls were in waves. Some are even felt when you drag your hand along the wall. Will it come later? Will these waves be noticeable after pasting with plain wallpaper ??
To give an accurate answer, you need to know the height of the humps. If the wallpaper is dense, and the irregularities are insignificant, then the waves will not be visible. In all other cases (thin wallpaper or painting), this can be a problem. But, again, you need to see the problem.
This is, in fact, hack. Under the wallpaper you need to align the wall with lighthouses, no waves are unacceptable. This will be clearly visible when the lighting will fall at an angle to the wall.
It’s a good informative article, but I’d like to know what kind of glue is better to use with the frameless method of leveling with drywall.
Perflix paid off. But then we tried Volma and were glad that it glues well. But Volma was especially surprised by the “layer” glued even where everything previously fell off - on the ceiling and it turned out easy for beginners like us. House pre-war building 4-floor. we have an end apartment - a lot of problems, but it turned out.
Oh, this is not an easy job. But it is necessary to do. With your help.