5 ways to level the floor for decoration in an apartment or house
Fine finish floor the apartment is preceded by a leveling of its surface. Depending on the degree of surface roughness and the type of future coating, one or another leveling method is used. The correct choice and execution of it in many respects affects future finish quality. Let us dwell on the most popular ways to level the floor in an apartment.
How to measure the level of the floor?
The choice of floor leveling method, first of all, depends on the degree of surface roughness, which is difficult to determine with the naked eye - special devices will be needed. For these purposes The following tools are used:
 ordinary building level. If its length is not enough, then a construction rule is laid under it;
- water level allows more accurate and simple measurements in large areas, but when filling the instrument with water, it is important to avoid airing its working tube;
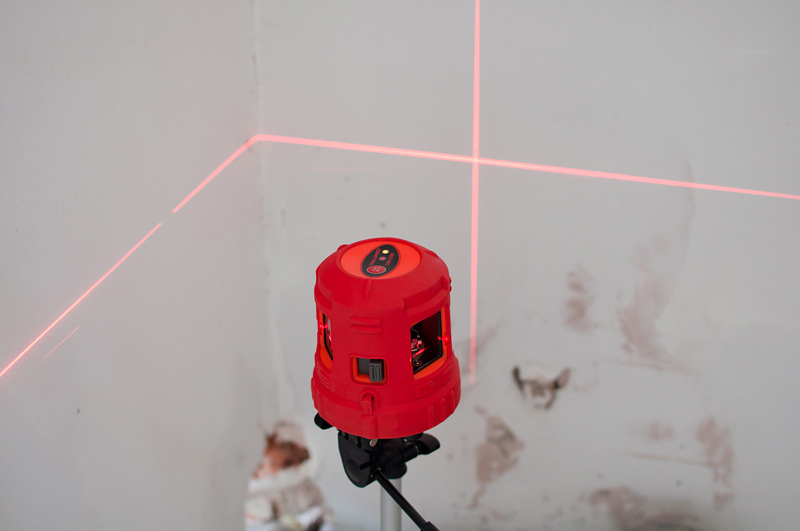
- laser levels they are even simpler to use and allow measurements to be made with maximum accuracy, and their wide functionality makes it possible to greatly facilitate the entire measurement process. The error is not more than 1-2 mm / m, and when measuring it is better to wear safety glasses;
- level - a professional geodetic instrument, quite difficult to use, it provides ideal accuracy and allows measurements to be taken on vast areas, therefore it is used mainly in large-scale construction.
Leveling the floors in the apartment, you need to bring them out zero level. After completing all the work and finishing, the floor level should be the same in all rooms, which means that when leveling, the height of the used finishing material. Thus, the height of the level of the rough floor in rooms where different coatings will be used may vary by 1-2 cm.
No. 1. Cement and sand screed
A cement-sand screed is considered one of the most popular alignment methods surface. It is based on a solution of cement and sand in proportions of 1: 3 or 1: 4 depending on future floor loads. Apply a cement-sand screed in private homes and high-rise buildings with concrete floors. She is great suitable for use in rooms with high humidity (kitchen, bathroom) and where the floor will be a decent load. Often this alignment method is used for the future. tile cover, parquet and linoleum.
Advantages of cement-sand screed:
- strength and durability;
- the ability to hide some communications in the thickness of the screed;
- the ability to smooth highly uneven surfaces - this method is used when the height difference exceeds 5 cm;
- low cost of work.
 strength and durability;
Among the main disadvantages are the following:
- long hardening time;
- the need for skills to perform such work or engage professionals.
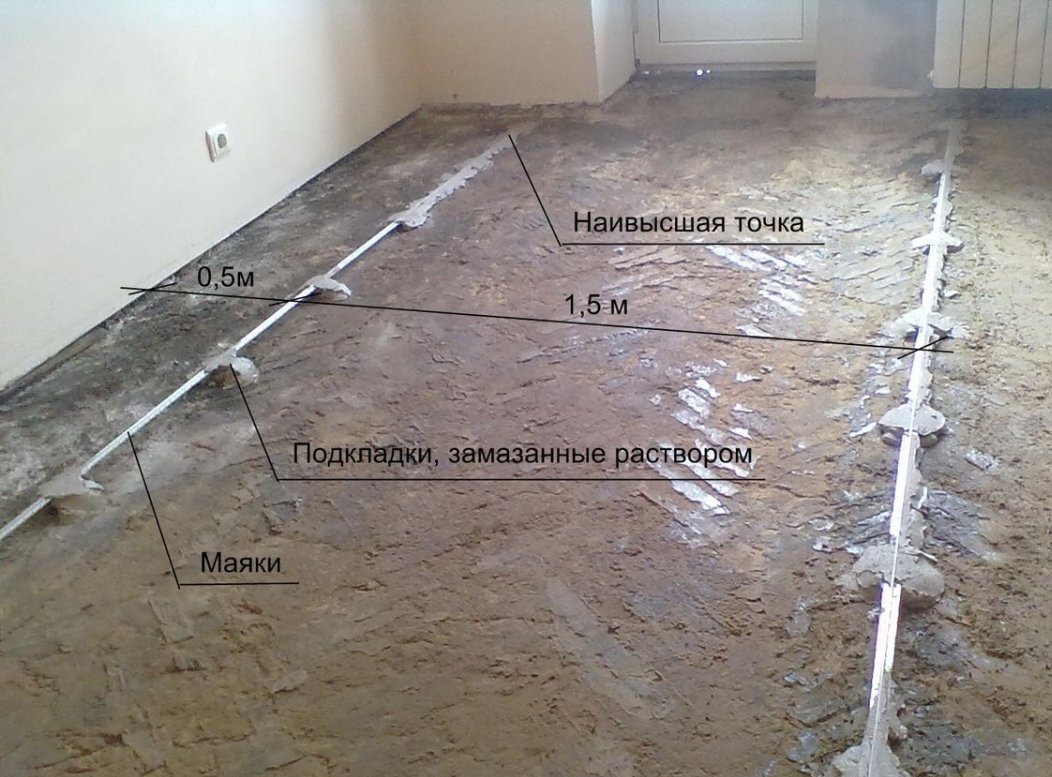
Screed begins with zero level determination. To do this, you can use the building level, with which a single line is created at a height of about 1.5 m from which the distance to the floor level is measured.You should focus on the minimum distance that will help determine the level of the floor height, but it should be borne in mind that the minimum thickness of the screed is 2 cm. on the bottom of the wall also outline the lines of the future floor levelto help make the screed as even as possible.
 Foundation preparation consists in its thorough cleaning of dust. It is first swept out, then the remainder is vacuum cleaned, and only after this can one begin to priming the surface. After applying the first coat of primer, it is recommended to cover the floor. waterproofing solution, and then apply a second coat of primer, due to which the maximum level of adhesion with concrete mortar.
Next stage - lighthouse, which allow you to achieve the most flat surface. In their quality, T-shaped metal guides can be used, which are fixed to the base with adjustable screws. An easier way is to install guides on slides from a thick cement-sand mortar of the required height. The evenness of the lighthouses is constantly checked using the building level. The first is installed at a distance of 20 cm from the wall, the rest are mounted parallel to it with a pitch of 40-60 cm.
 Leveling material can cook from dry mixesdesigned to level the floor. They add water in the amount provided in the instructions. You can make the necessary mixture yourself from sand and cement. Knead the solution using a construction mixer or a special nozzle on drill. The consistency of the finished solution should resemble a thick dough and be uniform. The solution should slightly diffuse on the surface, but not spread.
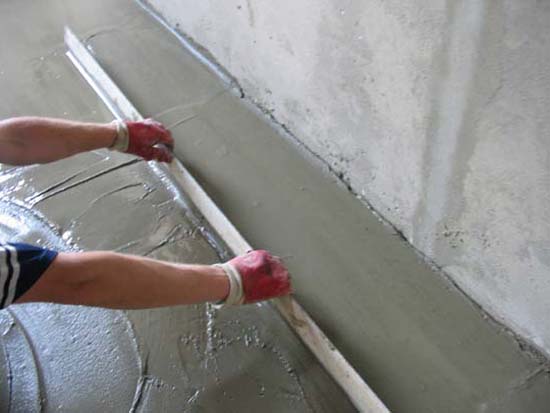
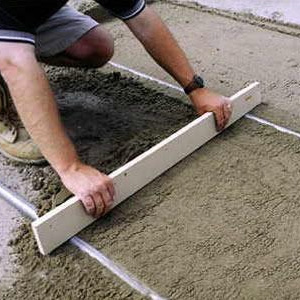
Ready solution spread between lighthousesstarting from the far corner of the room and moving towards the door. The mixture poured between two beacons is leveled according to their level, shifting it towards itself. During the installation of the screed, it is better in some places to pierce the fresh solution with a metal rod so that in the process of the screed hardening, air voids would not form in it. If you decide to carry out all the work yourself, then you still can’t do without the help of a partner: while one levels the mixture with beacons, the second must prepare a new portion of the solution, because screed within the same room must be performed in one day.
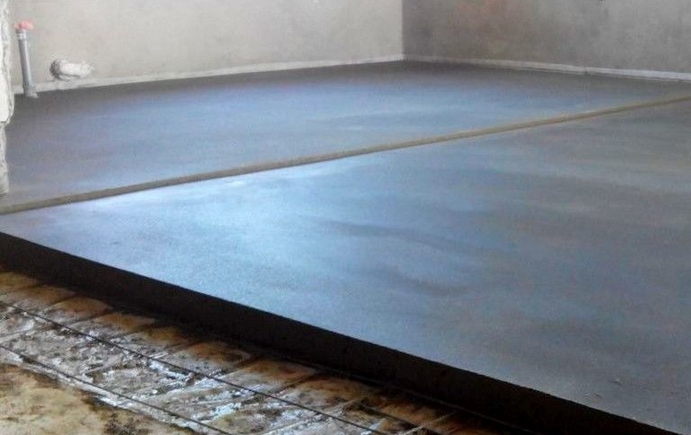 You can walk on the finished screed in a few days, but it completely hardens only after 2-3 weeks. At this time, its surface is recommended to be covered with plastic wrap so that the surface is not covered with cracks. An alternative to film is the uniform wetting of the surface twice a day.
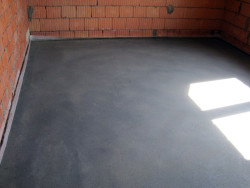
Indicators of a quality screed - a uniform gray color over the entire surface, the same sound when struck by a wooden block. The maximum horizontal deviation is 0.2%, which means that for a room 4 meters long, the height difference should be no more than 8 mm.
Depending on what requirements are put to the floor, a concrete screed can be an independent method of leveling or just one of the steps to create a flat surface.
Today is almost completely forgotten method of wood-concrete screed, which previously enjoyed great popularity. It differs in the composition of the solution, in which sawdust is added, giving concrete greater strength and allowing it to breathe. The only problem is the smoothing process, because larger sawdust floats closer to the surface of the mixture and breaks it.
No. 2. Semi-dry screed
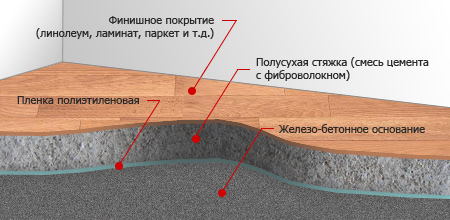
Semi-dry screed is one of the varieties of such a popular cement-sand screed. It is performed in fact in exactly the same way as in the case described above, but the changes affected the process of preparing the mixture - a minimum of water is added to itneeded only for cement hydration. As a reinforcing agent, fiber is added to the solution.Due to such small changes in the composition of the mixture, it was possible to achieve mass of advantages:
- high density of the obtained screed, as well as the absence of pores and voids, because in the process of solidification there will be no evaporation of moisture characteristic of a wet screed;
- minimal shrinkage, because evaporation is almost completely absent. You can lay the screed without taking into account shrinkage;
- a cleaner laying process, as the solution is less wet and forms less dirt;
- less time is required for complete solidification, again due to less moisture and a faster process of its evaporation;
- the humidity level in the room after pouring such a screed does not prohibit conducting associated finishing operations and store building materials in neighboring rooms, which is strictly not recommended when an ordinary cement-sand screed hardens.
The disadvantages of the method should not be forgotten either:
- due to the higher density, the ability to spread is deteriorated and sometimes there are difficulties with filling corners. However, experts advise against this drawback by introducing plasticizers into the mixture;
- with your own hands you can level only small surfaces up to 75m2, in other cases, you can’t do without a paver.
 The process of laying a semi-dry screed is almost identical in principle to the above-described installation of a cement-sand screed, but some features need to be considered. In particular, it is solution preparation process. In the tank, it is recommended to mix three shovels of sand and a shovel of cement until the desired amount of mixture is formed. It is mixed and a little water mixed with fiber is added (it is used about 80 g per bucket of water, unless otherwise specified by the manufacturer). Water is added until the mixture becomes a texture of sandy loam, sticky clay sand. If you squeeze the mixture, then moisture will not stand out, and the lump will retain its shape. If you overdid it with water anyway, you can add cement and sand in the same proportions, but in smaller quantities.
Recommend lay the mixture in two layers: the first is slightly below the intended level and with maximum tamping, the second - with a broach rule and grinding. You need to act very quickly, because within an hour the mixture hardens. Some experts advise applying the first coat immediately around the perimeter of the room: this can only be done if the second coat is applied within one hour. A day after installing the screed along the walls, expansion joints can be cut to a depth of one third of the screed itself and not more than 3 mm wide.
No. 3. Self-leveling mixes
 Self-leveling mixtures are otherwise called self-leveling mixtures, floor levelers and bulk floors. This is a fairly simple way to level the floor, while getting an excellent result. Suitable if height differences of not more than 3 cm. Such mixtures can be used to level the floors for finishing with tiles, cork, linoleum, carpet etc.
The basis of the self-leveling mixture is cement, but in addition to it, special modifying additives are also included in the composition, which allow to increase the plasticity and fluidity of the solution. Some supplements allow reinforce mortar and restrain microcracks in the future. Depending on the composition Self-leveling mixtures are divided into:
- high strength;
- for warm floors;
- quick hardening;
- thin layer.
 In addition, there are self-leveling mixtures on sale, designed not only for roughing, but also for the finishas well as formulations with special properties. There are also compounds for rough alignmentThey are designed for surfaces with significant irregularities.
All self-leveling mixes boast several advantages:
- simplicity and high speed of working with them;
- hardening speed;
- high strength indicators, so this leveling method is quite applicable for rooms with a high degree of patency;
- resistance to temperature extremes.
The disadvantages of this method leveling the floor a little - it is rather its features. Large differences in the level of the floor surface cannot be leveled by a self-leveling floor. You need to work with mixtures very quickly - if you hesitate and allow drying, then a smooth surface is unlikely to be achieved.
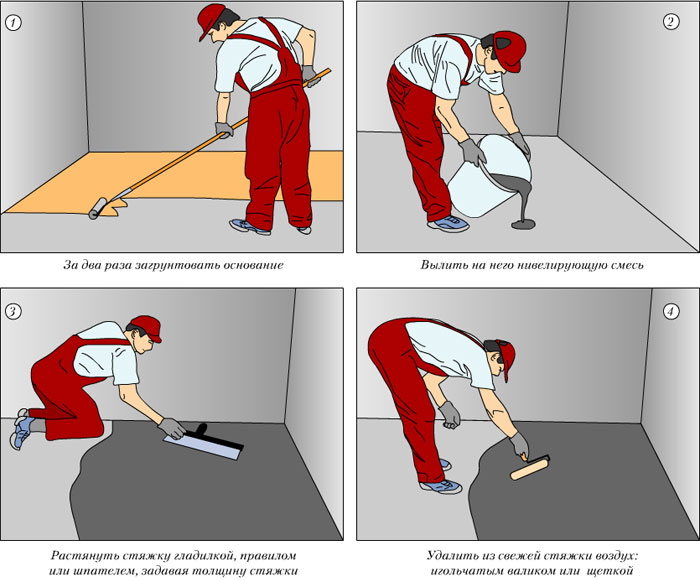
 Working with such mixtures is really simple. They usually level concrete and sand substrates. Mixture preparation consists in diluting the purchased powder with the right amount of water. For mixing, it is better to use a construction mixer or a drill with a nozzle. The composition is prepared in portions, since its properties are lost within 20 minutes. Naturally, before starting work, it is worthwhile to carefully prepare the initial surface: clean from dust, repair all cracks, and treat with a primer.
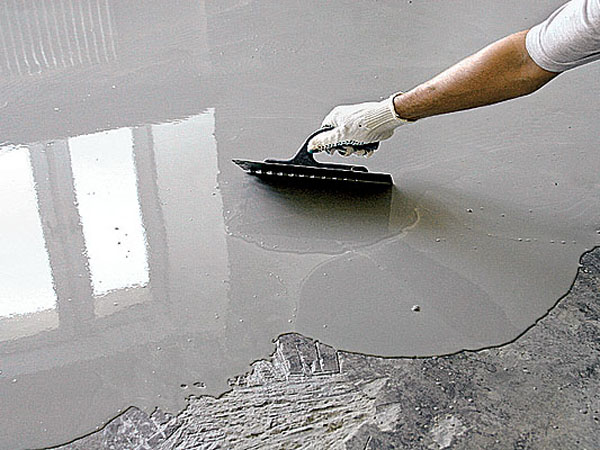
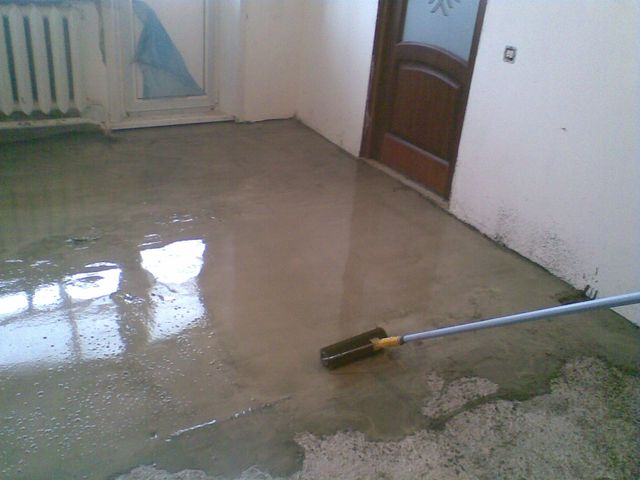
When the mixture is ready, it is immediately poured onto the floor. The principle of its operation is based on the law of gravity, so you do not have to install beacons and level the solution. It is worth remembering that this solution is self-leveling, and not self-flowing, so you need to pour it after pouring it onto the floor flatten with a wide spatula or needle roller. It is better to immediately fill the entire floor in the room, but if its area is large, but the solution is applied in stripes, acting very quickly and not allowing the edge of the strip to dry out. In this case, only professionals can achieve a perfectly flat surface.
The pour point depends on the room temperature, humidity and layer thickness. On average, after 6-12 hours you can move around the surface, and after 3-4 days - mount the topcoat.
Number 4. Plasterboard Alignment (GVL)
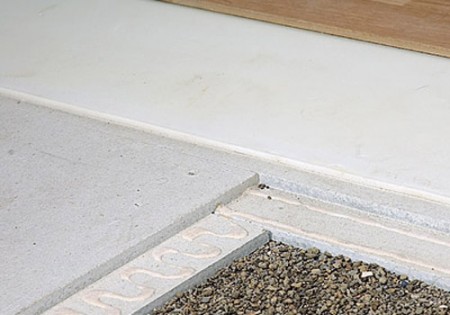
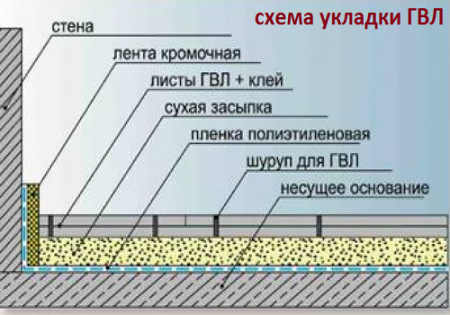 Leveling with GVL is called a dry coupler. This process is much simpler and faster, but the quality of the finished screed is inferior to monolithic. A layer of expanded clay is laid under the GVL, which plays role of heat insulator. The technology allows the use of other materials that have similar thermal insulation properties.
Begin alignment of GVL with surface cleaning from dust and dirt, after which a waterproofing material spreads over it, which can be a plastic film. Its strips are laid with an overlap of about 10-15 cm and with a 10 cm approach to the walls. It is better to use an edge tape around the room’s perimeter, which is located between the plastic film and the expanded clay layer.
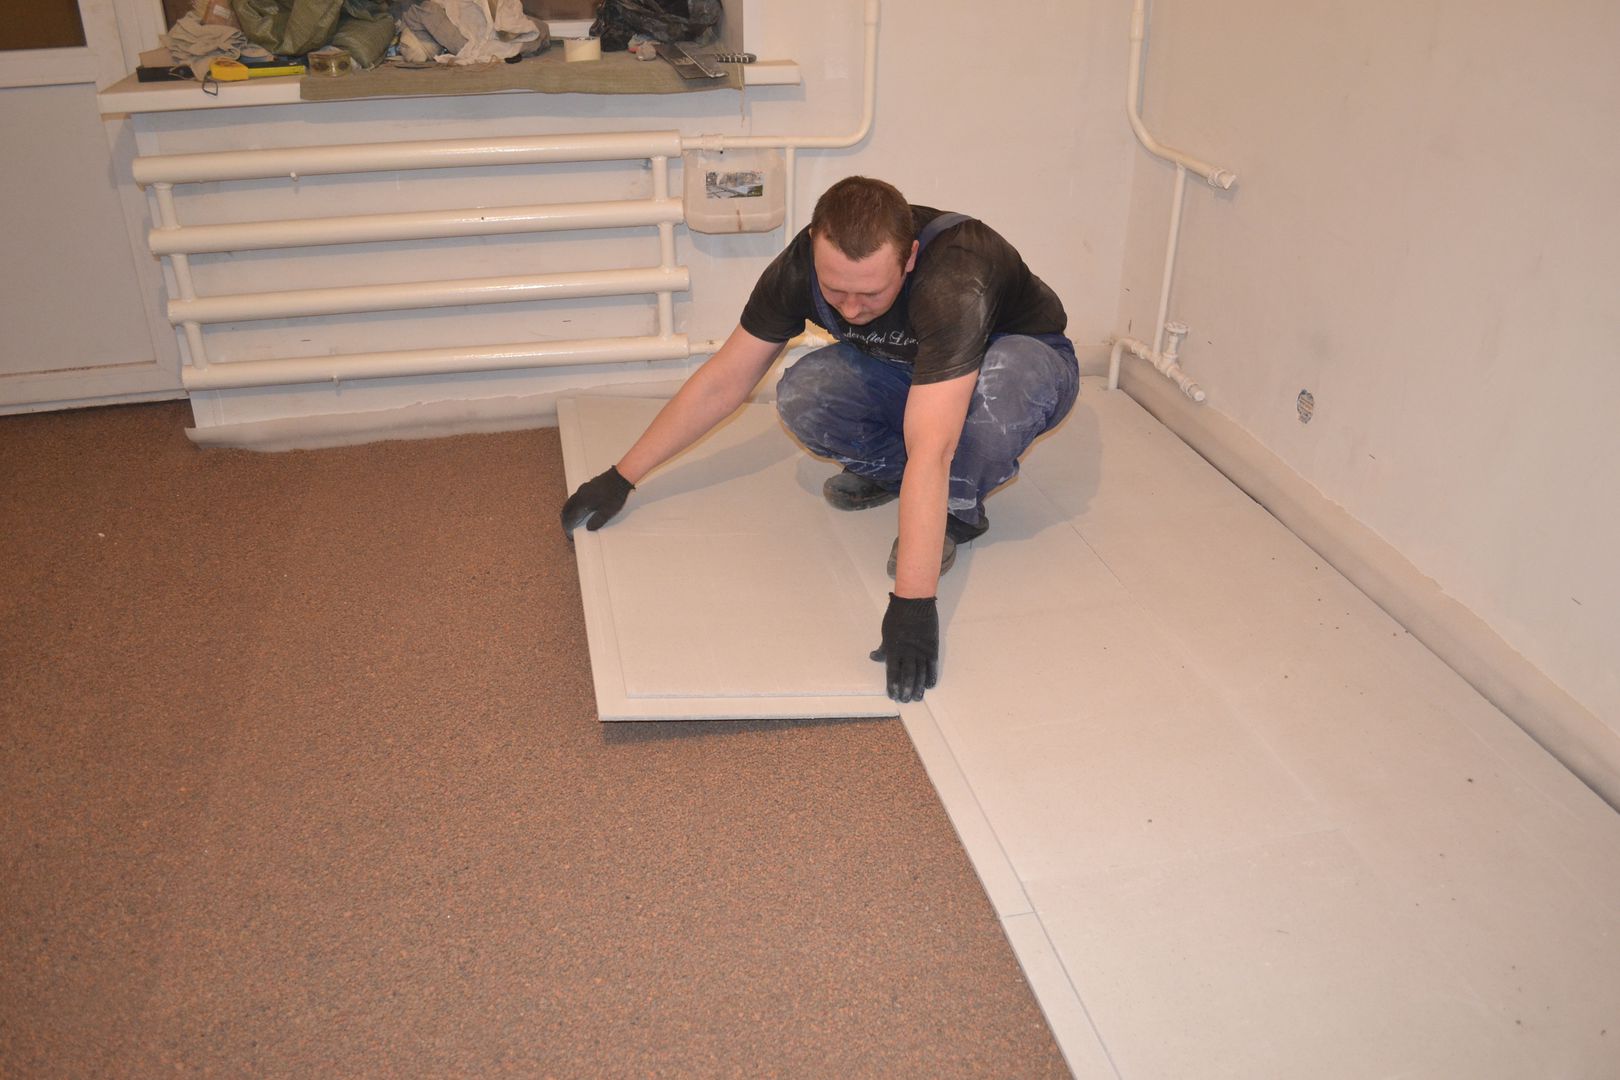 Expanded clay needs to be carefully tamped and leveled at the intended level. The first plate is mounted closest to the door corner attached screws. When the first layer of GVL is ready, proceed with the installation of the second, which is attached to the glue. Be sure to shift the sheets by 25-30 cm relative to the first layer. For reliability, the second layer can be attached with screws to the first. Some experts recommend installing beacons in the form of wooden bars or metal U-shaped profiles. To move around expanded clay, sheets of plywood or gypsum fiberboard are used.
 In the final stage ground joints of plates and attachment points with screws, then primed and the rest of the surface, cut off excess plastic film and edge tape. Important advantage This method of floor leveling consists in the possibility of performing in stages, in several approaches, and not in one day, and this greatly facilitates the process when floor leveling is done with your own hands.
No. 5. Plywood Leveling
Another dry way to level the floor is to use plywood. A similar method is applicable only for those rooms where in the course of further operation there will not be strong differences in humidity. Leveling with plywood is used, as a rule, for wooden and concrete floors, when the finish coating is laminate, parquet or linoleum.
Depending on the level of deformation and elevation differences, two main methods of leveling plywood are used:
- installation of plywood directly on the plank floor;
- installation using lag.
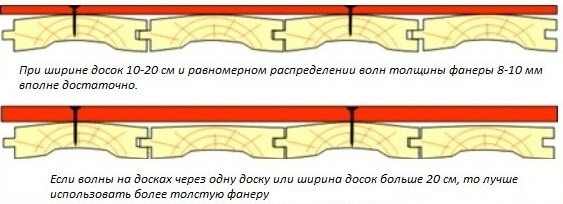 First option applicable when the height difference is minimal, and bumps are caused mainly by the deformation of correctly laid floorboards. In this case, the lags are not required - their role will be played by the tubercles of the arched floorboards. The thickness of the plywood sheets, in this case, will be 8-10 mm, if the width of the boards of the main floor does not exceed 20 cm, and they are all uniformly deformed. If the floor consists of boards with a width of more than 20 cm, or not every floorboard will abut the leveling layer, then it is better to use plywood with a thickness of 20 mm.
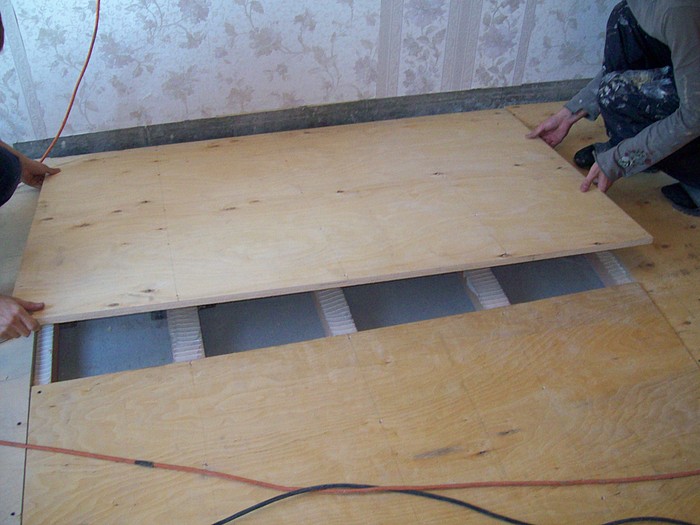
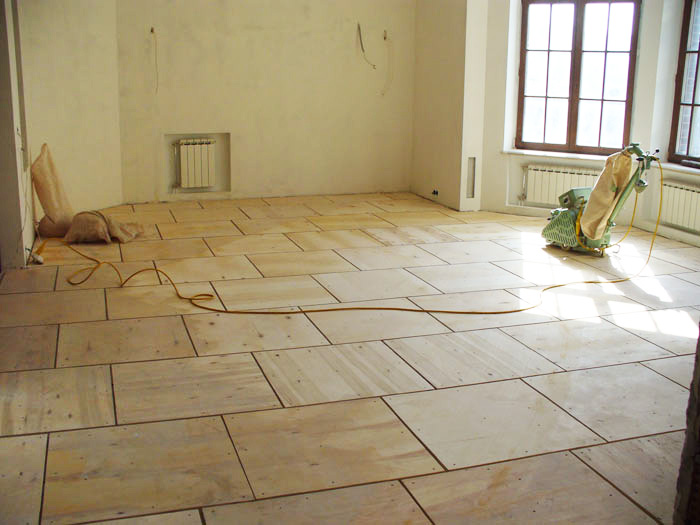
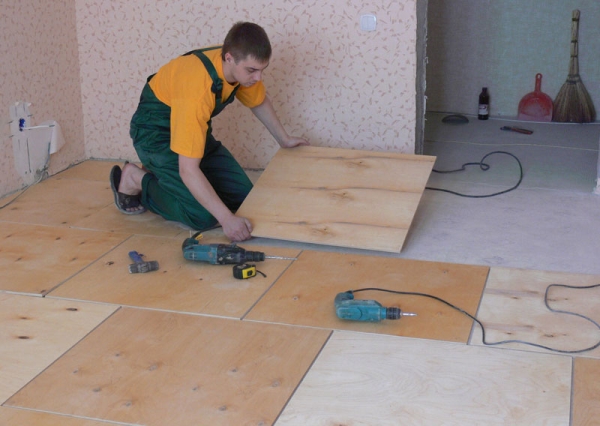 It is better to maintain plywood sheets in advance for several days in the room where the work will be carried out. They should treat with antiseptic. Before starting work, the sheets are laid out on the floor as they will subsequently be attached. If sheets with dimensions of 125 * 125 cm are used, it is better to cut them into 4 parts for convenience. They are laid out on the floor, moving each row relative to the previous one and simulating masonry, leaving a gap between sheets of 1-3 mm and a gap between sheets and a wall of 1-2 cm to expand the wood. Now it remains to attach the sheets to the "crests" of the plank floor with self-tapping screws.
Sometimes plywood sheets are laid on an already leveled concrete floor. This technique helps to achieve the most even surface.
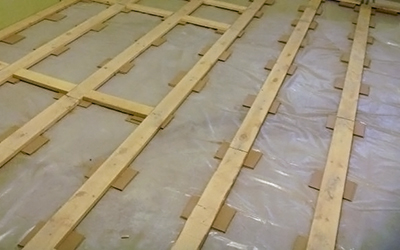 Second way used when elevation is significant. Using the lag, concrete and old wooden floors can be leveled. Work begins with foundation preparationwhich is cleared of garbage. If the basis is a wooden floor, then it must be treated with an antiseptic. Then a waterproofing layer is laid, in the role of which a plastic film or a special membrane can act. Lags and plywood are pre-treated with an antiseptic.
As a log, you can use a bar with a side of 40 * 40, 50 * 50 or 60 * 60 mm, a second-class board or chopped plywood. If it is undesirable to raise the floor strongly, then use not a beam, namely the cut off parts of plywood. Logs are laid across the direction of incidence of sunlight with a step of 40-50 cm. Now you can install the transverse jumpers, which are attached using screws.
 The following is the most crucial moment - setting the finished crate by levelpreplanned on the wall. To this end, metal wedges are installed under the logs, roofing material, only, but most often used wooden gaskets, which will resemble point supports. Some use for this purpose. sand. After alignment, the entire system is attached to the floor, for which you can use dowels, three times the length of the thickness of the log. The space inside the crate can be filled with a layer of insulation (more often used mineral wool) or with a screed of wet sawdust and PVA glue. In the latter case, the mixture is applied in 2-3 layers, waiting for hardening within 2 days, but plywood can be used less thick. Pre-prepared and processed sheets of plywood are fixed with screws, leaving a gap between the sheets of several millimeters.
 If the height differences are more than 5 cm, but less than 8 cm, then more sophisticated mini-lag system. Wooden linings are installed under the logs and jumpers, and the height of each such supporting element is calculated separately and can be different, and this is the most difficult stage.
In general, the leveling method using plywood can be called quite fast, because you do not need to wait for solidification. Logs and sheets of plywood do not create such a load on the floors as concrete, therefore, in the case of the old housing stock, this option is indispensable. But in some cases, this alignment method will require a professional approach, and it will cost a pretty penny.
Finally
When planning to level the floors in the apartment, it is important not to overestimate your own strengths - in this case it is better to spend money hiring specialists than to get uneven floors in the end. Even ideal walls on a crooked base look uneven, so it is better to approach the leveling of the floors with all responsibility.

 Dry mix for floor screed: 7 tips for choosing and calculating
 8 tips for choosing bulk floors
 Damping tape for floor screed: 6 tips for choosing
 Choosing a flooring
 Ceramic tile laying
 9 tips for installing mosaic floors
 Do-it-yourself bathroom waterproofing
 4 ways to align walls for interior decoration
 Do-it-yourself laying laminate flooring. Stages of work
 5 tips for laying tiles on a wooden floor
I only had to deal with the device of the bulk floor, but in essence of the article I see that it will be possible to try other, “dry” methods. For example, expanded clay!
Very useful information!