7 tips for whitewashing the ceiling and walls with lime, chalk, water-based paint
Today, shelves of building stores are bursting with a variety of finishing materials. Wallpaper of different types, decorative plaster, a rock, tile - choose what you want, but with all this good old whitewash does not lose popularity. Among the main reasons are low cost, ease of application and environmental friendliness. These qualities are sometimes enough to close your eyes to the low durability of the coating. We will figure out how to whitewash the ceiling and walls with lime and chalk, determine if the water-based paint belongs to whitewash, and what material shows itself better.
No. 1. Whitewash benefits
Whitewashing ceilings and walls is not the most modern way of decoration, and far from the most fashionable. What makes thousands and tens of thousands of people across the country still whitewash in the old fashion? The benefits of whitewashing are enough:
- low price - This is the main argument in favor of this type of finish. When the budget is limited, and it is necessary to tidy the room, the choice falls on whitewashing. For this reason, gypsum and chalk are still actively used in hospitals, schools and other public institutions for decorating ceilings and walls;
- ease of application. A person can cope with whitewashing without special preparation - no special skills, abilities and tools will be needed;
- neat appearance. Of course, by the intricacy and decorativeness, the whitewashed ceiling is inferior to the tension system, and the whitewashed walls are finished with Venetian plaster, but if you apply whitewash correctly, you can get a fresh white surface with a smooth matte color. If desired, a dye can be added to the whitewash solution;
- harmlessness, ecological cleanliness, ability to pass moisture and air. Regular whitewashing in this regard is far ahead vinyl wallpapers and expanded polystyrene ceiling tiles, so in some cases it will be even more preferable;
- lime whitewash has bactericidal propertiestherefore it will become an additional protection against mold and fungus.
Among cons low durability (1-3 years), plain appearance and dirt when applied.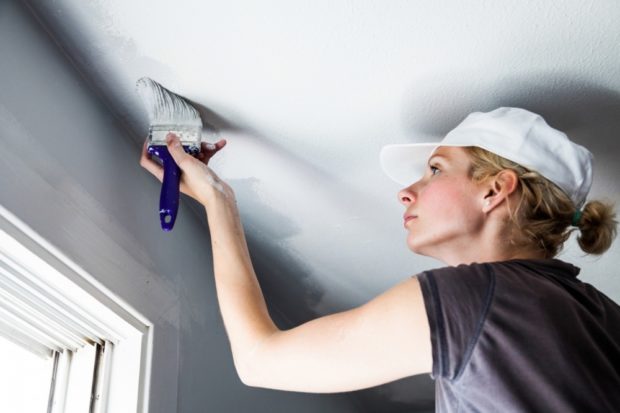
No. 2. What to whiten: lime, chalk or water-based paint?
When talking about whitewashing, most often mean lime whitewash. Lime (this is calcium oxide) is quenched with water to obtain the material used in the decoration.
The main advantages of lime whitewash:
- bactericidal properties of the material, so this finish is used in kindergartens, schools, medical institutions, even in wet rooms. The antiseptic qualities of lime also allow its active use in the arrangement of cellars and chicken coops. For the same reason, the bark of trees is treated with lime whitewash;
- if the lime mortar was prepared and applied correctly, the coating will last about 3 years or more;
- resistance to temperature extremes and high humidity. That is why lime can be trimmed bathroomsif other materials can not afford;
- excellent adhesion with almost all materials, including brick, wood, plaster and concrete;
- ability to fill small cracks;
- low price, which is typical for any whitewash.
With all the benefits, lime is different and disadvantages. The main one is the opportunity to get a burn, so all work must be carried out with gloves. Chalk in this regard is much safer. In addition, there is a chance to leave spots and stains. Allergy sufferers are not recommended to use this finish.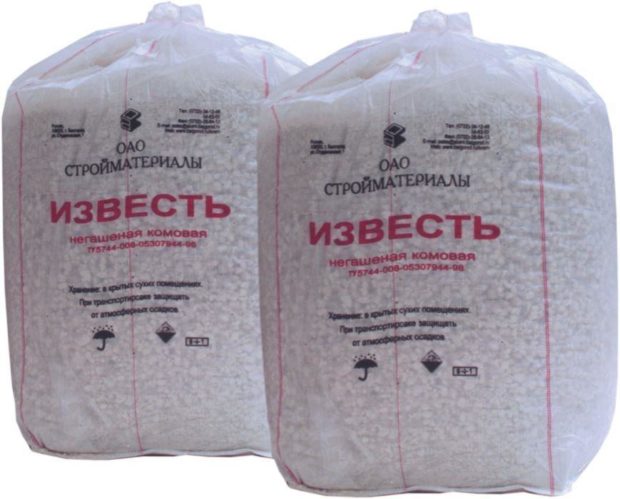
a piece of chalk as well as lime, it is inexpensive and environmentally friendly, and among its additional the benefits:
- safety at work;
- a deeper white color, which many like more than the color obtained by lime whitewashing;
- the ability to use in rooms where allergies live.
When interacting with water, chalk is able to accumulate it, which leads to the appearance of cracks on the surface and to quickly exfoliate the whitewash layer, which is why chalky whitewashing of taboos in bathrooms, kitchens and other wet rooms. In violation of the application technology, you can get not only spots and stains, but also bubbles. In addition, the chalky whitewash gets dirty.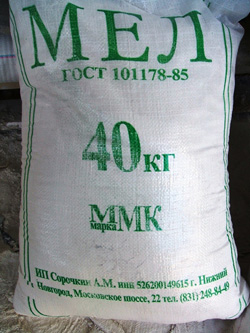
The people go around such a thing as whitewash with water-based paint. This finish has nothing to do with whitewashing and relates to painting. Apparently, they began to attribute it to whitewashing because of the composition of the materials used - this based paints cement and lime. Today, painting with mineral water-based paints can be considered the best alternative to whitewashing. Among the main advantages of this option:
- resistance to abrasion, temperature extremes;
- bactericidal properties;
- ability to breathe;
- safety for humans;
- simplicity in work, high speed of drying.
However, the durability of such a coating is also not up to par, but the price is much higher than that of ordinary whitewash.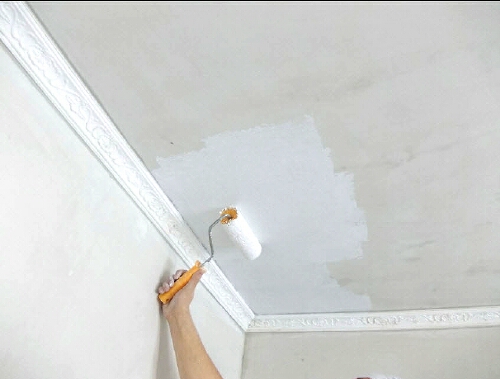
No. 3. How to determine what was done whitewashing?
Probably, at least once in my life, everyone heard that you can’t mix different whitewashes. If calcareous whitewash was applied to the ceiling or wall, then when installing on top of the chalky, soon it will be possible to observe ugly spots. When preparing the room for decoration and evaluating the condition of the surfaces, it is very important to determine what the whitening was done before.
Verification is very simple. It is enough to wet a small fragment of the finish with water and observe the reaction. Wet lime will darken a little, and if you rub the surface with your finger, then there will be no white marks on your hands.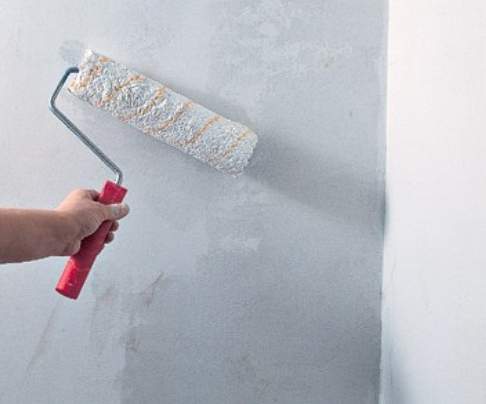
Number 4. How to wash off the whitewash and prepare the surface?
Before whitewashing a ceiling or wall, it is necessary to prepare the room and surface for future work. The sequence of actions is as follows:
- if possible, remove all items of furniture and decor from the room. What did not work out can be covered with plastic wrap and fixed with masking tape;
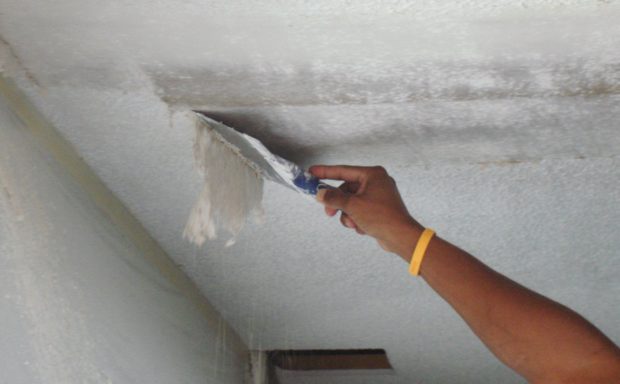
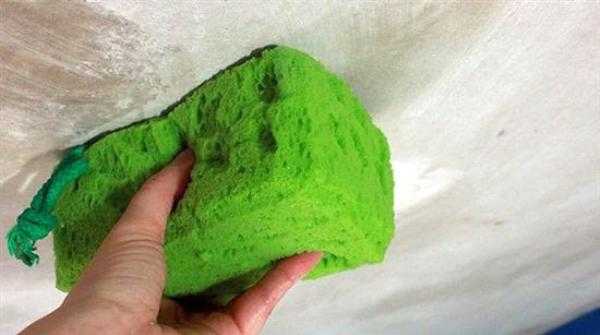
- remove old whitewash it will be easier if you pre-wet it. It is better to wet the surface in parts so that the moisture does not have time to dry. Some advise adding a little citric acid or vinegar to warm water, others use a mild soap solution. You can moisten the surface with a sponge or brush. Moist whitewash is simple enough to remove with a spatula. Fragments that fall away, it is better to try to dump in a separate container, minimizing their contact with the floor. Residues are washed off with a damp sponge. Cretaceous whitewashing is removed much easier;

- if there is visible spots, the surface must be put in order. Rusty spots are washed with water, and then treated with a solution of copper sulfate (the solution is prepared by adding 50-100 g of vitriol in 1 liter of hot water). Grease stains can be removed with a weak solution of soda ash: rags are moistened in a 2% solution and applied to the contaminated surface until the stain completely disappears. Then the treated area is thoroughly washed with water. Treatment of hydrochloric acid with a concentration of 2-3% can help with soot;
- applying an antifungal composition;
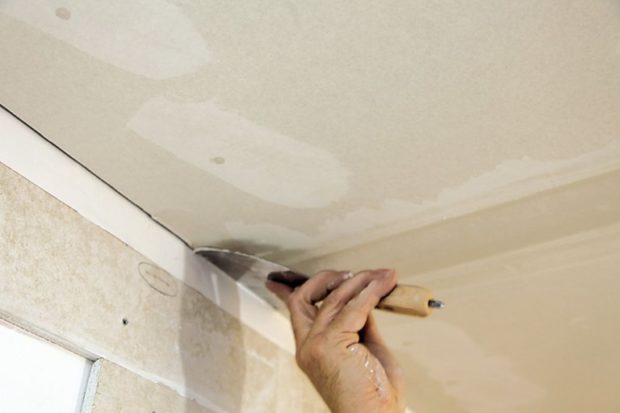
- if there are noticeable on the surface cracks and dents, then it’s better to get rid of them. If the depth of the bumps is within 1 cm, then for alignment can take puttyIf there are cracks up to 3-5 cm, then it is better to take plaster. Putty can be found ready, you can - in dry form, it will need to be sealed with the amount of water indicated on the package. The mixture is applied with a spatula, and they are evened out with it. If there are large vertical deviations, you can use the construction rule. Many experts believe it is illogical to apply expensive store putty under cheap whitewashing, therefore prepare the composition yourself. The simplest recipe: mix gypsum, chalk and a solution of wood glue in a ratio of 1: 2: 2. A glue solution is prepared by adding 30-50 g of glue to 1 liter of water;
- after the putty dries, it must be wiped with sandpaper to get a smooth smooth surface;
- application primers. In principle, you can take any finished composition, but you can prepare the primer yourself. One of the simplest and most suitable recipes: dissolve 50-100 g of drying oil and 200 g of laundry soap, cut into thin chips in 3 l of hot water, dilute 3 kg of slaked lime separately in 4 l of water, then two solutions are mixed and diluted with water to a volume of 10 -11 l;
- after the primer has dried, you can go to whitewash. It takes about a day to dry.
If your task is only renew whitewashed surface, then in the presence of small defects they can be repaired with cement-based putty, and then proceed with applying a new whitewash layer.
No. 5. Preparation of a solution for whitewashing
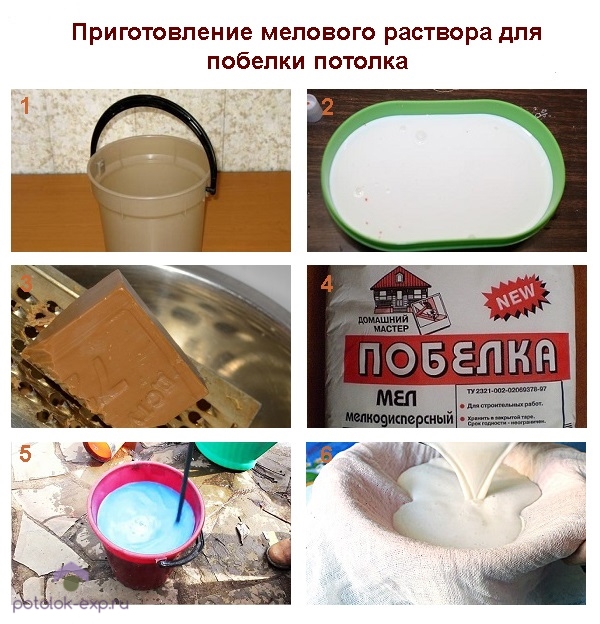
Since lime is used more often, we will start with it. The process of preparing the material is simple, but still requires attention. So, how to dilute lime for whitewashing?
- first you need to prepare all the necessary ingredients in the required quantities. We will need 10 liters of water, 2-3 kg of hydrated lime, 150-200 g of aluminum alum, 50-100 g of coarse salt, which is pre-soaked, and a teaspoon of blue (if white whitening is needed) or 400-500 g of dye;
- in a small amount of warm water (about 1 l) dissolve all the components, then bring the solution to 10 l and mix thoroughly;
- if you cook whitewash solution, it is best to immediately prepare such an amount that is needed to finish the entire surface. Otherwise, it will be almost impossible to repeat the shade, no matter how accurately you measure all the ingredients;
- if you bought or you just have available quicklimethen you can repay it at home. It is enough to mix it with water in equal proportions and mix thoroughly for 15-25 minutes. After this, it is advisable to leave the lime for 15 days in a closed container - so it will lie as even as possible on the surface;
- lime whitewash consumption depends on the type of tool that is used for application and the characteristics of the material. Average consumption of 0.5 l of solution per 1 m2 surface.
Now consider how dilute whitewash based on chalk:
- in 5 l of warm water dissolve 30 g of wood glue, 3 kg of sifted chalk, 15-20 g of blue to enhance whiteness. This amount of solution is enough for about 10 m2 surface;
- the consistency of the solution can be checked with a knife. If you dip the blade and pull it out, the solution should not completely drain from it. If it flows down, completely exposing the blade, then you can add a little more chalk, and it is better to do this in small portions.
Note that ready-made dry mixes are also on sale, where lime or chalk has already been mixed in the required proportions with other components - you just have to fill with the required amount of water. Such mixtures are more expensive if you take all the ingredients separately, but the difference is small.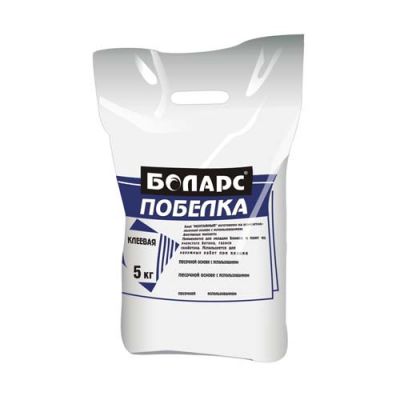
No. 6. How to whiten the ceiling and walls: brush, roller or spray?
Theoretically, you can whitewash such tools:
- brush;
- roller;
- spray gun;
- vacuum cleaner with air blowing function.
Just note that the first two options are more applicable - use a vacuum cleaner and a spray gun makes sense with a large surface area to be whitened.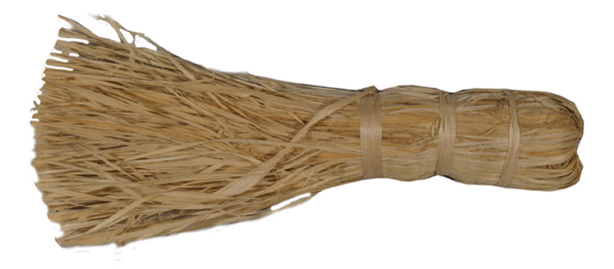
Whitening brush they take a special one, made of natural bristles with a width of 15-20 cm. After work, the brush can be washed and later reused. To whitewash a brick wall, you can use a brush-brush with natural bristles. It is advisable to soak it in water a few hours before use. In this case, the wooden handle swells a little and holds bristles well, which will not fall out during whitewashing.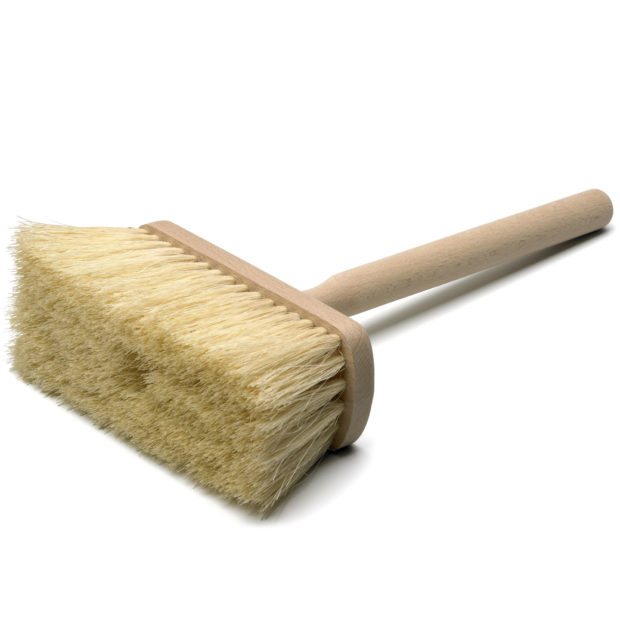
Before applying the mixture, it is important to mix well once again so that the shade is uniform. The first layer is applied perpendicular to the window, the second - parallel to the frames. In this case, the stripes from the brush will be minimally noticeable. Experts recommend slightly moistening the surface of the ceiling and walls before applying the mixture.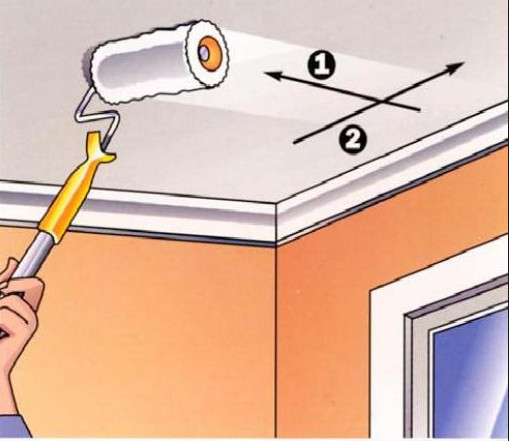
It is better not to use a whitewash roller. When there will be only one layer, this tool will still work, but when applying the second layer, the dried first one may fall off. If you act carefully, you can get a beautiful matte surface.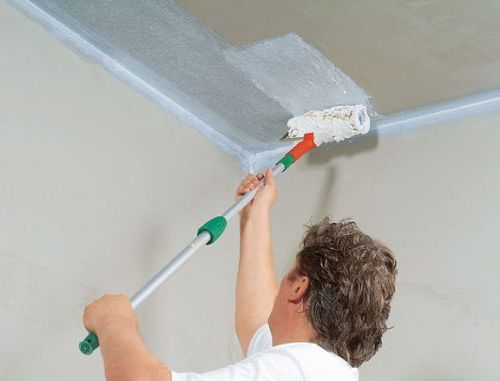
Sprayer and vacuum cleaner take only when you have to finish a large surface. The flow rate of the solution increases, it is applied in a thicker layer, but it will be possible to mask small defects. If a sprayer is available, then no questions arise.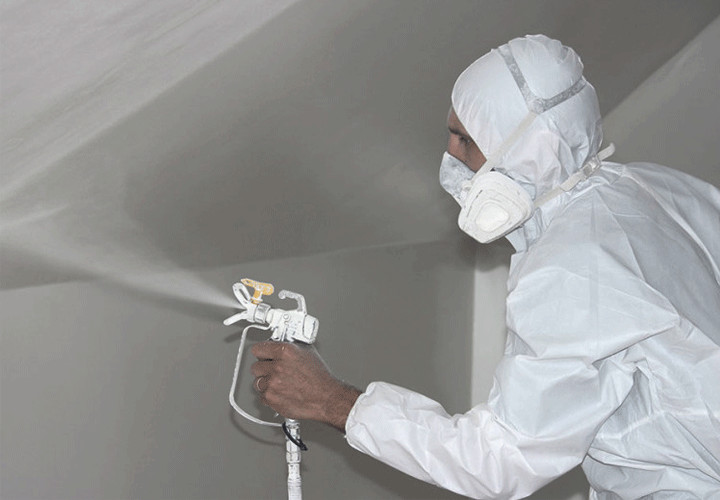
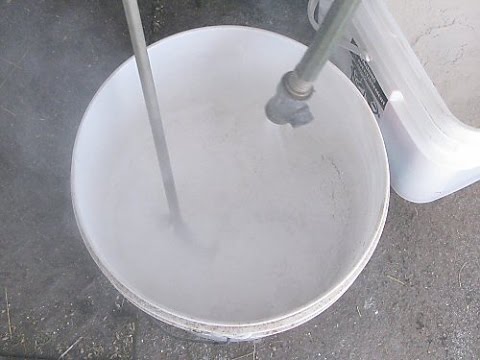
You can apply whitewashing with a vacuum cleaner, if it has a function of blowing air. Among the many nozzles in such models should be a polyethylene cover with tubes. This cover is also a spray. It must be put on a jar and connected with a hose to the outlet in the vacuum cleaner. It turns out that when blowing air out with a vacuum cleaner, air enters the atomizer, draws the solution from the can and sprays it through the nozzle. As a rule, there is a special hole on the sprayer, covering which you can get the required pressure of the solution. It is better to apply the solution in circular motions, spraying at a distance of 70-100 cm.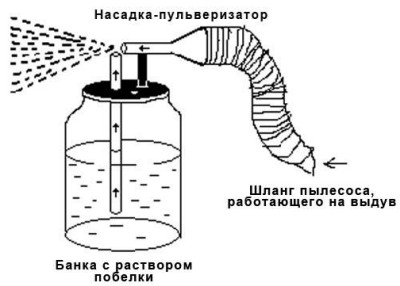
Number 7. Safety Summary
So that after whitewashing did not have to be treated, it is better to take care of safety precautions in advance. Respiratory tracts are protected by a respirator, wet dressing or face shield. Hands must be protected with rubber gloves, and eyes with glasses.

 9 materials for finishing the ceiling in the kitchen
 12 materials for decorating the bedroom ceiling
 9 hallway ceiling materials
 13 living room ceiling materials
 7 materials for decorating the ceiling in the nursery
 10 materials suitable for wall decoration in the bathroom
 9 tips to remove / wash off whitewash
 9 materials for decorating the walls of the kitchen
 6 materials for wall decoration in the children's room
 9 hallway wall materials
Everything is written correctly. It is healthy.