7 tips for fixing lining: methods and types of fasteners
Wooden lining is beautiful and environmentally friendly. Ceilings and walls in baths, saunas, country houses and city apartments are similarly finished. At material, many advantages, and one of the most significant is the ease of installation, if, of course, high-quality materials were used, so you should find a responsible supplier of fasteners for the lining and, of course, the lining itself. Today, kleimers, nails and even staples are used to fasten material. What kind of fasteners for lining will be most appropriate in each case?
No. 1. Lining installation features
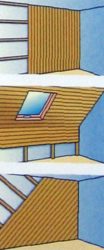
The lining is recommended to be mounted on pre-installed frame. If the walls or ceiling have a perfectly flat surface, it is possible to install the lining without building a frame, but the crate still helps to extend the life of the base surface and allows you to create an additional layer for laying in the space between the lining and the main surface heat insulating material.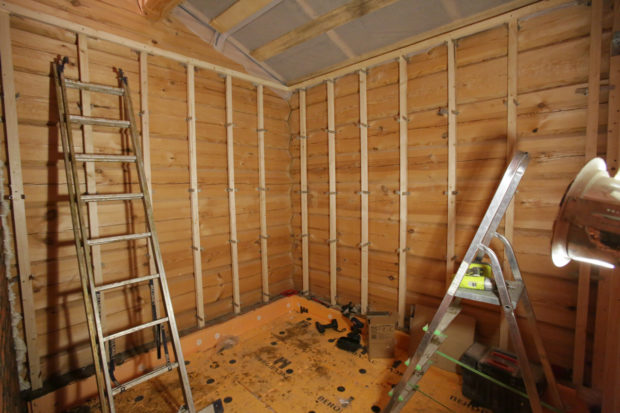
The crate is attached in increments of 50-60 cm, it is imperative to use a level to achieve a perfectly flat surface and compensate for irregularities in the base ceiling or wall. The frame may be from metal profile or bar. When it comes to wooden lining, it is better to stop the choice on a beam. The thing is the ability of wood to absorb and give moisture, changing in volume. Lining and timber will react in a similar way, but the metal does not change in volume, and with rigid fixation of the profile to the surface, the lining can lead. Of course, this risk remains when using a wooden frame, but still to a lesser extent.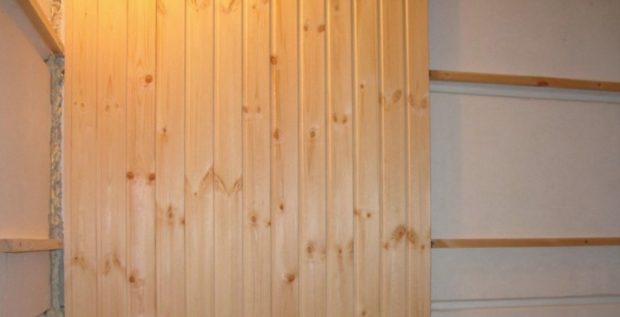
Between the bars of the crate, it is possible to lay insulating material, which is important not only for residential buildings, but especially for baths and saunas.
You can mount the lining in one of the following ways:
- horizontally. This is probably one of the most popular lining installation options. Some types of material (lining a quarter and "American") can be mounted only in this way. If we are talking about arranging a steam room, then it is necessary to place the lamellas with the spike up. Only in this way will condensation and water slide freely along the wall. Installation of lining in this case begins from the ceiling;

- upright. This installation allows you to visually raise the ceiling in the room, often used in baths. Installation of lamellas begins from any angle, the first element is installed with a groove outward. When attaching the lining to the ceiling, it is recommended to work in the direction from the light to avoid the appearance of shadows between the boards;
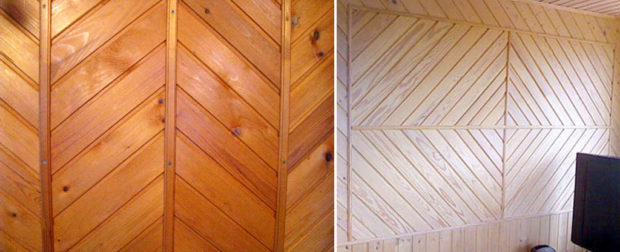
- diagonally. This is a decorative laying option, which is often used when decorating walls and ceilings in living rooms;
- combined and patterned involves the installation of lamellas lining in different directions, so you can get the original picture. Unlike everyone else, this installation option requires proper skill and preparation, so it is not suitable for beginners.
The direction of the bars of the crate will be perpendicular to the direction of the lining, this goes without saying.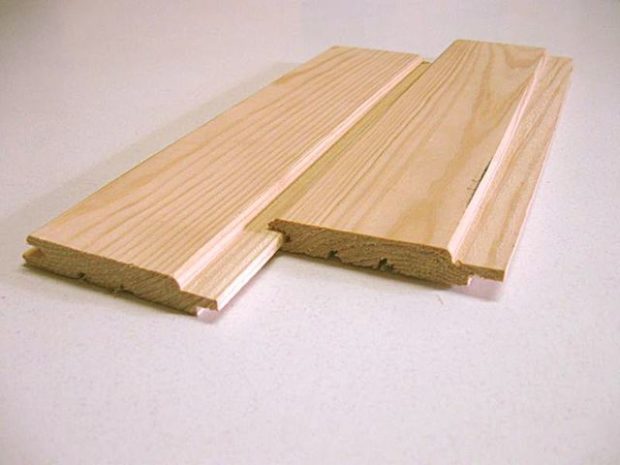
No. 2. Types of fasteners for lining
Traditional ways execute several lining fixtures:
- using kleimers. This is the most gentle way, it allows you to maintain the integrity of the lining;
- using nails that hammer into a groove or dowel. This technology requires more caution from the contractor, as there is a risk of damage to the lining;
- through fastening screws through the lining;
- fastening with a construction stapler.

Regardless of which type of fastening is selected, it is recommended to mount the first and last boards with nails with small hats - they are easy to drown in the body of the lining. The lining is attached first to the middle bar, then to the two extreme ones, carefully controlling the vertical or horizontal. Then there is a fastening to the intermediate bars.
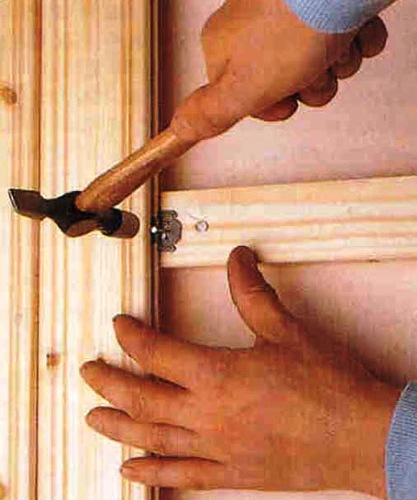
No. 3. Lining fasteners with kleimers
Kleimers allow you to install the lining, fully preserving its integrity. They are metal plates with tongue and holes. The tongue is designed to hold the lining, and thanks to the holes, the clamp is attached to the frame. Such simple, but at the same time ingenious, fasteners allow for the latent fixing of the lining - no fastenings will be visible from the outside. At the same time, the wood is protected from cracks that may appear when nails are driven into it, and the entire installation process is quite simple.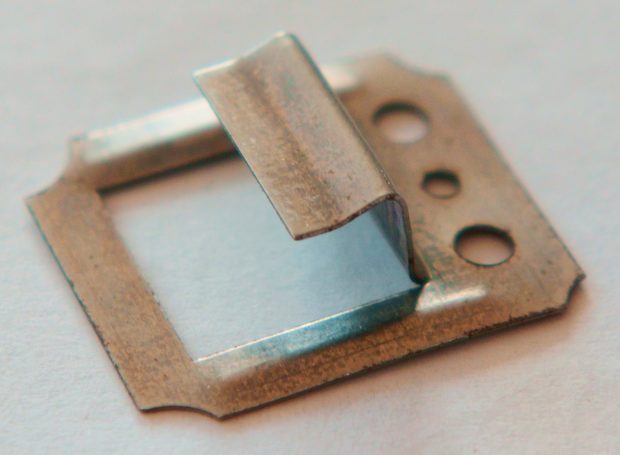
The main difference between all Kleimers on the market is tongue height. The choice of this parameter depends on what type of lining will be mounted: for euro lining the necessary brackets with a tongue 4 mm high, for lining a block house - 6 mm. As for the material, Kleimers are mainly made of galvanized iron and steel. Consumption this fastener depends on many factors, but on average 1 m2 lining leaves about 20 kleimers.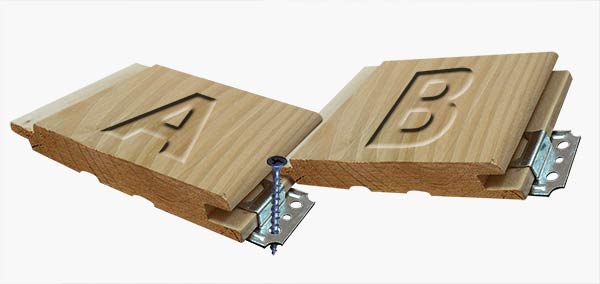
The sequence of work is as follows:
- a kleimer is installed on the lining spike;
- the board is mounted in place, fixing occurs due to nails or screws that pass through the holes on the clamp and enter the crate. There are usually three such holes on an element, but only two of them are allowed to be used;
- the Kleimer tongue is thin enough to insert the next panel of the lining into the groove of the previous one with the Kleimer already installed. The process is repeated again and again. Recall that the first and last boards are better to fasten with nails.
It is necessary to install the boards tightly to each other, leaving no visible gaps. The last board, most likely, will have to be cut to fit in width. In baths and saunas, it is recommended to retreat 2-3 cm from the ceiling and floor so that the wood can expand easily.
Kleimers provide a detachable mount, so in which case the lining can be easily dismantled and assemble the coating in a new place.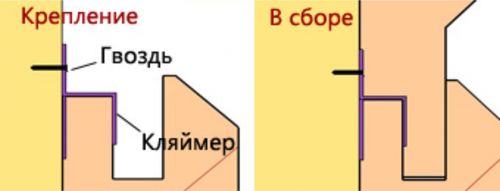
Number 4. Fastening the lining with nails
Via nails it is easier and faster to fix the lining, because there is no need to use some intermediate fasteners, but there is a risk of breaking the board, so you should be prepared for a certain amount of marriage. For fastening use nails 5-6 cm long, them drive in in increments of 25-30 cm, so a lot of fixing material will be needed.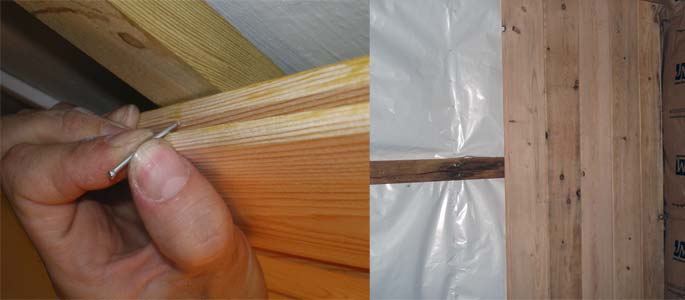
Usually nails drive into a groove at an angle of 45 degrees. To reduce the likelihood of damage to the lining, the nail with a hammer is carefully planted in the right place, and then clogged with a blunt damper. An alternative is to drill holes in advance. The nail head during installation must be carefully drowned in a tree so that the next element of the lining can be freely inserted into the groove.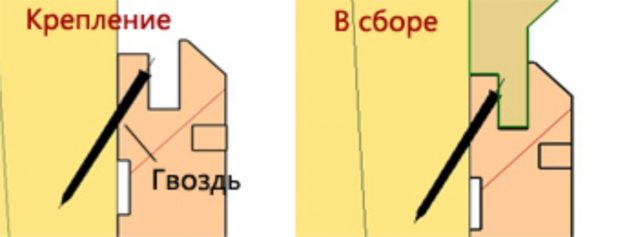
It is allowed to drive a nail at a right angle into the tongue.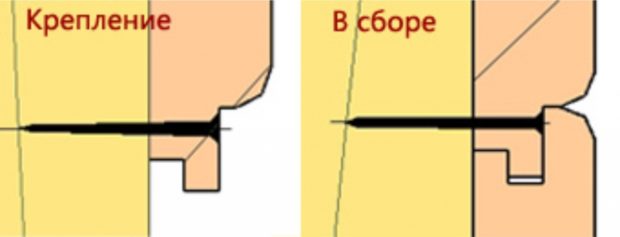
No. 5. Fastening the lining with a stapler
This is a variation on the theme of the previous method: instead of carnations and a damper, a construction stapler is used here, which has sufficient power to drive the bracket into the lining.This device greatly facilitates the execution of work, but requires some skill, so for a start it is better to practice. If everything is done correctly, then the bracket will fit tightly into the wood, without interfering with the installation of the next element of the lining. The stapler can also be used for fastening with kleimers.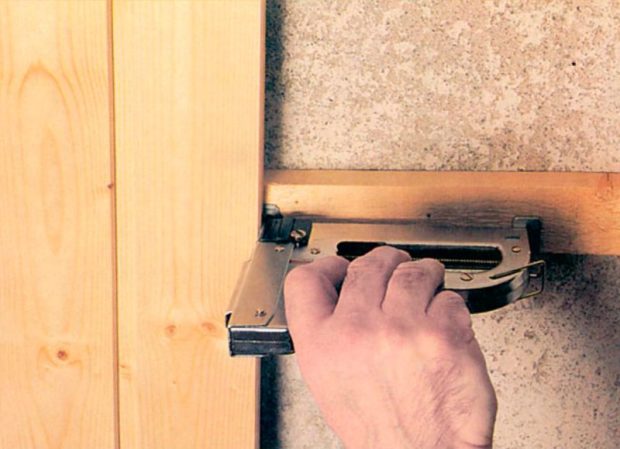
No. 6. Through lining fastening with self-tapping screws
Through fastening is usually used for mounting the last boards of the lining. In this way, lining is also fixed in steam rooms and saunas. In this case, the fastener does not enter the spike, but passes through the entire lining. This is a fairly reliable and durable method of installation, but if it comes to using it in a bath, then the wood must be covered protective compound and remember to update it every three months.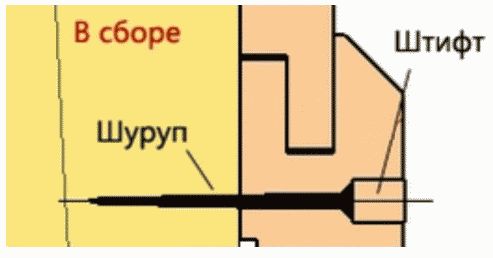
Pre-holes are made in the boards, and then using screwdriver screw fasteners that should go as deep as possible. To cover the resulting hole, use wooden pins, however, over time, all the attachment points can become noticeable, no matter how carefully and regularly protective equipment is applied.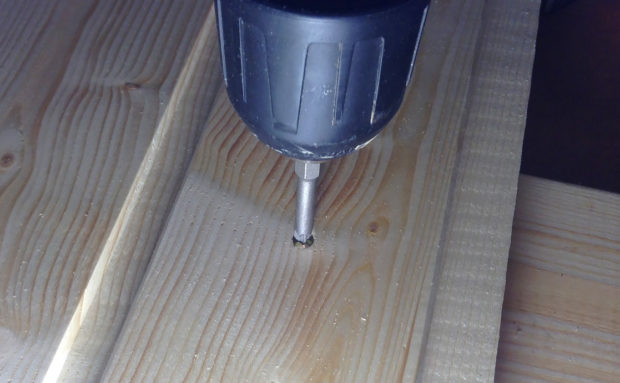
This method has one interesting variation. Some experts hammer nails into the crate, but not to the full length, so that lining can be planted on them in the future. The length of the protruding elements should be less than the thickness of the lining. Hats of nails bite off, and the panels of the lining are neatly stuffed on protruding nails with a mallet. The result is an aesthetic surface.
Number 7. Lining Mounting Tips
Over the years of working with lining, experts have gained decent experience and are ready to share tips:
- it is better to mount the lining on the crate, even if the main surface does not have serious differences and irregularities;
- the walls of the house before installing the laths are best treated with an antiseptic, as are the bars for the frame and the lining itself;
- before installing the lining, it is better to withstand it for a day or two in the room where it will be installed;
- if in the future there will be a lining tint, then do not forget to treat the surface with a primer;
- with a horizontal mounting option, the lining is installed from the bottom up, but in this case, the top-most cropped board can spoil the appearance of the finish, so today more and more often the finish begins with the fastening of the upper element. If the last bottom board needs to be trimmed, then it will then be covered with a baseboard.
 it is better to mount the lining on the crate, even if the main surface does not have serious differences and irregularities;
The lining fastening process cannot be called too difficult, but nevertheless it requires accuracy, attentiveness and certain skills, so if you are not completely confident in your abilities, it is better to immediately call for help from professionals and not spoil the material.

 8 tips for choosing a wooden lining
 7 tips for choosing a plastic lining
 5 materials for decorating the balcony outside
 6 Tips for Choosing and Installing an Aluminum Slatted Ceiling
 Laminate wall decoration. How to fix a laminate on a wall?
 Laminate ceiling. How to fix the laminate to the ceiling
 9 Tips for Decorating Wooden Walls
 12 materials for decorating the bedroom ceiling
 10 materials for decorating the ceiling in the bathroom
 How to choose nails: types, material, length