Visor above the wooden porch: 5 tips for choosing a design and manufacturing
We will not say platitudes that porch and canopy over it - This is the face of the house. Everyone understands this very well, and therefore they are trying to make the “face” as attractive and original as possible. Are going various materials: metal, polycarbonate, corrugated board, metal tile and even glass, but wood remains the option for all time. You can make a wooden visor yourself or entrust this task to professionals. Whatever it was, but before making a decision, you need to know how the visor above the wooden porch behaves in operation, what strengths and weaknesses it differs in, and what care will require.
No. 1. Advantages and disadvantages
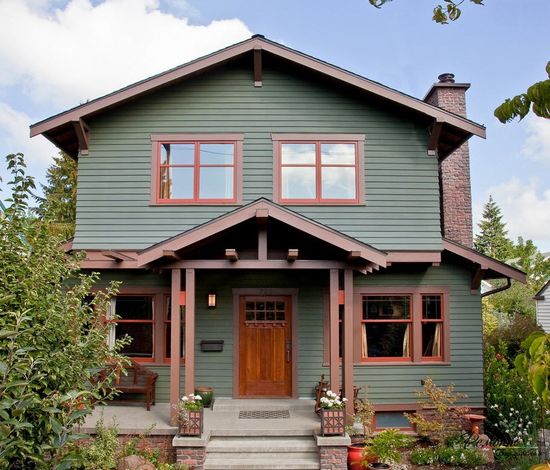
The function of the canopy over the visor is to protect entrance area from rainfall, divert water and, of course, decorate and complement the house. Wooden visors have been used for centuries, and now they have not lost their popularity. True, with the advent of new materials for the construction and decoration of houses, wood has ceased to be universal. Wooden visor will be a harmonious decoration houses from timberlogs sheathed wooden clapboardas well as houses in facade which used wooden elements.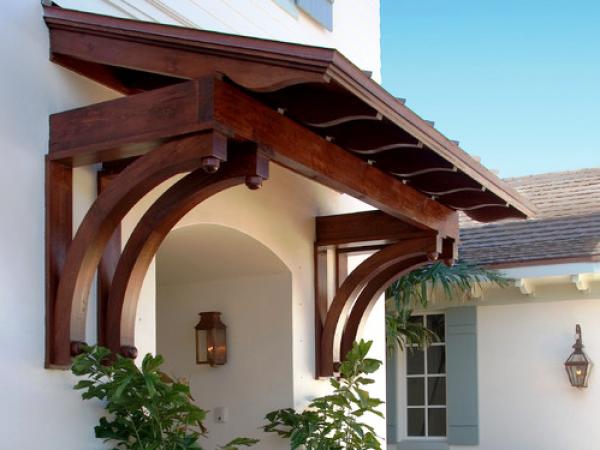
The main advantages of wooden visors include:
- absolute environmental friendliness and naturalness;
- chic appearance, which is ensured by the beauty of the natural pattern and the color of wood;
- wood is a ductile plastic material that can be given almost any shape, so that in terms of variety, wooden canopies confidently outperform competitors and can only compete with forged counterparts. From wood, you can make a fairly simple canopy, as well as a real work of art with an abundance of carved and openwork elements;
- design reliability;
- relative ease of installation.
Frankly, wood is not the most ideal material. Its shortcomings include:
- fear of moisture, fire and pests;
- to extend the life of the wooden canopy, it will have to be regularly treated with special protective equipment. Despite the fact that some people like to leave the visor uncovered, it is better to use roofing material over it, which will become additional protection for the material.
Wood is often combined with forged elements, tiles, decking and other materials - it turns out quite interesting. Such a combined visor is highly versatile.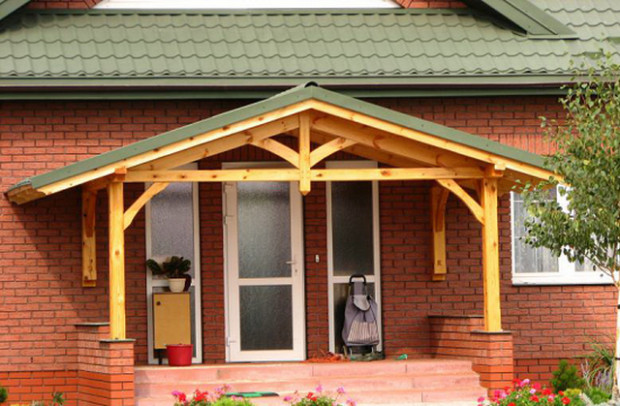
No. 2. Wood species
It is not surprising that the most important performance of the visor depends on the selected wood species. The most commonly used breeds are:
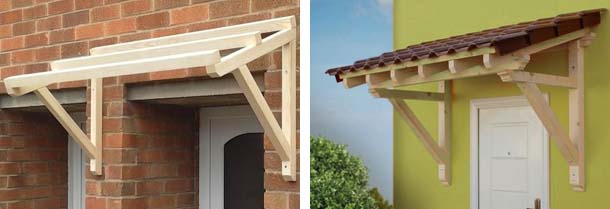
- Pine - This is soft wood, which lends itself perfectly to processing, has a high resin content, due to which it is less prone to cracking. The pine color is quite interesting, even noble, the pattern and color are preserved for a long time;
- spruce possesses almost the same properties as pine, is also actively used in the production of visors;
- maple is most popular among hardwoods. It lends itself to cutting and polishing, practically does not crack, it is well painted.
Whatever type of wood is chosen, it is important to pay attention to the fact that there are no defects, wormholes and starting rotting processes on the material.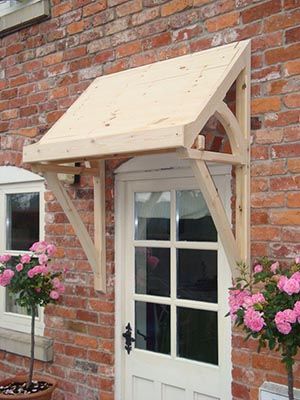
No. 3. What are wood canopies for construction and design?
According to the type of construction, wooden visors are:
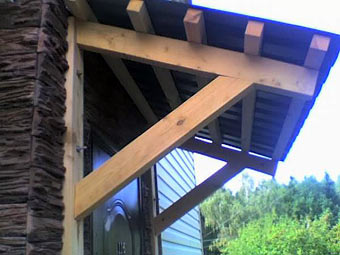
- mounted, suggest fixing the visor supports to the wall. This type of construction is applicable to small canopies that have a minimum weight. Since wood is a rather heavy material, it is impossible to make suspended visors on its basis (when the visor is mounted on suspensions on top of it);

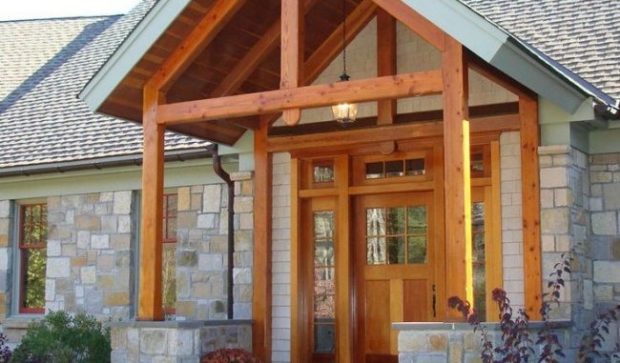
- supporting, provide for the presence of additional supports that will support a heavy visor. This type of design is used when the area of the canopy is large enough, and the front wall of the house will not withstand such a load. As supports, wooden or metal beams are used.
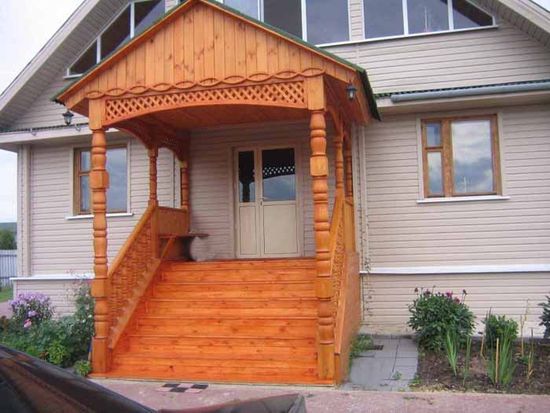
In an independent group can be identified freestanding visorsthat are used to organize the canopy over the terraces, the verandas and parking lots. Under such visors it is necessary to prepare a serious foundation. The canopy will be in contact with the house, but will not rest on it.
The choice of design depends on what functions will be assigned to the visor. If you just need to protect the entrance zone from precipitation, then you can do with the usual hinged visor. If you plan to turn the porch into a small sitting area with a bench or chairs and a compact tablethen you will need a support structure. When arranging a terrace or carport for a car, you can look in the direction of freestanding visors.
However, to determine the type of fastening is not enough - you still need to choose the shape of the visor. You should focus on your own preferences, especially the facade of the house, landscape design and take into account the properties of various types of visors.
The most popular can be called such models:
- single slope visor, which is mounted at an angle of more than 20 degrees relative to the wall of the house, thereby ensuring a normal flow of water and snow. This is the most simple design to manufacture, so if you decide to make a wooden visor with your own hands, and you have little experience, then a one-piece canopy will be the best choice. However, despite the simplicity, and there is a place of imagination. The visor can be flat or concave. It’s clear that it’s easier to make a flat one, but a concave one will look more interesting and will fit perfectly into certain architectural styles;
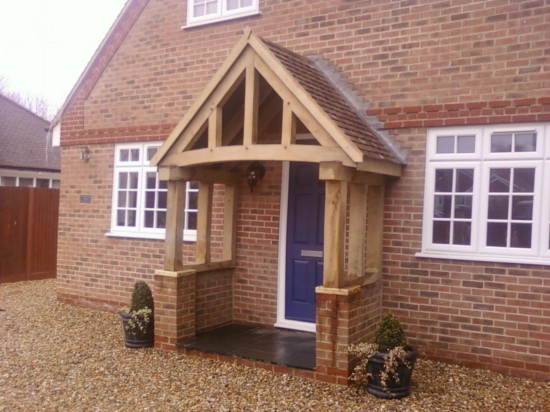
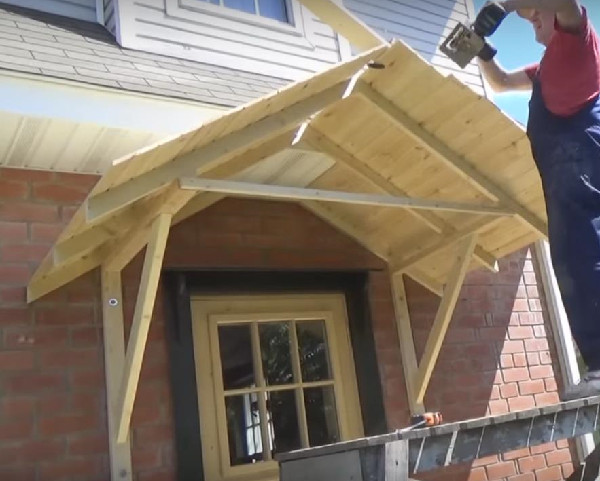
- gable visors a little more difficult to manufacture, but they are characterized by higher strength, because snow loads will be distributed evenly over the roof. Excellent visor complements exactly the same gable roof at home;
- cracked and polygonal visors are much less common. They are quite complicated to manufacture, require a lot of details to be taken into account, but they look original and very interesting;
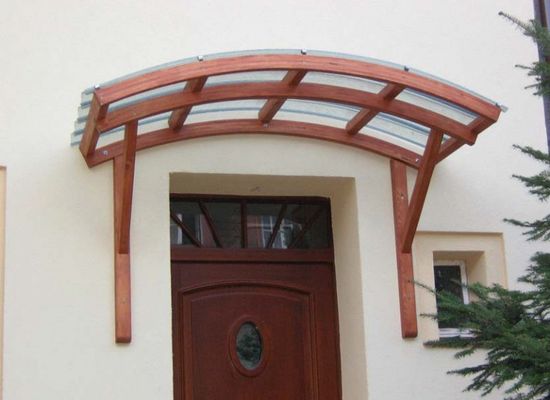
- arched and semi-arched visor it is not very easy to make wood, but the loads on such a surface will be distributed as evenly as possible;
- dome or tent canopy It is also not easy to do, so you can undertake the manufacture of such a design if you are completely confident in your abilities. It’s easier to buy a ready-made visor. The advantages of this design include a streamlined shape, which is especially important for regions with strong winds.
Naturally, each of these forms can be decorated with carvings, openwork elements and other decor according to your desire.
Depending on the presence of the side walls, the visor can be:
- open, i.e. without walls;
- closed, with side walls, which will be additional protection from rain and wind. If the porch is large and will be used not only for access to the house, but also for organizing gatherings, small picnics and dinners, then it is better to take care of the side walls.
Number 4. What else needs to be considered?
Many of us choose a visor, evaluating only the shape, size and, at best, the harmony of combination with the house, but many other aspects must be taken into account, among them:
- precipitation will constantly exert a load on the canopy, so the structure must be designed to withstand this load. For each region, the degree of load will be different, so when designing it is important to take into account the thickness of the snow cover, the strength and direction of the winds;
- regardless of what form the canopy will be, simple or outlandish, it is necessary to provide a system for outflow of water so that rain flows do not just pour under your feet and on your head;
- ideally, the visor should be slightly wider than the porch to reliably protect the entrance group.
No. 5. Buy or do?
In this case, the answer depends on your skill and ability to handle the tree. If you yourself or according to the instructions will be able to design a visor, cut all the workpieces, work with protective equipment, connect all the elements into a single structure and complete the installation so that everything is smooth and durable, then it will be cheaper to do all the work yourself. Moreover, in this way you can create a design with an original design and just the size that is required.
There are no ready-made visors as such on sale. Just for a certain amount, you can order the manufacture of a canopy for the porch. At the same time, an individual approach is preserved, the canopy will have clearly the necessary dimensions, shape and design. You do not have to spend time and effort working with wood and understanding the basics of woodworking. The downside of this option is that the visor will come out more expensive. In addition, many people prefer to do everything on their own, in order to personally control the quality of the material and all processes.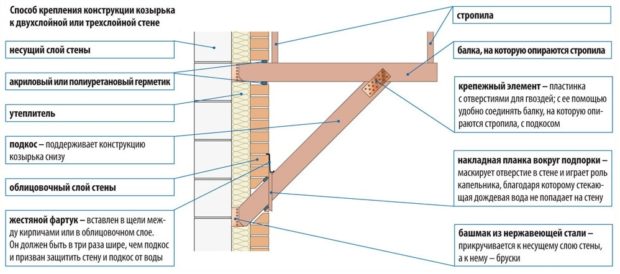
If you decide to make your own visor, then stick to the following action plan:
- at the first stage, it is necessary to create a design drawing, which depicts the shape of the structure, decorative elements and all sizes. When compiling the scheme, it is necessary to take into account the climatic features of the region, wind loads, as well as the type of roofing material selected;
- prepare all the necessary materials and tools. You will need a wooden beam for supports with a cross section of 10 * 10 cm or 12 * 12 cm, as well as a board 25-45 mm thick for the crate. You may have to stock up with a bar of 50 * 50 and 20 * 15 mm. The choice of parameters depends on the size of the structure and future load. The amount of material depends on the shape and size of the visor. You will also need to stock up screwdriver, screwsanchor bolts nails, a hammer, level, plumb, hacksaw on a tree, tape measure, pencil;
- the nuances of making a canopy depend on the shape. A single-pitch visor, for example, is much easier to build than a single-pitch visor;
- determines the length of the rafters, triangular brackets;
- bars of the required length are cut at an angle of 45-60 degrees. These are brackets that will support the visor. They must be fixed against the wall, the distance between them is equal to the width of the canopy;
- if the design of the visor implies the presence of supports, then at this stage pits 50 cm deep are prepared in the place of their installation, the bottom is lined with a layer waterproofing, the supporting bars are placed on top, and the space around them is filled with rubble or gravel, all this is poured with concrete from above. The tops of the supports can then be cut off at the required angle. Some prefer to fasten the supports to the existing columnar foundation;
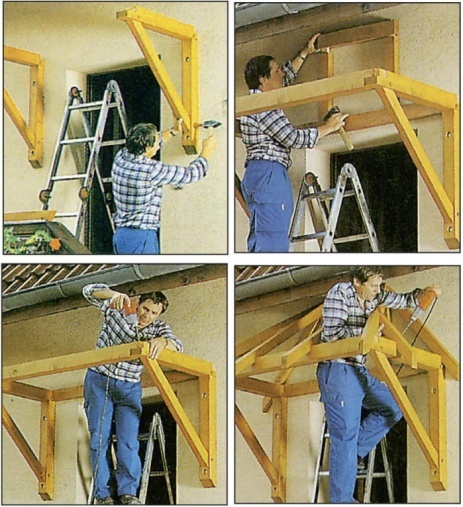
- the manufacture of rafters and their fixation with crossbars;
- installation of a ridge beam;
- installation of the crate of plywood, timber or edged boards over the rafters;
- installation of hooks for future runoff;
- installation of roofing material;
- if necessary, fixing the side strips;
- installation of a drain pipe, installation of a cornice strip, fixing of a drain pipe.
This is a general scheme for making a wooden visor with your own hands. It is necessary to take into account many more nuances.Detailed instructions, videos and recommendations on how to make a visor above the porch yourself can be found on olestnicah.ru. We thank this resource for the information provided.
 over the porch of a private house + photo")
 over the porch of a private house + photo") 6 tips for arranging a canopy (visor) over ...
6 tips for arranging a canopy (visor) over ... 5 tips for choosing wood siding for decoration ...
 Imitation of a bar for external and internal decoration
 6 tips for choosing and installing windows in a wooden house
 5 materials for decorating the balcony outside
 7 tips for designing and decorating a private porch ...
 Floor board: types, size, manufacturing method
 8 options for decorative balcony decoration with photo
 Wood veneer wallpaper: selection and sticking
 14 Tips for Choosing Wood Varnish for ...