11 ways to remove old wallpapers from walls quickly and easily
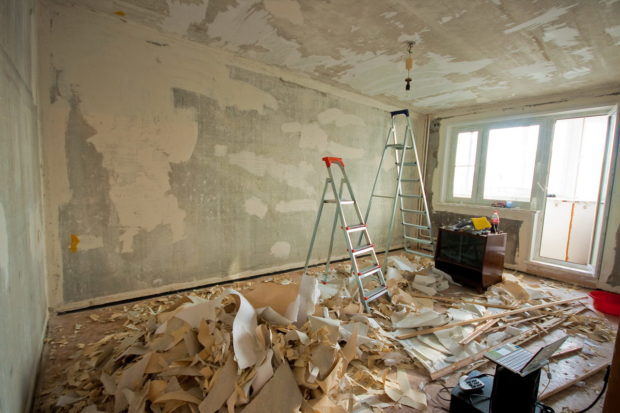
Before, people didn’t bother much, and if they wanted to update interior simply glued new wallpapers on top of the old ones. The canvases were paper, so in the process of such installation no bubbles, bumps or spots were formed. As a result, in some apartments you can find from 2-3 to 8 or more layers of old wallpaper. To apply a modern coating, you will have to get rid of all this, and here many are waiting for difficulties. We have put together several effective ways to remove old wallpaper from the walls quickly and easily, whether it be paper, vinyl or washable canvas.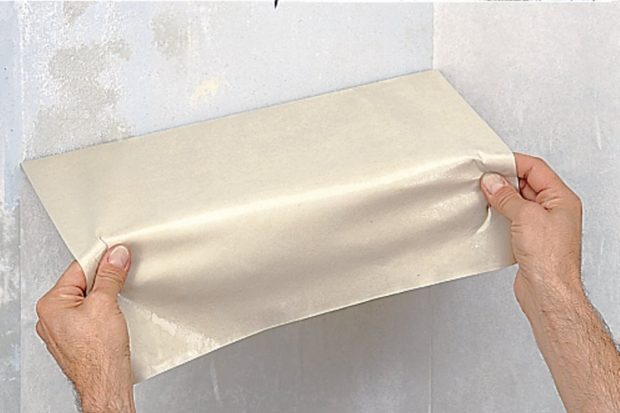
Why is it better not to glue new wallpapers on old ones?
In the old days, when wallpapers were completely paper without any protective films and coatings, it was possible to glue new wallpapers on an old smooth, undeformed, but simply boring, coating with a clear conscience. Sometimes there are so many layers of old wallpaper that you can determine the number of repairs and recall various periods in the life of the owners using them, like rings of trees. If on top of old Soviet and miraculously surviving paper wallpapers you are going to glue again paper wallpaper, then you can take a chance and do without the dismantling procedure. In all other cases, it is better not to do this.
First if you are planning finish the walls with plaster, photo wallpaper, paint or any other decoration, the layer of old wallpaper must be removed without fail. Secondly, even if you are going to wallpaper again, then when applying one layer to another, you can get lagging of a new layer, wrinkles, bubbles and other defects. This is due to the fact that the old layer can no longer hold very well, and there is also an increased load. Moreover, the glue that you will use will soften the old layer of wallpaper. As a result, the drying process will be delayed, and if the wallpaper is of different quality in two layers, then lagging behind the walls can not be avoided.
- It’s great if you still have labels from rolls that indicate the type of dismantling, for example, “removed wet” or “delaminated when removed”.
- Before you start shooting old wallpapers, remember how they were pasted. If it was plain wallpaper gluewhich was applied to primed walls, then, most likely, the whole process of dismantling will not be very difficult.
- Problems can arise if the wallpaper was glued with non-standard glue, for example, PVA, or mounted on an unsuitable surface. The most difficult surface is considered - non-putty drywall.
- Some difficulties may arise if the top layer does not absorb moisture (vinyl and washable wallpapers), but effective methods have also been devised for this case.
In any case, remember that nothing is impossible. Many ways have been invented for how to remove old wallpapers from the walls, just, you may have to make a little more effort than planned.
How to prepare for the removal of wallpaper?
The process of dismantling old wallpapers is often a dirty process.Plaster will pour in, splashes of water and some special means will fly, so it is better to prepare the room in advance:
- try to make the maximum of furniture;
- if all the furniture couldn’t be taken out, move the remaining objects to the center of the room and cover with foil;
- It is also recommended to cover the floor with film, and so that it does not slip, you can put old newspapers or cardboard on top of it:
- definitely worth a cover skirting board. The same film that is attached with masking tape will come to the rescue;
- if you are supposed to shoot the wallpaper with water, then you must turn off everything sockets and switches, and even better - additionally cover them with a film, which is fixed with tape;
- on the threshold of the room, you can put a damp rag so that the dust does not spread in neighboring rooms;
- all the necessary tools are better prepared in advance.

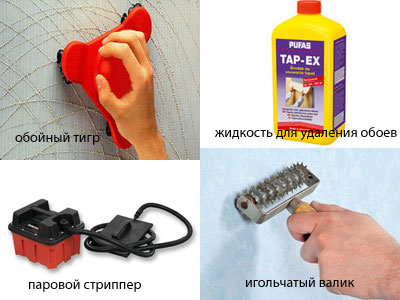
The last point is most interesting. What devices may be needed in the process of removing wallpaper? Here is the list:
- two sharp spatulas of different sizes;
- bucket, water, detergent;
- sponges, roller, rags;
- garbage bags;
- gloves
- ladder;
- roller for perforation, wallpaper tiger, knife;
- special tools for dismantling wallpaper / steam iron and fabric flap.
The toolbox can be reduced or expanded depending on the chosen method.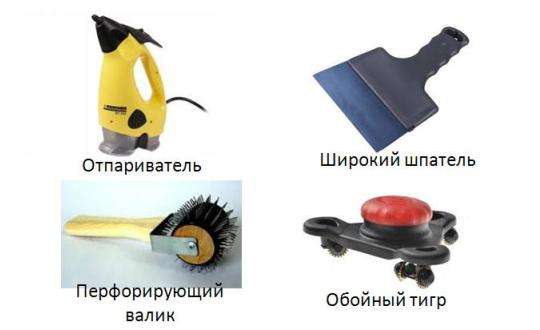
No. 1. We remove the wallpaper with our bare hands
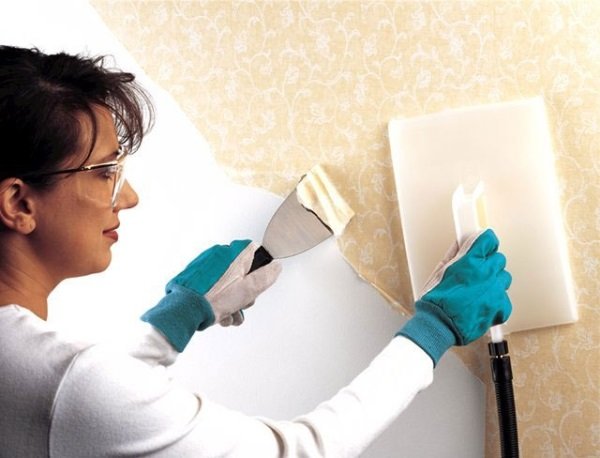
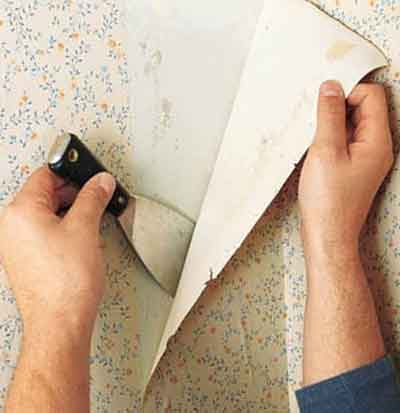
This is an option for those lucky old wallpapers themselves are already moving away from the walls. To remove old canvases, just pull the upper edge, and if some parts do not lend themselves, then pry them with a spatula or knife. Strips of wallpaper can go entirely. Old wallpapers, most likely, have already lost their strength, so it’s not worth pulling so that the canvas does not crumble. Take off carefully. If in some place the wallpaper is securely attached, then pry it with a knife or spatula. If this does not help, then use one of the following methods.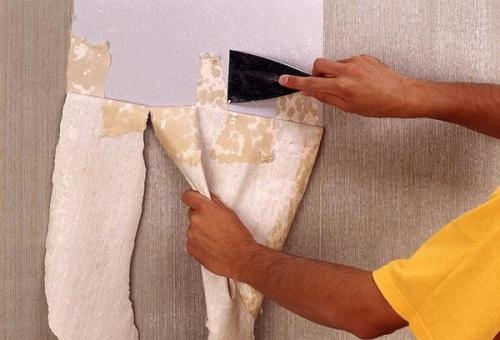
No. 2. The traditional way: removing wallpaper with water
The wet method works in most cases. Moreover, it is more hygienic compared to the previous version, as less dust will be generated in the process. The procedure is as follows:
- prepare the room, glue the baseboard, sockets and switches;
- the essence of the method is soak the wallpaper so as to soften the material itself and dissolve a significant part of the glueso it is necessary to prepare the water. It is better to take warm water, and to guarantee it, you can add a little soap, dishwashing liquid or fabric softener. These substances will greatly accelerate the process;
- it is best to moisten the wallpaper with a sponge (but you can use a spray bottle, spray gun, rags, roller), trying to apply a sufficient amount of liquid to soften the wallpaper and glue, but also not overdoing it so that water does not flow on the floor and does not fill out sockets. After 20-30 minutes, you can proceed directly to the removal of wallpaper, until everything is dry. It is better to process a surface in parts;
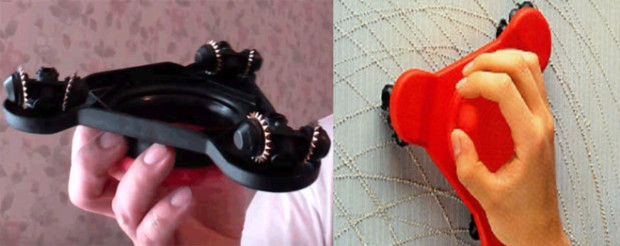
- for better penetration of water inside the wallpaper and under the wallpaper, the top layer can be perforated with a needle roller, knife or wallpaper tiger. If the wallpaper has a protective water-repellent layer, then you can’t do without such a trick;
Wallpaper perforation by wallpaper tiger
- when the canvas is sufficiently saturated with water and begins to slightly move away from the surface, it can be pry off with a spatula and begin to tear off. It is better to tear off the seams. If some areas do not respond, moisten them again;
- the edges of the spatula should be sharp, so they can be pre-sharpened with emery;
- with extreme caution, take wallpapers near sockets, switches and counters;
- if some areas still do not lend themselves, you will have to arm yourself with a scraper, just work carefully so as not to damage the layer of plaster;
- experts advise using household soap when removing wallpapers that were glued to PVA. The bar is grated, pour 4 liters of water and boil.An alternative is 9% vinegar: 450 ml is enough for a bucket of water. If you add vinegar and soap, you can get a tool that can cope even with wallpaper that has eaten into the wall. To remove waterproof wallpaper in warm water, you need to add fabric softener at the rate of 300 ml per bucket of water;
- immediately remove all removed fragments into bags or sacks. After finishing work, wipe the walls with clean, warm water and a sponge.

This method is ideal for paper wallpapers: single-layer is soaked in literally 5-7 minutes and can be perfectly removed from top to bottom, two-layer will take 10-15 minutes, and only the top layer can be removed. If you are going to glue the wallpaper, then the bottom layer of the old can be left. If not, then the procedure will have to be repeated. In the case of paper wallpaper covered with a moisture-proof protective film, as well as in the case of vinyl, non-woven and washable wallpaper, you will have to try a little more. At a minimum - to perforate, and as a maximum - to use special compounds and other tricks.
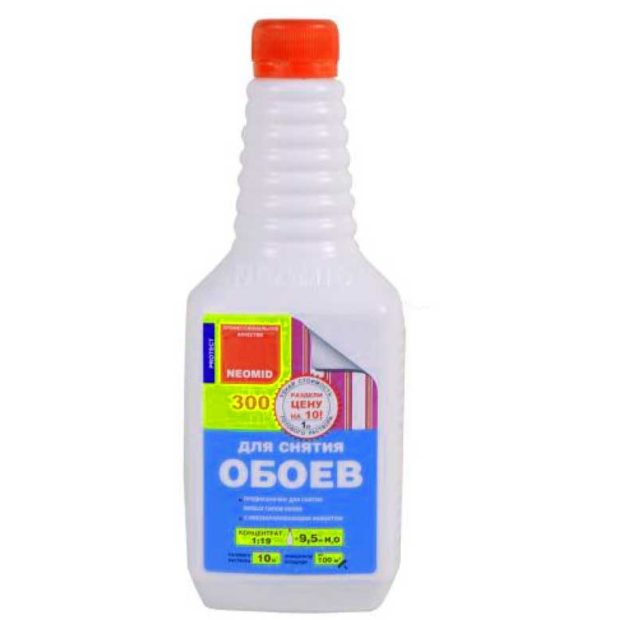
No. 3. We use a special wallpaper remover
If the wallpaper is glued tightly, or you just don’t want to lose time and energy soaking them with water, then you can take a special composition for removing wallpaper. Such funds are inexpensive, non-toxic, absorbed into the structure of the wallpaper much better than just water or soap and water.
Procedure:
- the purchased product in the form of a powder or gel is diluted with the indicated amount of water, mixed thoroughly;
- via roller (you can use a sponge) the resulting solution is applied to the wallpaper in the usual way;
- Leave the product to absorb and penetrate for the time indicated on the package. The term can be from several minutes to 3 hours;
- after the expiration of the time, the wallpaper paintings themselves lag behind the walls and there will be no need to apply inhuman efforts to peel off. For convenience, it is better to remove the wallpaper with a spatula;
- waterproof wallpaper is better to incise with a knife or wallpaper tiger;
- among the most popular drugs Zinsser, Quelyd Dissoucol and Atlas Alpan. One bottle should be enough for processing about 100 m2 surface;
- suitable for removing paper, textile, vinyl, non-woven and other types of wallpaper.
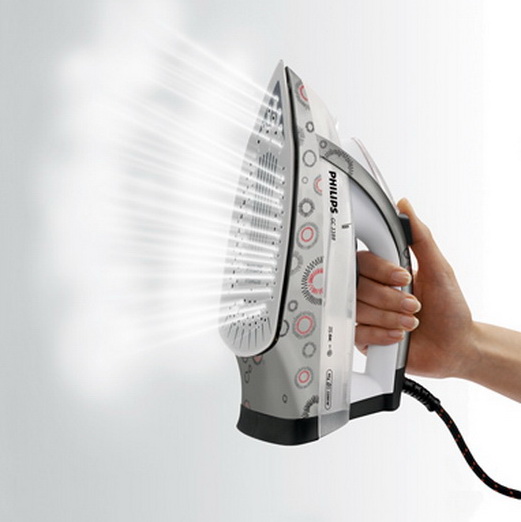
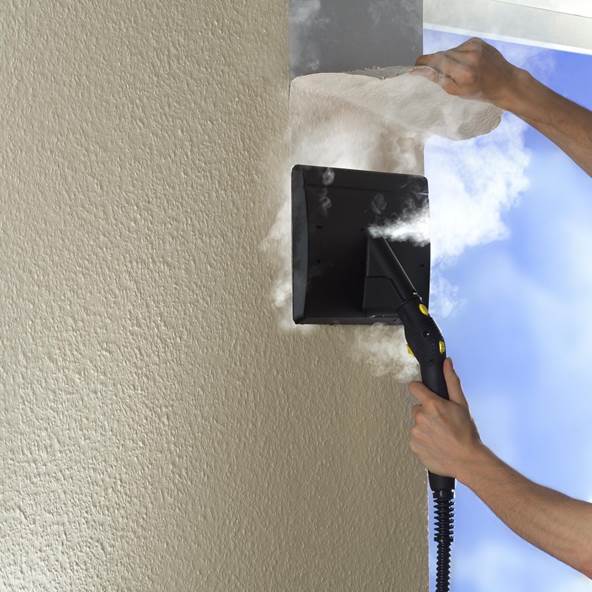
Number 4. Steam way
The most common iron, steam iron or steam generator can help deal with old wallpapers:
- if the household has only a regular ironthen you will have to additionally prepare a piece of cotton fabric. It is thoroughly moistened and applied to the wall. It is better to act together: one person holds the fabric, the second - irones the area, setting the heating of the iron to maximum. Iron the fabric several times, remove it and pry the wallpaper with a spatula. Moisture and hot temperature contribute to the rapid dissolution of glue and softening wallpaper;
- even better to use steam generator or iron with vertical steam function. Steam acts on a specific area of the wallpaper, you can apply a thin cloth;
- Steam generators make the process easier and simpler. Steam penetrates much faster than water, while reducing the risk of spoiling plaster. It is much more convenient to work with a steam generator than with an iron or a steam iron;
- The method is best suited for paper wallpapers, you will have to remove the protective film from the rest or perforate it very carefully.
No. 5. Mole vs. Wallpaper
In construction, the following method is often used. It is a variation of the traditional method of removing wallpaper using soaking. If the wallpaper is glued firmly, then in warm water the “Mole” pipe cleaner should be dissolved. Add 1 part of water to 1 part of the “Mole”. Using a roller, this solution is applied to the wallpaper, and after 5-10 minutes the wallpaper should go off with whole canvases. The effectiveness of this method is at its best, only it will be necessary to moisten the wallpaper very carefully and act with gloves.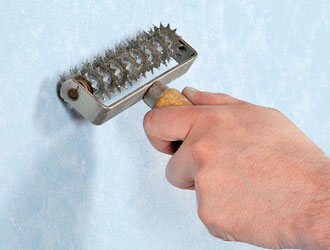
No. 6.How to remove wallpaper glued on PVA
PVA glue is a water-insoluble composition, so traditional methods take it poorly. You can try adding household soap or vinegar, or both, to the water, or you can do it in a slightly different way.
Operate with a spatula and grinder. Using a spatula, they try to gently remove those parts of the wallpaper that lend themselves. Leftovers and large chunks can be removed with a grinder, but in this case it is worth remembering that you are at risk of damaging the main surface. Most likely, after completion of the work, you will have to level the walls.
Also do not forget about the most effective way - steaming.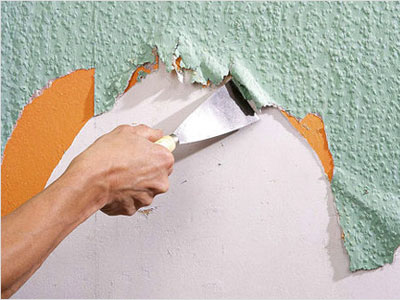
Number 7. How to remove vinyl wallpaper
Vinyl wallpapers represent a layer of polyvinyl chloride film glued to paper, less often - to non-woven. To remove such wallpaper, the traditional method is suitable, but several nuances should be taken into account:
- vinyl film does not allow water to pass through, so that moisture gets into the glue and soaks it, this must violate the integrity of this outermost layer. Use a knife, spatula or wallpaper tiger;
- after that moisten with water and wait 15-20 minutes;
- due to the fact that the vinyl film is very durable, the wallpaper will be removed in whole stripes. Each of the paintings on top must be cut with a knife or spatula, and then gently pull down;
- in some places, the paper base may remain, but it can be easily removed with the same soaking and stripping with a metal spatula;
- heavy multi-layer vinyl wallpapers are dismantled a little more difficult, you will have to slowly and systematically get rid of each layer;
- masters suggest using not just water, but a weak solution of glue for wetting. Thanks to this, the liquid becomes thicker, lingers on the surface of the wallpaper longer and acts more effectively. On waterproof vinyl film, even perforated, ordinary water will drain very quickly. Wallpaper glue in water is added two times less than when gluing wallpaper;
- place water and glue solution, you can use special tools for removing wallpaper.
Number 8. How to remove non-woven wallpaper?
Non-woven wallpaper can be made purely from non-woven fabric, or from non-woven fabric and a layer of another material. In the latter case, paper, textile or vinyl is attached to the non-woven backing. The tactics of dismantling non-woven wallpaper are not much different from the traditional method described above.
Non-woven backing is much stronger than paper, although it is also natural. She will be removed with whole canvases. It is most convenient to act with a spatula, if necessary, the wallpaper can be dampened.
In the presence of an external vinyl layer, it is first perforated, then moistened, and after 15-20 minutes they begin to take wallpaper with a spatula. If the non-woven bottom layer remains intact and has not been removed, you can leave it - it strengthens the surface of the wall and will be an excellent basis for new wallpapers.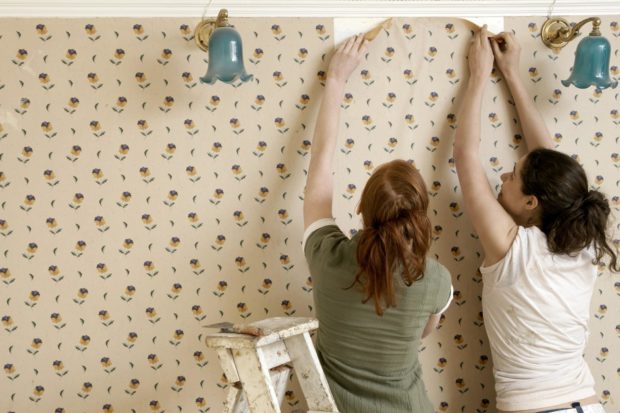
No. 9. How to remove washable wallpaper?
Washable wallpaper choose for those places where water can get, or where there are constant sources of pollution. Such a coating can be washed with a damp sponge, and it will not be anything. Cool, huh? That's just this advantage becomes the main problem when trying to remove washable wallpaper. Experts advise to act as follows:
- First you should try to lay the wallpaper. Notch, dampen the surface, wait. The top layer is removed elementarily, and the bottom will have to be removed with a scraper. Be prepared that with water, you may need to moisten the surface several times, because such wallpapers are protected from such an impact, and it will not be easy to break such protection;
- if the water has badly soaked the wallpaper, it is better to use a steam generator. Often, old washable wallpapers do not succumb to either water or a special liquid, so only steam remains.
No. 10. How to remove liquid wallpaper?
According to the composition and method of application liquid wallpaper more like decorative plaster.They consist of cellulose fibers, silk, cotton, adhesives, dyes and specific additives such as fungicides. The surface of such wallpaper is strong and durable, and if you are tired of its color, you can change it using acrylic and water-based paint of the desired shade.
If you decide to completely get rid of liquid wallpaper and change them to another type of coating, then it will be easy to remove them. It is enough to soak the coating with warm water, and when it begins to swell, remove the mass with a spatula. Experts say that liquid wallpaper can be reused.
If it happened that under the influence of warm water the wallpaper did not soften, then you can prepare a weak primer solution.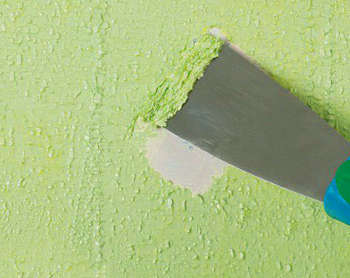
No. 11. How to remove wallpaper from drywall?
Drywall allows you to very quickly level the surface of the walls. For this convenience, the material has become ubiquitous. Nevertheless, it is more difficult to remove wallpaper from drywall than from brick and concrete. The material cannot be wetted with water, and you must act as carefully as possible so as not to damage the top paper layer.
You can remove wallpaper from drywall as follows:
- via special meansthat dissolve the glue, but this is an option in case there is wallpaper putty. However, gluing wallpaper on drywall without prior puttying is a very rash decision;
- on top of the wallpaper you can apply cheapest wallpaper glue, it will dry very slowly, and during this time it will have time to saturate with moisture wallpapers that swell and themselves move away from the wall. It remains only to pick them up with a spatula;
- in rare cases, when none of the methods above helped, you have to take on abrasive materials and machines, but this is a very dangerous option, since drywall can be damaged;
- if you don’t want to resort to a rough manual method of dismantling, then you can try steam wallpaper.
Gluing paper wallpaper onto drywall without first puttying - this means dooming yourself to the eternal contemplation of the same wallpaper, or pasting other paper wallpaper on top of them, or demolishing the walls, but this is cardinal. The paper adheres tightly to the paper, and it will be almost impossible to break the layers. If you save on putty, then use non-woven wallpaper. In this case, when removing the top layer, a strong layer of non-woven remains, over which you can even putty.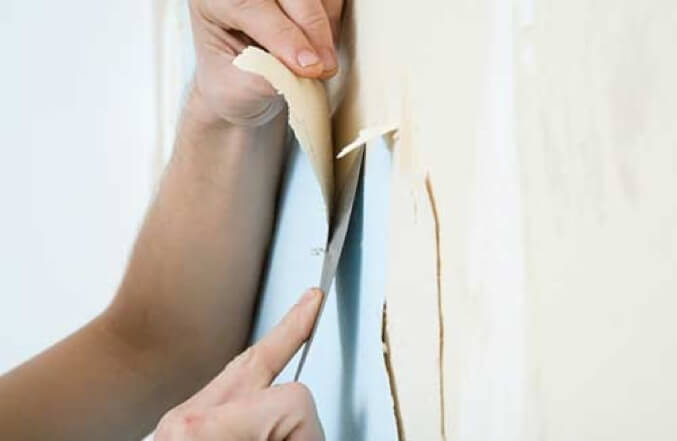
Many complain that the old Soviet paper wallpaper literally got eaten into the walls and they are not removed with water or steam. If all the methods have been tried, and part of the wallpaper has remained firmly glued to the walls, then such a half-prepared wall can be puttied to level the surface for subsequent finishing. If the remnants of the old wallpaper hold tight, tight, then there will be nothing under the putty, and they will not affect the new coating in any way.
Wall treatment after wallpaper removal
When all the work is completed and the walls are cleaned of the last piece of old wallpaper, it is time to assess the condition of the surface. In most cases, part of the plaster is removed with the canvases, so the wall is unlikely to boast of perfect evenness. Before proceeding with the decoration, its surface must be carefully prepared.
Previously, there was a misconception that there is no particular need to bother with the preparation of walls under Wallpapering. Alas, still admirers of this opinion. It is easy to guess that as a result of this approach, they get not very high quality finishes, even if they chose high-quality wallpapers. An unprepared wall contains bumpsthat even the most dense wallpapers will not be able to hide. Such a surface is more porous, which means that wallpaper glue will go many times more, and adhesion will be worse. Cracks on the walls in contact with the street can even cause mold to develop.
Whatever the subsequent wall decoration (wallpaper, painting, decorative plaster, etc.), the list of surface preparation measures will be approximately the same:
- primary priming of walls necessary to improve the adhesion of the finishing material to the wall, to reduce the degree of moisture absorption (saving paint, glue), to accelerate the process of drying putty. Primer inflict roller, in hard to reach places you can use a brush. If you see that somewhere the composition is absorbed into the wall literally before our eyes, it is better to apply a second layer;
 To prepare the walls in any room, Glims DeepPrimeGrunt and GLIMS PrimeGrunt primers are perfect, which not only strengthens the base, improves adhesion and saves paint or glue, but also protects the surface from mold and fungus due to the antiseptic that is part of the composition. The primer can be applied to almost any surface, it dries quickly (4 hours) and has a low consumption (0.08-0.2 kg / m2).
- plaster not always necessary. If the wall surface does not contain deep holes, drops and other defects, and you plan to glue sufficiently dense vinyl or non-woven wallpaper, then it will be enough to putty some irregularities. If the defects are significant, thin wallpaper or painting will be used, then you will have to use plaster first. For brick walls, a cement-sand composition is used, for concrete gypsum plaster is more suitable. It is most convenient to use ready-made mixtures that require only the addition of water. Wall plaster technology is dedicated separate article on the site;
- putty it’s better not to neglect it. It allows you to reduce the roughness of the walls, perfectly level the surface, which will positively affect the quality of the subsequent finish. Putties differ in composition. If you do all the work yourself, it is better to take a gypsum composition - it is easier to apply than cement. Putty is putty with spatulas, and the finish layer can not be applied if thick wallpaper is glued, decorative plaster is applied or ceramic tile is installed;
- primer will finally prepare the surface for subsequent finishing. At this time, the composition should go much less.
Remember to let each applied layer dry well. Data on the time of complete drying will be indicated on the package.

 How to choose the right wallpaper, what they are
 How to glue the wallpaper?
 8 tips for choosing a primer for wallpaper
 7 Tips for Choosing the Best Wallpaper Adhesive
 11 tips for choosing the right skirting board
 Wallpaper border: 5 tips for choosing and sticking ...
 Non-woven wallpaper: selection, sticking and painting
 Wallpaper for painting: types and techniques of painting
 Liquid wallpaper: properties and application
 Metal wallpaper: how to choose and stick
Very interesting and accessible written! Many thanks to the author !!!
Thanks for the helpful tips - I have to deal with such problems. Now other methods have come into service, I will take advantage.