5 ways to remove tiles from the wall and floor
Anyone who has ever gone through repairs, a little tremble at the mere thought that again you will need to remove the old tile. Even repair technicians do not like this process and often refuse customers, or they charge very, very expensive for their services. It would seem that breaking is not building. What can be difficult to dig out old tiles? If you think so too, there are many discoveries ahead of you! Even with a puncher, tiles are not always easily removed, and when you need to keep a tile intact, the task is complicated several times. There are several basic ways to remove tiles from the wall and floor. Consider everything, and you choose the one that is more suitable in a particular situation.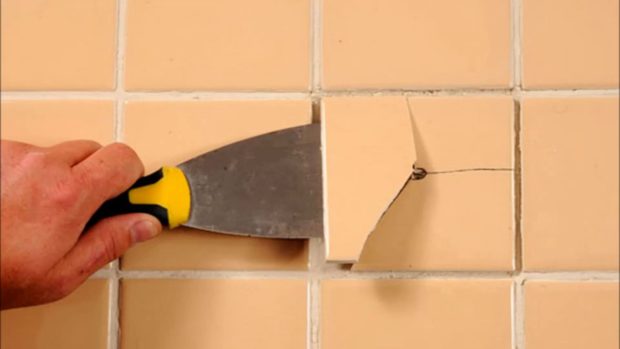
Tools and Training
Going to dismantle the tile, each of us wants to inflict minimal damage to the wall. Someone calls a prerequisite and minimal damage to the tile itselfso that it can be reused. The choice of installation method depends on the purpose: either you try to save tile, or you don't care what happens to him.
Moreover, The method of removing the tile also depends on how and on which surface it was attached:
- if tile mounted on cement-sand mixture, and even with plasticizers, and even experienced craftsmen who did their job as efficiently as possible, it will not work to remove the tile without damage with a probability of 99%. In this case, only a hammer drill with a chisel tip will help. Even the specialists will not be able to maintain the integrity of the tile;
- if the tile was mounted on tile adhesive, then the probability of removing it without damage is much higher. Be prepared for what losses will be anyway. It will not be possible to maintain the integrity of all tiles. Sometimes part of the elements damaged during dismantling reaches 50%, so weigh well whether the game is worth the candle;
- with concrete and brick surface it’s possible to remove the tile, but if you have it glued on drywallthen get ready for massive destruction. In the best case, the tile will be completely broken, in the worst - it will be necessary to change the drywall partition.

Specialists have one uncomplicatedguide to determine if there is a chance to remove the old tile without damage. You need to go over the entire surface of the tile to tap it with a spatula with a rubber mallet. The movements should be light so that you can detect the presence or absence of voids under the tile. If they are, and in large quantities, then you can try to remove the tiles in more gentle ways to preserve the tile and its further use, for example, in the country.
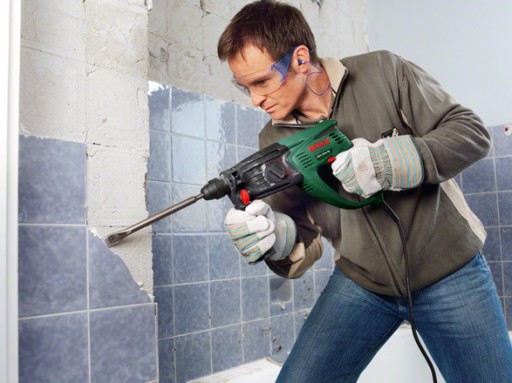
From the tools you may need:
- hammer drill with a nozzle-chisel, some use nozzles in the form of a drill, bits, chisels;
- chisel or chisel;
- spatula, you can several. Preference is given to more durable products;
- hammer;
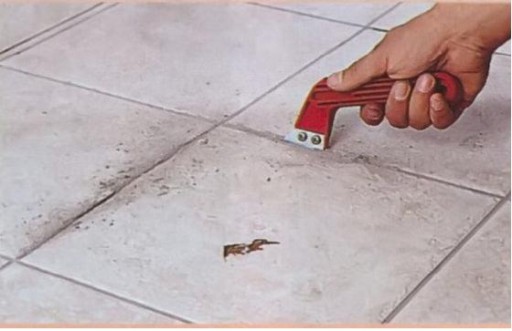
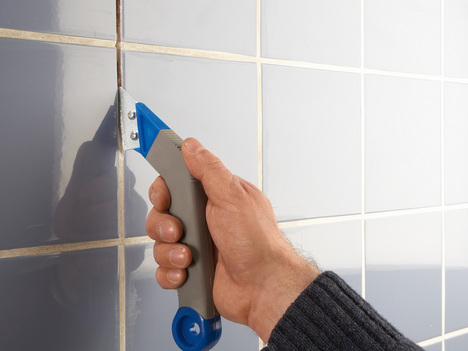
- Chisel and scraper to remove grout;
- may need and screwdriver with a handle, which is convenient to strike;
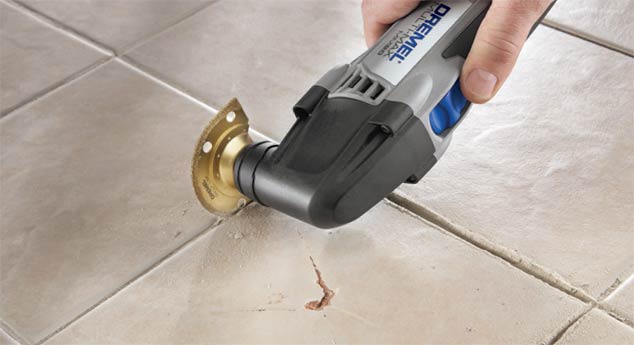
- not necessary but may come in handy Bulgarian with a nozzle for cleaning seams between tiles;
- a container of warm water, sponges;
- drill with a drill of 6 mm;
- red-hot wire with a diameter of 3-4 mm.
Of course, not all of these tools can come in handy right away - it all depends on the chosen method.
Do not forget to take care of personal security. Use safety glasses, a mask or gauze bandage, tight gloves, and even better, wear a protective suit.
No. 1. How to remove a tile without damaging it
Before you try to crank up this experiment on the scale of your apartment, I would like to remind you once again - to remove the whole tile safe and sound will not work. Losses will be anyway. The result depends not only on the composition on which the tile was fixed, but also on the quality of the preparatory work. The preparation is as follows:
- prepare a warm soapy solution, moisten thoroughly with it all the seams between the tiles;
- carefully remove the old one with a chisel, putty knife, paint knife or triangular screwdriver grout. If you have the skill to work with the tool, you can use the grinder and walk the disc at the seams;
- wipe the edges of the tile with a sponge dipped in the same solution. If there is a drill and a special nozzle-brush, then you can use them - the result will be achieved more efficiently;
- leave the tile for a while so that the water slightly soaks the glue or solution.
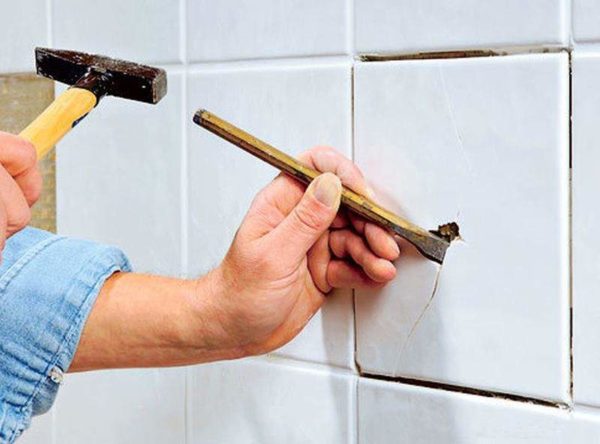
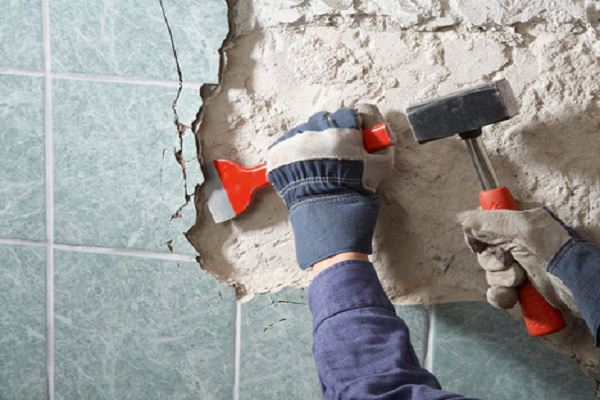
A hammer will not be needed - you have to act with a hammer and a chisel. It is slow, difficult and painstaking, but if maintaining the old finish is important, this is the only way. The procedure is as follows:
- if the top, side or bottom row is not open, you will have to sacrifice one tile to ensure normal access. As a rule, this is not required, but if suddenly the tile covers the entire surface of the wall, then with a spatula and a hammer break the tile somewhere on top;
- when normal access to the tiles is open, you need to drive a chisel, a chisel with a thin blade or a spatula between the tile and a layer of glue and tap the tool with a hammer. Shots must be accurate, but strong. If after several strokes the tile stays firmly in one place, there is a chance that it will crack from subsequent strokes. Try to pry it on the other side. If she didn’t give in again, she’ll have to come to terms that you won’t remove her whole, and finish her off. Remember, no one promised you a 100% result? If the tile moves away from the wall, then you must be especially careful when it is repelled by 2/3 - this is the dangerous moment when you need to make every effort to keep the corners of the tile intact. Pull the tile from different sides;
- the tile is brought down from top to bottom;
- From one row to another, move from top to bottom. This reduces the likelihood of tile collapse and injuries;
- You can clean the wall of old glue or mortar with a punch.


In a similar way it will turn out to remove the tile laid on glue, or that which was mounted on a solution with violation.
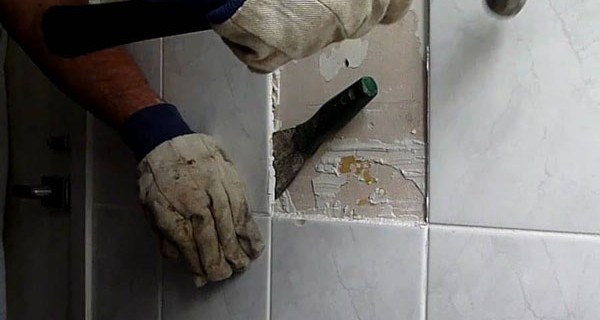
No. 2. How to remove tiles without damaging adjacent tiles
Imagine that only one or two tiles cracked on the wall. Or you need to access wiring, or other communications. Dismantling the entire tile would be foolish. But how to remove several elements without damaging adjacent tiles? The task is complicated by the fact that in the process of dismantling it will be necessary to try to preserve those elements that you remove. If the tile is old and you don’t have any spare samples, it will be difficult to find a suitable replacement in the store. Even if the collection is still being produced, there is no guarantee that the color matches. In general, this is without exaggeration jewelry.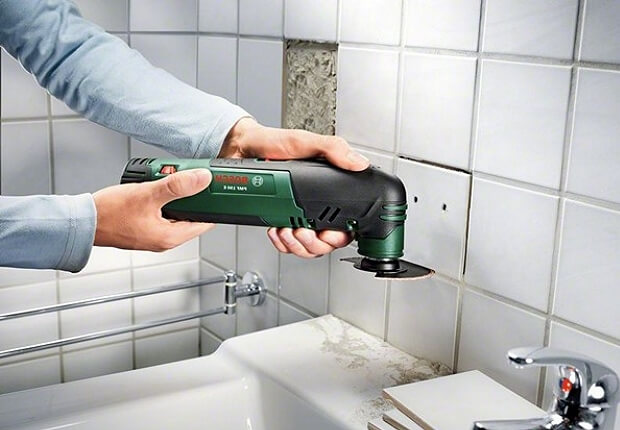
Procedure:
- moisten the seams near the tiles that will need to be removed, as well as moisten the seams between them;
- wait a while, clean the seams, as described above;
- moisten the seams with soapy water and try to pry off the tiles with a spatula or chisel. By tapping with a hammer, the tile is carefully beaten off the surface;
- if the classic method didn’t work, you can use red-hot wirebent on both sides. The edges of the tile hook with hooks. Now it remains only to pull the wire with the tile on itself, applying force perpendicular to the wall.If you pull it at an angle, then the tile can be broken;
- when all the elements are in place, it can be very difficult to act - there is nowhere to catch, therefore, you may have to sacrifice one element. They break it with a spatula and a hammer, or drill a hole in it with a drill. To replace a damaged tile (if there are no more tiles in your stores and stores) pick up a tile of the same size with a characteristic image. If you remove a few old tiles randomly in different places and put there elements with the image of coffee, dishes, palm trees, flowers or something else, it will turn out stylishly. It was as if it had been conceived! So there is always a fallback;
- when cleaning the seams and trying to remove the tiles, be extremely careful to do not damage adjacent tiles.
Whatever the dismantling of the tile may be, remember that even experienced craftsmen give no guarantee whether it will be possible to save it or not.
No. 3. The easiest way to remove old tiles
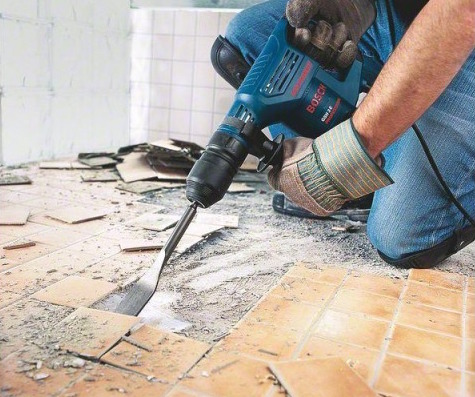
If the integrity of the tiles does not care, then you can significantly simplify and speed up the whole process. However, even if you originally planned to save at least part of the tile, and in the process it turned out that this is impossible, then this method will also be useful to you. Arm yourself with a hammer drill and follow this order of work:
- cover the floor with polyethylene, cardboard, plywood or polystyrene, if you do not plan to repair the flooring soon. Pieces of falling tiles can cause irreparable damage to the finish;
- pipes communications are also better protected; you can use the same plywood;
- do not forget to protect the eyes, hands and respiratory tract;
- the base under the tile must be solid (brick or concrete);
- punch tiles one at a time with a chisel nozzle, moving along horizontal rows and moving from top to bottom. The nozzle should be at an angle to the tile, as if to pry the cladding.
Number 4. How to remove tiles from drywall?
Many experts do not like to mess with the dismantling of tiles, but as soon as they hear that the tile is glued to drywall, and often refuse. The fact is that the glue literally eats into the drywall, so that it can be removed with the tile. However, it is real to separate the tile from the wall. Only now no one can give an accurate forecast of how drywall will look after such an execution. Nobody undertakes to guarantee the integrity of at least some part of the tile.
If the tile was laid a few days ago, then remove it without much damage to the surface and the tile itself is still realistic. In other cases, you have to torment. The procedure is similar to the classic way:
- stitch preparation;
- First, you can dismantle one tile in the top row to make it convenient for you to work. A hammer and a spatula / chisel / chisel / chisel will come to the rescue - all, as described above;
- the remaining tiles are removed one after another with the same set of tools;
- Do not be alarmed if the tile falls off with a portion of drywall;
- it is almost impossible to remove tile adhesive from drywall. If this is important, then peel off the glue gradually with a grinder, only work very carefully;
- when work is completed, assess the damage;
- if the partition has minor damage, then the pits and glue residues can be hidden under a layer putties. After it dries, you can mount a new tile. If the tile was removed "with meat", then a complete replacement of the partition may be necessary. You have to be ready for this right away.
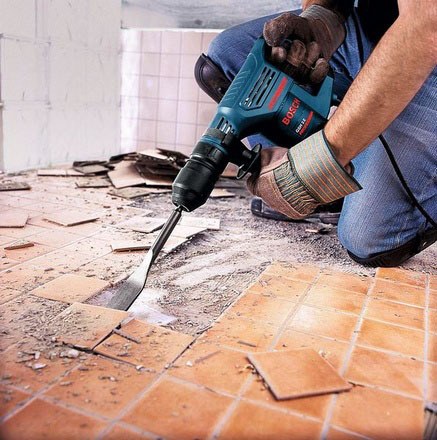
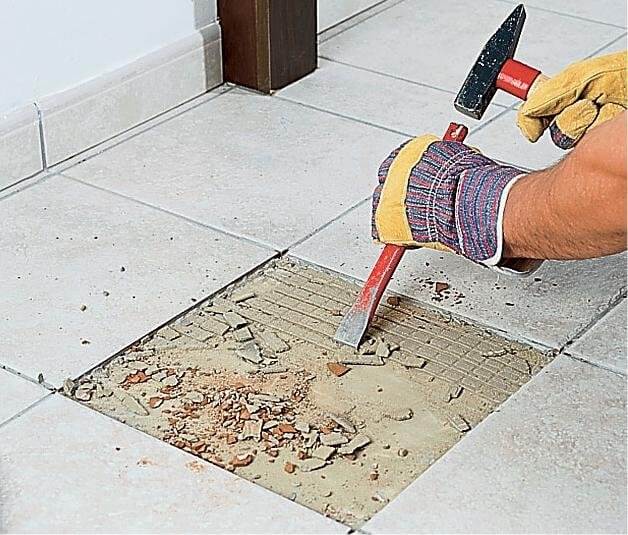
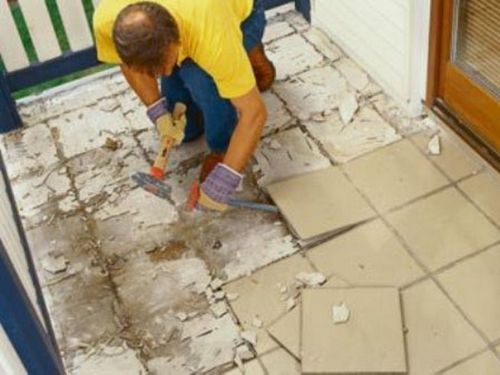
No. 5. How to remove tiles from the floor?
The process of dismantling floor tiles is not much different from the same process for wall decoration. It all depends on the need to maintain coverage:
- if the old tile is not needed, then act with a punch, prying one tile after another. If there is no tool, then use a chisel and a hammer, but it will be longer, and more forces will go;
- if you decide to try to keep the tilesthen proceed according to the classic method described above.First, the seams are wetted and cleaned, and then methodically each tile is poked with a thin spatula, which is hit with a hammer. Pull off and tap on all sides. As soon as in some place the sound became deaf, it means that the tile can be carefully separated from the surface.
Tile removal is a long and laborious process. The most annoying thing is that no one can guarantee the safety of the tile. So be prepared for everything, but hope for the best.
 tiles")
 tiles") 14 ways to wash, clean ceramic ...
14 ways to wash, clean ceramic ... Ceramic tile laying
 Choosing floor tiles in the corridor: tips and photos
 9 tips to remove / wash off whitewash
 5 tips for grouting tiles
 How to glue the wallpaper?
 Wall decoration with decorative artificial stone
 5 Tips for Putting Tiles on a Wooden Floor
 Liquid wallpaper: properties and application
 8 tips for redecorating a kitchen and updating it