6 ways to defrost a water pipe and sewer
In winter, not only ourselves are freezing, but also communications. And if a person just needs to drink a cup of hot tea, wrap himself in a plaid and sit for about heater, then with pipes it will be more difficult. If the water or drains in them are frozen, you will have to deal with utilities (and we all know that this is not always fast), or take the initiative in our own hands. Fortunately, the people’s ingenuity came up with a lot of really working and effective ways to defrost a water supply and sewage pipe without waiting for spring.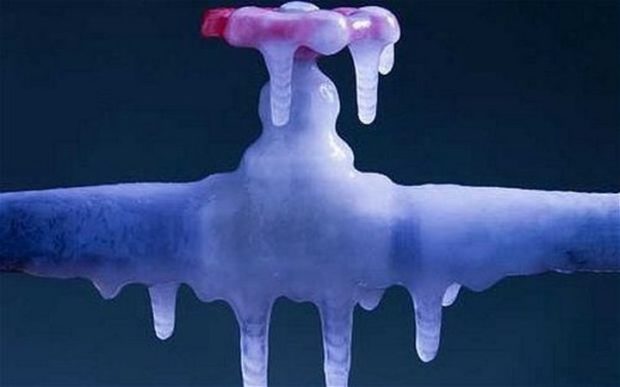
Why do pipes freeze?
No, this is not a rhetorical question. The reason is often in ourselves. Yes, it is we, whether consciously or not, we are violating the rules, and as a result, in the midst of a fierce winter, we get an unpleasant consequence in the form of an icy water supply system or, worse, sewage.
Pipes freeze for the following reasons:
- insufficient depth. Ideally, the pipes should be below the level of freezing, and in some regions this level is at a depth of 1.8-2 m, or even deeper. Utilities and private developers sometimes do not adhere to this rule, either because of incorrect calculations, or in attempts to save money;
- inefficient insulation. So that the pipes do not freeze in winter, it is necessary to insulate them, and those places of pipes that pass through foundation or brick walls, need double insulation, as these materials cool faster than soil;
- it is better not to place the pipes close to brick and concrete structures for the same reason. The exception is entry into the house;
- low water consumption. In private unheated houses, you can not leave water in the pipes, it is better to drain it before winter;
- pipe diameter too small. The smaller the diameter, the faster the liquid freezes. Underground is not recommended to lay water pipes with a diameter of less than 50 mm;
- even if the pipe laying depth is sufficient, and they are qualitatively insulated, at extremely low temperaturesnot specific to the region, freezing may occur. This is an emergency.
If it so happened that the pipes were frozen, and they would have to be thawed on their own, then for a start it would be necessary to calculate the place of freezing of water. It can be external sites or underground. Defrosting methods will be different.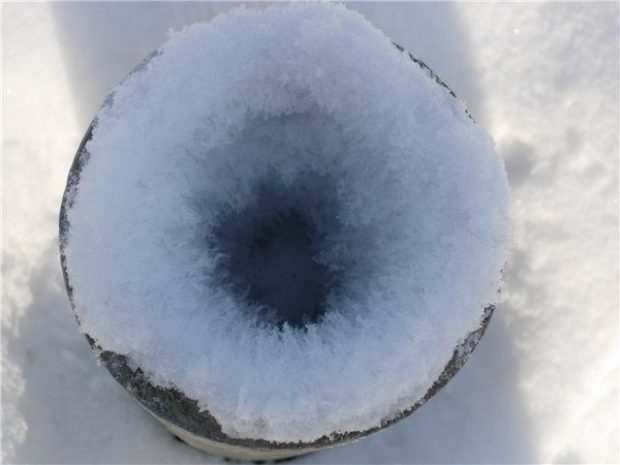
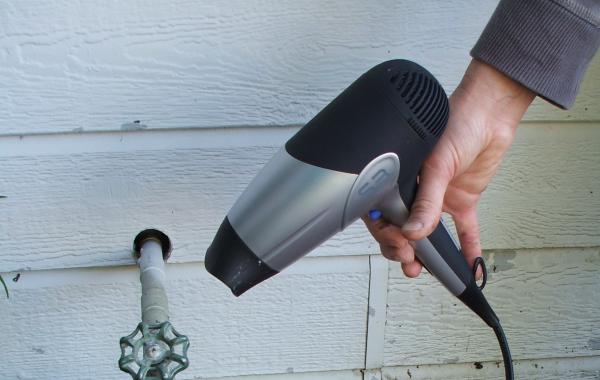
No. 1. Defrosting a pipe with a hairdryer or blowtorch
If the outside of the pipe, which is in range, has frozen, then the task is greatly simplified. It is enough to expose the frozen area to external heat, and for this you can use:
- hair dryer, normal or building;
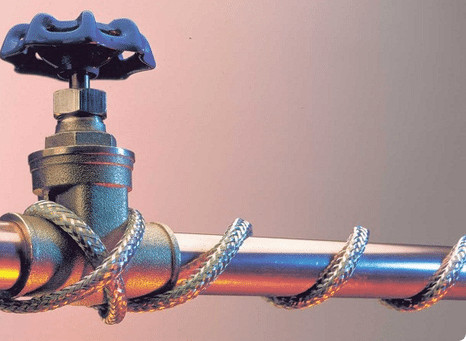
- heating cable;
- heating pad;
- electric blanket.

If the pipe is metal, then you can also use such heat sources:
- gas-burner;
- blowtorch;
- homemade torch.
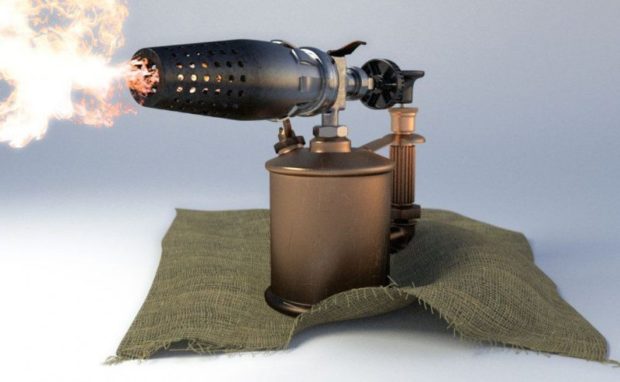
The principle in all cases is the same. The frozen area is exposed to heat. If this is a heating pad, then it is applied, if the cable is wrapped around the pipe and connected to the network, if the burner or blowtorch, the flame is sent to the pipe area, but with a hairdryer, everything is clear. An old blanket or thick cloth can be wound on top of a heating pad, heating cable and thermal blanket to keep warm.
It is important to open the water tap before starting work so that thawed water can flow out of the pipe. Column or heating boiler disconnect for this time.
No. 2. Defrosting with boiling water and rags
The method also works. if pipes are in the building and available. Of course, you can simply water the pipes with hot water, after substituting the containers for collecting water, but it is much more efficient to first wrap the pipes with rags, and only then arrange a “hot shower” for them. The rags will absorb water, heat up and contribute to the constant exposure of the pipes to heat. If there are not many rags, then it will periodically need to be promoted along the pipe section. Do not forget to substitute a container for collecting water that is not absorbed.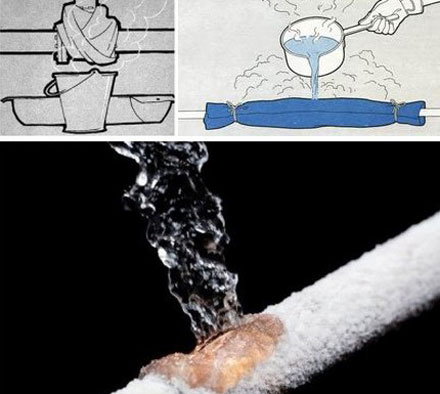
No. 3. Defrosting a pipe with a welding machine
If the frozen area is located outside the house, then it will take more time and effort to thaw. Method with welding machine considered one of the most effective, but he has a limitation - he Only suitable for metal pipes.
First you’ll have to at least approximately determine the location of the formation of an ice jam. Then, on both sides, the water pipe is cleaned of thermal insulation and cleaned to a metallic luster. An electric cable connected to the secondary winding of the welding transformer is connected to these places.
Now it remains to set the minimum current on the device (about 180 A) and turn it on to the network. Metal pipe will start to heat up over the entire length of the connected area. Thawing is relatively quick, but the duration of the whole process depends on the length of the pipe. At the same time, the water tap should also be kept open. Experts warn that the method has a side effect - pipes after such processing begin to rust faster.
It is very important to connect and disconnect cables to the pipe only when the welding machine is turned off. Otherwise, you can get an electric arc, which can damage both the pipe and your hands with eyes.
Number 4. Defrosting with hot water through a hose
When the frozen area is in sight, it is enough to pour hot water directly on it. By simple conclusions, we can conclude that if the mash is located away from home, you need to somehow deliver hot water to the place of icing. Just pouring hot water into the pipe is not very effective - you will have to bother a bit. This way applicable to plastic pipeswhen you can’t just take and run current over them, as if for metal.
The procedure is as follows:
- remove stop valves;
- prepare a rigid hose or pipe with a diameter smaller than the water supply. For example, for a pipe with a diameter of 25-32 mm is suitable plastic pipe diameter 16 mm. This is if the site is completely straight. If there are twists and turns, then you have to take a hose that can bend, but at the same time quite rigid. Normal watering hose you can’t take it - it may not withstand exposure to hot water and soften, so pushing it will be more difficult. You can take an oxygen hose or a hose, which usually connect gas cylinders. True, it can only be stretched 10-15 m from the input - it is too hard and heavy. An alternative is to use a flexible hose with an attached wire;
- insert the prepared hose or metal-plastic pipe into the pipe until you hit the ice;
- a container can be attached to the outer end of the hose, from which hot water will be supplied. If you attach a faucet to it, it will be much more convenient. However, you can pour hot water through the funnel, but it is not very convenient;
- instead of a simple hot ox, you can use salt solution - it freezes at a lower temperature, so that work will go faster;
- melt water will flow out through the gap between the pipe or hose. Prepare a container in advance for its collection;
- as the ice plug melts, it will be possible to lower the metal-plastic pipe or hose deeper.
When the work is completed, it remains to assemble the pipeline and put the stop valves. To prevent re-freezing, ensure that the water flows continuously through the pipeline, at least with a small pressure. A heating cable can be lowered into a straight pipe.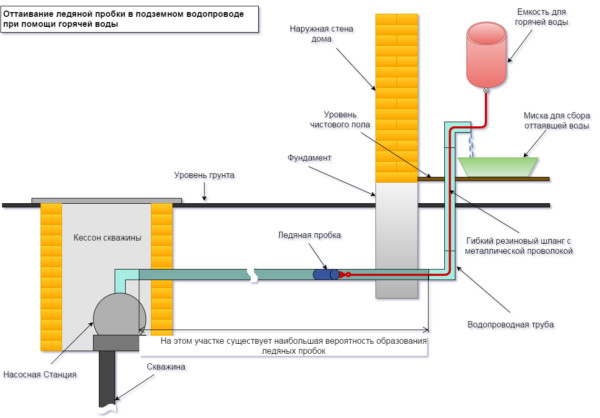
Hydro Level Method
A variation of this method is the use of a building hydraulic level of the required length. Method is good if there are 2-3 knees in the pipe and the distance from the house to the frozen area is 20 m. To the end of the hydraulic level, tape the wire. Both that, and that in advance it is necessary to align a little. From the end that will be immersed in the pipe, the wire should not stick out. It is better to let it be shorter than the hydraulic level by 1 cm.
The hydraulic level is pushed into the pipe until it hits the ice. Hot water (or saline) can be served using Esmarch's mug, popularly called an enema. When rested on ice, you can start supplying water. To simplify, then we make the tube an enema. We collect melt water in a basin or bucket, as we thaw, we move the hydro level.
The method is good in that the hydraulic level tube is quite thin, so that it goes well into the water pipe, and it easily overcomes turns. The average speed is 1 meter of ice per hour.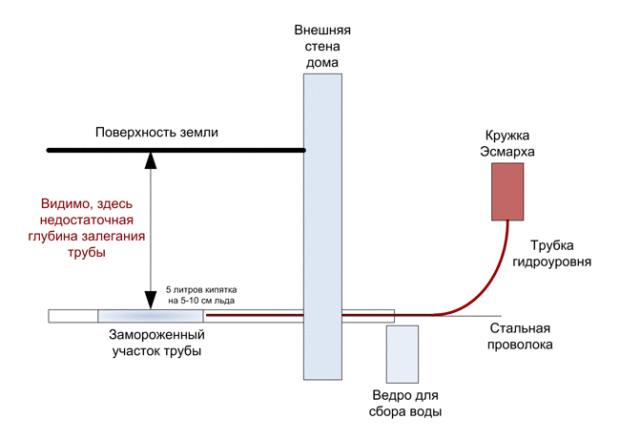
No. 5. Defrosting with a wire
The method is suitable for defrosting only plastic pipes water pipes located at a distance from the house. For work, you should purchase:
- two-wire wire, length and thickness depends on the pipe, but people with experience are advised to take the wire thicker and harder;
- power plug;
- a compressor and a hose will be needed if the pipeline is long enough, or if the ice plug is located far from the place of entry into the house. You can buy a fuel hose, it is inexpensive, and use a pump as a compressor, or use an automobile compressor.
The main thing, prepare the wire correctly. First, remove the general insulation in the area of 8-10 cm and expose one of the wires. Gently bend it in the opposite direction and make several turns (3-5 are enough) around the part that remains under general isolation (it is clear from the pictures below). The turns should be tight. The insulation is also removed from the second wire and wound it below the turns of the first wire. The distance should be about 2-3 mm - the turns of the first and second wires should not be in contact. If you use pliers during the creation of the turns, then pre-wrap the wire with something tight so as not to damage the insulation.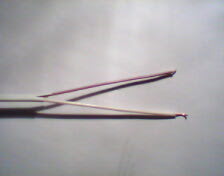
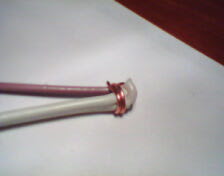

When the first end is ready, it remains to connect the plug from the second end. Here is our working tool, popularly sometimes referred to as the “burbulator,” is ready. You should not undertake this method if in electrics you do not think much.
The action of this method is based on a simple physical phenomenon. When a current passes through water, the latter heats up. What you need when you need to defrost pipes! It is important that the wire itself remains cold, only water is heated, i.e. the likelihood of damage to the plastic pipe is minimized.
You can use this method of defrosting frozen pipes only if all parts (including stop valves) are made of plastic. With steel fittings, a short circuit may occur.
You can check if our defroster is working with a can of water. It is enough to lower one end of the wire there, plug the other into the outlet, and you will see how bubbles begin to appear in the water, all this will be accompanied by a buzz. Fingers in the water should not be lowered - it may cause an electric shock.
Now it remains to lower the wire into the pipe until it hits the ice, but without unnecessary force. We plug it into the outlet, gently press the end of the wire to the ice and wait a couple of minutes, after which you can try to lower the wire a little more, as if it would fall into the ice.If the icy area is large enough, then it is better to gradually pump out the melted water. You can do without this, but then it will take more time, because you will also have to warm up a sufficient amount of water. There is another threat - that ice that has already melted may begin to freeze while you melt its deeper layers. In general, it is better to use a pump or compressor.
No. 6. How to defrost a sewer pipe?
Note immediately sewer pipes much less likely to freeze water, and this is a solid occasion for joy. The fact is that warm drains are continuously moving along them, but if it suddenly happened that the sewage system froze, try one of the following methods:
- if we are talking about a private house, and the sewer pipe is not deep, then you can make a fire over the supposed frozen area. He will warm the soil, and then the runoff. The process is long, fire will have to be maintained until the sewage system is fully growing;
- if the ice plug is not far from the outlet of the toilet bowl or sink, try pouring hot concentrated salt solution (1 kg of salt into 10 liters of water) into the pipe. Such a solution freezes at a temperature of -220C, therefore capable of melting ice in a pipe;
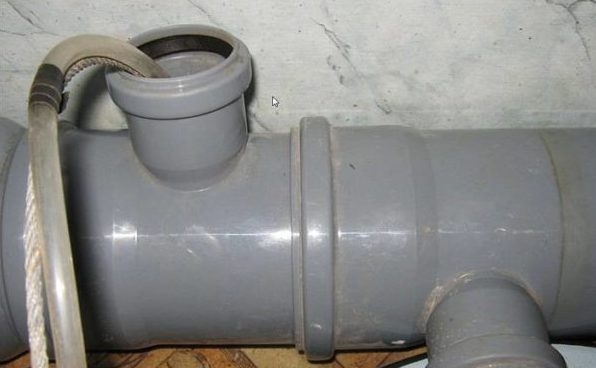
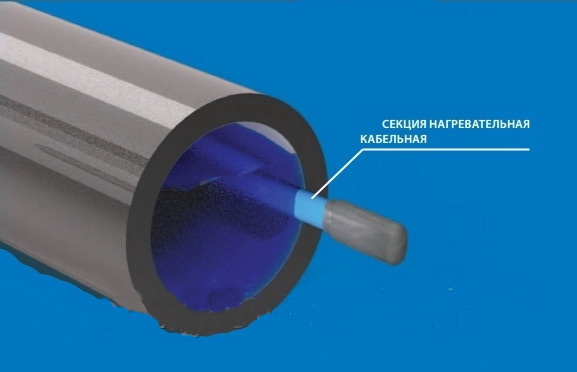
- through the inspection hatch or the toilet drain hole, a heating cable can be inserted into the pipe;
- if other methods did not help, you will have to supply hot water to the place of formation of the ice plug through a hose, metal-plastic pipe or hydraulic level. The method is described above. The most obvious flaw - melted sewage can flow back. If the pipe section near the drain manifold has frozen, it is better to supply water not from the side of the house.
If independent attempts to defrost water supply and sewage pipes were unsuccessful, all that remains is to rely on specialists who use special steam generators. These devices resemble washing machines for cars, only steam is produced at the outlet, and its temperature and pressure can be adjusted depending on the pipe material and the length of the frozen section. This method is very fast and efficient.
How to prevent pipe freezing?
The answer to this question comes from the very first section of the article with a description of the reasons. In short, we must try to minimize the possible risks, i.e.:
- lay pipes at a sufficient depth below the level of freezing of the soil;
- properly insulate them;
- Do not lay pipes near reinforced concrete and brick structures, which are characterized by much higher thermal conductivity than soil, and freeze faster in winter, freezing pipes. If the junction cannot be avoided, take care of enhanced thermal insulation. The same applies to pipe entry points to residential buildings;
- Choose pipes of sufficient diameter;
- if the house is not used for regular residence, in the late autumn does not interfere with draining the water from the system.
The only thing that cannot be predicted is record low temperatures in the region. If usually in winter the temperature does not fall below -150C, a -250Since it is considered almost a disaster, it is quite logical to lay pipes to a depth of 80 cm (for example, Stavropol). It’s hard to believe, but still you can’t completely discard the situation when the temperature drops to -350C or even lower. And if earlier it only remained to rely on nature, now we have at our disposal a heating cable that will not allow the pipes to freeze under any conditions, so that for reinsurance you can also use it.

 Options for sewer pipes for digging into the ground
 Which is better to choose polypropylene pipes for ...
 8 tips on which water pipes are better ...
 7 tips for choosing PVC sewer pipes
 How to properly drain the water from the bath - 5 ways
 6 tips for the location of the septic tank on the site
 7 Tips for Cross-Linked Polyethylene Pipes for ...
 How to choose a heating cable for pipe heating: 9 tips
 7 tips for choosing pipes for a warm water floor
 6 tips on how to hide a gas pipe in the kitchen + photo