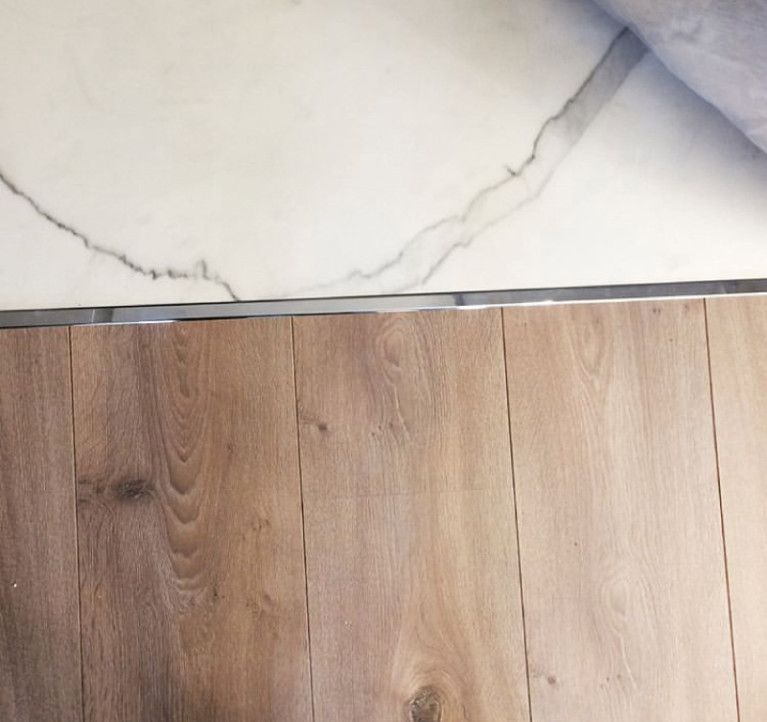
The joint of tiles and laminate: 5 tips for arranging
In the kitchen, in the bathroom, in the combined kitchen-living room, as well as in studio apartment often have to combine floor coveringsto get the most practical and aesthetic interior. One of the most popular combinations is tile with laminate. The tile takes a hit in the working area, and the laminate allows you to comfortably equip a relaxation area where there is no moisture. It is not always easy to dock the two coatings correctly - it is necessary to take into account a lot of features. Let us dwell on the main subtleties and study the options for organizing the junction of tiles and laminate.
No. 1. Advantages and disadvantages of joining tiles and laminate
Laminate and tile are found, as a rule, at the border of two rooms or in the same room, when necessary divide into zones. A vivid example is the design of a large kitchen, where necessary highlight the working and dining areas, or the entrance hall, which smoothly goes into the living room.
The combination of these two materials has many advantages:
- Functionality. It is better to lay out areas of the room where water can often drip. tiled - in such conditions, it will serve clearly more than laminate. The latter looks more comfortable and will be appropriate in drier areas.
- Aesthetics. Combining two materials, it is possible to get an original fresh interior. If you combine the texture and the drawing correctly, make a successful joint, you can even visually increase small room.
- Saving. Decorating a room with only tiles is more expensive than a combination of tiles and laminate.
- Zoning without partitions. To divide a room into zones, it is not at all necessary to build walls, resulting in two cramped dark spaces. The junction line of the two coatings will serve as an excellent delimiter.

Of course, without some shortcomings, more precisely, the difficulties could not have done. The combination of two coatings looks very beautiful if the materials are in harmony with each other and correctly laid. Docking tiles and laminate is not always easy, and the task is complicated when the "border" has a complex shape, a large length and is located in the central part of the room. If the joint is even and passes under interior door, then the installation is greatly simplified, but some nuances are important to consider in any case.
The main difficulties in combining tiles and laminate are as follows:
- It is difficult to accurately cut the coatings in order to precisely dock them. The more complex the transition line, the more difficult the task.
- The height of the flooring is different. The tile has an average thickness of 8-10 mm, add a layer here tile adhesive and get the final thickness of about 12-14 mm. Laminate thickness - 8 mm, and even substrate will not save the situation. If at the junction there remains a height difference, then households and guests will constantly stumble. Moreover, garbage will collect strongly in this place. It’s better to foresee this at the stage of repair complete screed at a different level.
- Laminate can expand and contract when temperature and humidity change. If the joint is very tight, then the laminate can be deformed, therefore, during installation it is necessary to leave a small gap.
- Laminate can deteriorate when exposed to moisture, so it’s better to lay the tile first, let the tile adhesive dry, and then laminate installation qualitatively process the joint with sealant.
No. 2. Junction
The shape of the joint depends on where this joint will be located, which tiles are used, and what preferences the owner of the apartment has. The junction line may be:
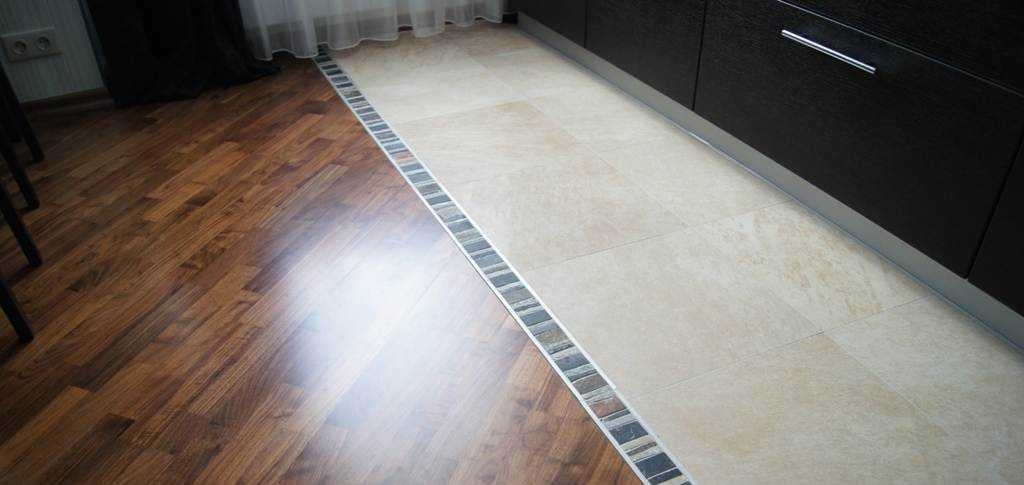
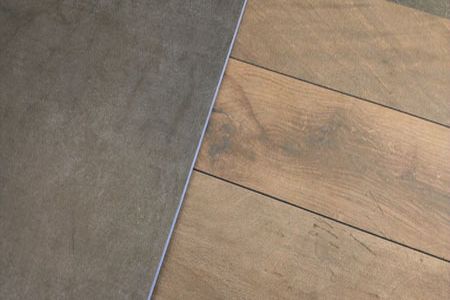
- straight. The most popular option, usually used when the joint is located on the border of two rooms under the door, and then it is framed by a decorative threshold. A straight joint can be long enough when used for zoning a room;
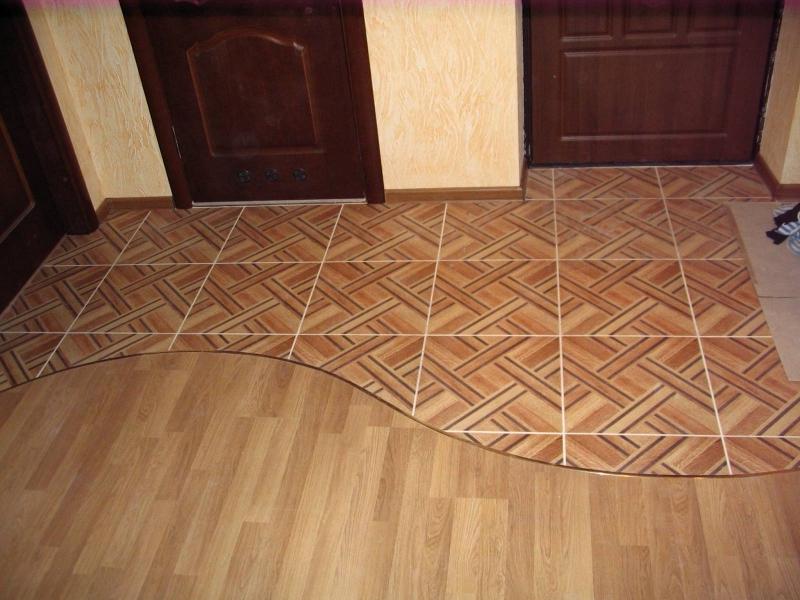
- curved. It is usually used when laying two coatings in the same room, if necessary, separate zones. Making such a joint with your own hands is quite difficult, since it is necessary to perform a very accurate cut of the tile and laminate. If you managed to make a neat cut, then the joint can be made without a nut. Otherwise, it is better to use a decorative overlay.
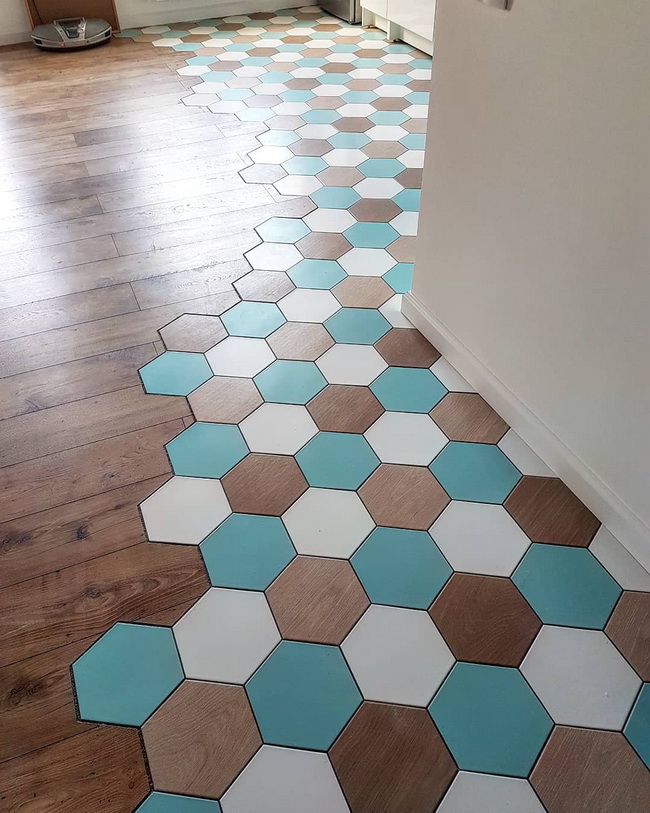
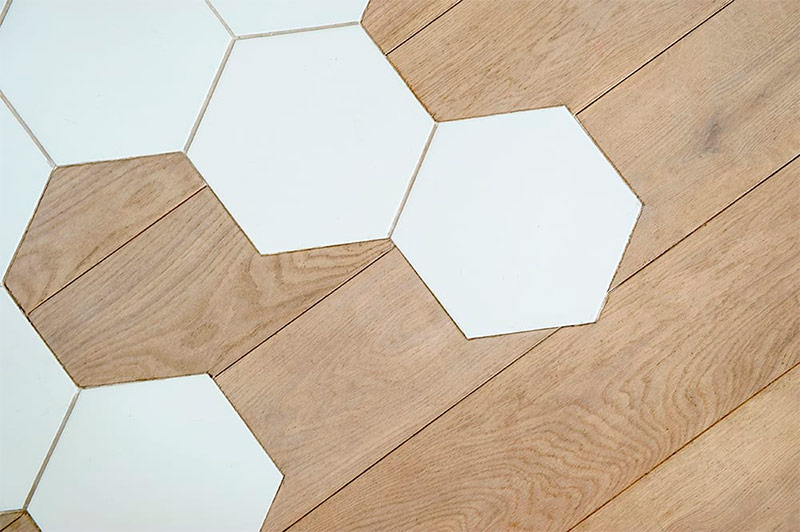
- broken. It is used for the installation of triangular, hexagonal or diamond-shaped tiles. Laminate is trimmed so as to exactly go around the tile, the latter is not cut and does not fit. Performing such styling is not easy, the joint should be perfect, since the threshold is not used - it will ruin the whole view. Well, a similar joint looks over a long section.
No. 3. Joint of laminate and tile without a door
As you can already understand, the joint of the laminate and tile can be arranged with the help of a decorative nut, or you can do without it. A joint without a threshold looks more aesthetically pleasing, does not interfere while walking and cleaning. If the line is of complex shape, then it will be practically impossible to draw it up with a threshold. It is more difficult to complete a joint without a threshold; a number of conditions have to be met:
- Carefully cut tiles and laminate, which will require a special tool and high qualification, so you can hardly do it yourself, especially if the junction line is complex.
- To achieve the same height of both coatings, an error of 1-2 mm is allowed. Fitting is done due to the different thickness of the screed. Do not forget to consider the thickness of the adhesive layer. To get the perfect result, you need to conduct a competent calculation.
- Use the adhesive styling method. Everything is clear with the tile - you won’t put it in any other way, but the laminate can be mounted both on glue and on the substrate. In the latter case, you can’t do without a threshold, and if the method of joining without a threshold is chosen, then you need to lay the laminate on glue.
- Provide a clearance of sufficient width. The minimum is 5 mm, and it is better to proceed from the rule according to which 1 mm of the compensation gap should be provided for each meter of the length of the laminate. Otherwise, the laminate begins to creak, and then it is deformed, because it has nowhere to expand. The spacing of the laminate from the wall should be 5-10 mm, this is also a margin for expanding the material. This gap will close later skirting board.
Experts do not recommend performing a joint without a threshold if the line length is more than 3 m. In addition, it will be necessary to choose finishing materials even before the screed is completed, in order to eventually get a floor of one level.
 You can buy a laminate in the Parketov-store.ru store, which offers the widest selection of floor coverings. The site sells products only of those brands that have proven themselves in Russian apartments. The store offers favorable prices, prompt delivery throughout Russia and regular updating of the range. If necessary, managers will help you choose the most suitable coverage.
Consider the main options for joining coatings without using a threshold.
Grouting
Most simple, fast and economical way - use it grout for tiles. It’s easy to work with, you can choose almost any color. It is better to focus on the shade of tiles and laminate, but some prefer to choose a contrasting color. Grout Great for decorating joints of complex shapes.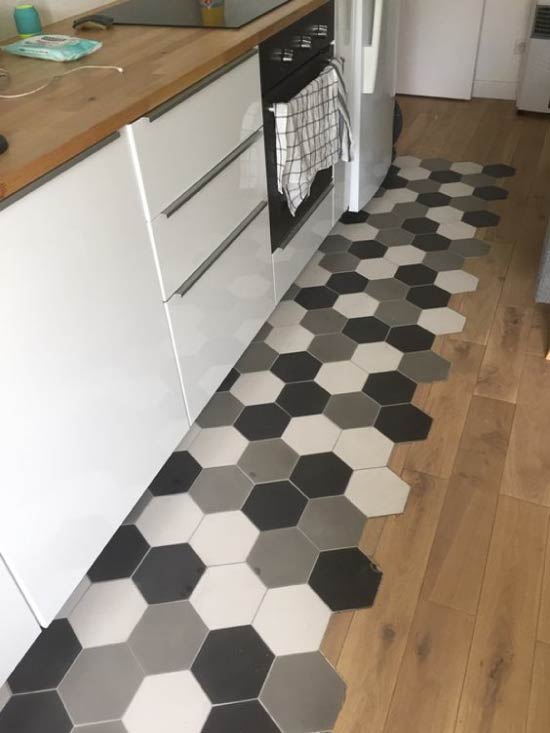
Installation process in general terms is as follows. First, a future joint line is planned on the screed. Start laying with the tile, cutting it in accordance with the intended line. After that, the laminate is mounted, and the gap between the coatings is filled silicone sealant about half the height. When the silicone dries, grout is applied, carefully pushed into the gap, and the excess is quickly wiped from the finishing materials. Dry grout is best covered with clear varnish for added protection.
The main disadvantage of this method - the risk of cracks during shrinkage of the building. In addition, when using grout, a rigid joint is obtained that does not allow the laminate to expand normally, therefore more attention should be paid to the organization of the gap in the area of the baseboard.
Joint sealant design
The sealant is much more elastic than grout, therefore, during shrinkage, it will not be covered with cracks. It is very easy to work with the material, but it can be used with a gap width of not more than 5 mm.
Installation process identical to that described for grouting, only in this case the seam is completely filled with grout. You can use silicone, acrylic and polyurethane sealants. The advantage of acrylic is the possibility of staining after application.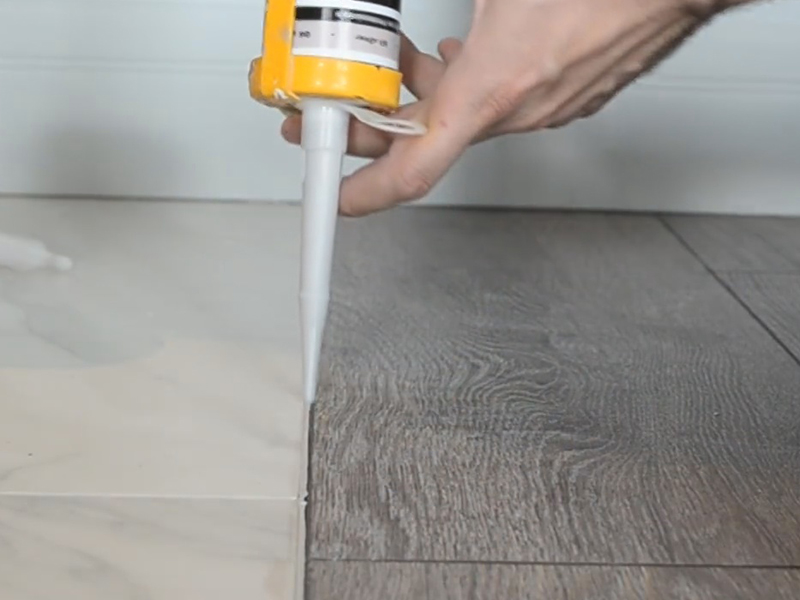
Joint plug for joint
It's a strip traffic jams small thickness that perfectly fills the gap and can to level joint irregularities, because the material is called a compensator. Since cork is a fairly soft material, it allows the laminate to expand quietly. Due to its elasticity, a cork compensator can be used to design slightly curved joints, but it is not suitable for a complex shape line. The material can be additionally decorated with veneer, which increases the aesthetics of the joint. The choice of shades, alas, is not very wide.
The length of the cork strip is a maximum of 3 m, so that with a longer line, a junction cannot be avoided. The thickness of the compensator ranges from 7 to 10 mm.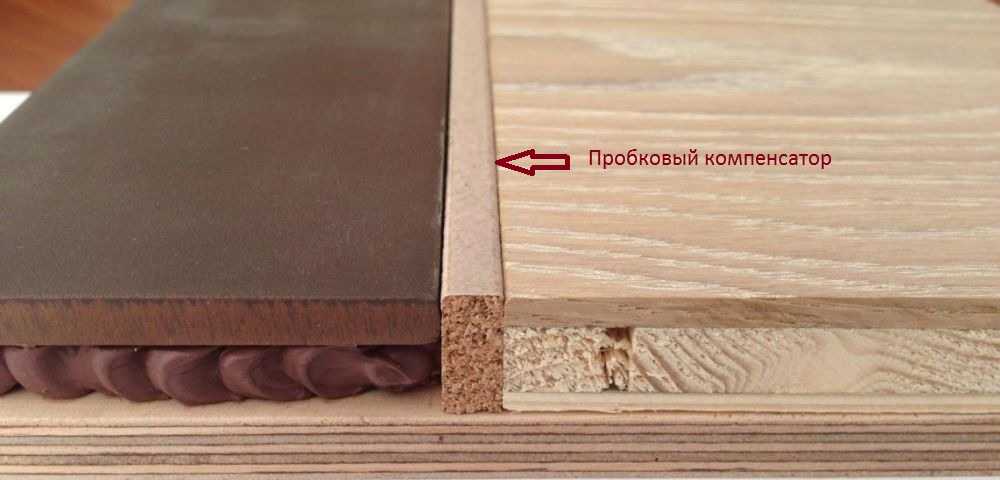
If a cork compensator was chosen for the junction, then start styling process It follows from the tile. After grinding and dusting the edge, a compensator is applied to it to understand how long the material is needed. The cork is cut and applied to the tile edge, which is pre-treated with glue. When the glue dries, the gap between the tile and the cork is filled with sealant, the excess of which is immediately wiped away. It is better to take sealant to match the tiles. The final stage is the installation of the laminate.
Joint design with liquid plug
A fluid plug is something between a sealant and a plug. The material is obtained on the basis of cork chips and glue. It is sold in tubes that are inserted into a construction gun. Using such a device is very easy to fill in any joints, including complex shape. The elasticity of the material allows you to compensate for uneven cuts. In addition, the liquid cork already contains components for protecting the laminate from moisture, so no additional measures are necessary.
Main minus - cork sealant is available in only one shade, which limits the scope of use. It can be used to design joints of any thickness, but with a gap of more than 7 mm it is more difficult to accurately carry out all the work.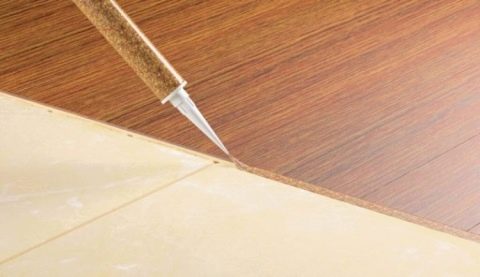
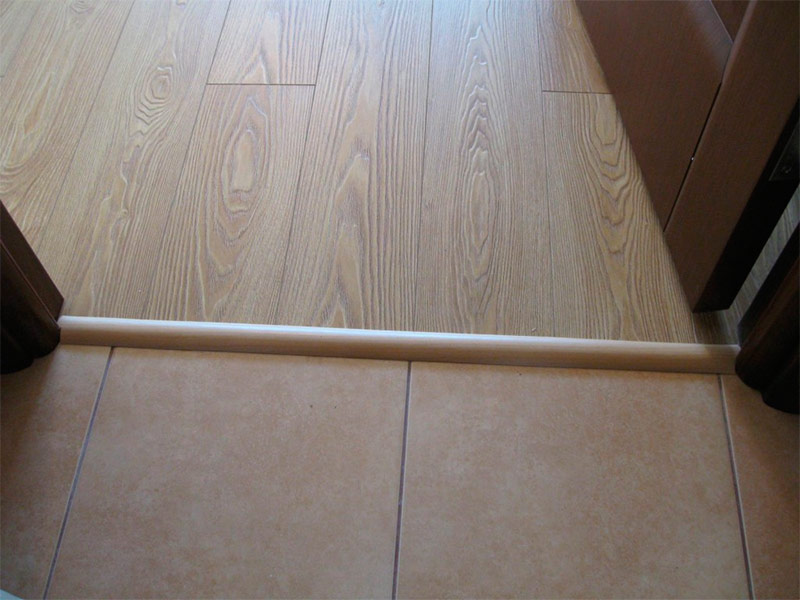
Number 4. The joint of tile and laminate with a threshold
This is a simpler solution, therefore, is used more often. If the profile for the docking is chosen correctly, and all the work is done correctly, then the flooring will look good. Joining a laminate and tiles using a decorative lining will be possible for a person with little experience in construction, so if repairs are done with your own hands, it is better to choose this option. Ease of installation is not the only plus of this method of docking. The overlay allows you to hide a wide enough compensation clearance, so that the laminate does not swell and does not deform.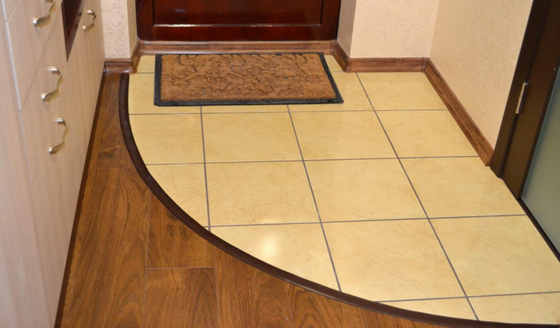
Use sills to mask the junction makes sense in the following cases:
- insufficient qualification of the performer for arranging the joint without a nut;
- the need to mask sloppy cut materials;
- the difference in height of the coatings is more than 10 mm, and it cannot be compensated for in other ways;
- it is necessary to distinguish the border of two zones. Without a threshold, it will also be noticeable, but the threshold allows emphasizing zoning. To enhance the effect, you can use the lining of a contrasting shade;
- in a studio apartment hallway area can be made a little lower living areaso that the garbage does not spread throughout the house;
- when installing the laminate in a floating way:
- when the joint is in the doorway, it makes no sense to bother with the dock without a threshold;
- with a large area of the room (25 m2 or more). In this case, for the normal expansion of the laminate, it is necessary to provide for a fairly impressive gap, and it is most appropriate to hide it most precisely with the help of a threshold.
Be prepared that even with proper installation of the threshold, it can become a small barrier while walking. In addition, garbage will easily accumulate under it, but it will be difficult to remove it from there. It’s not always easy to choose a trim to match the flooring, many sills look rude and will stand out in the interior.
The biggest problem - joints of complex sinuous shape. In some cases, choosing the right profile is completely impossible. In addition, difficulties may arise during the design of a long joint, since the lining is usually made with a length of not more than 2.7 m.
Decorative overlays for the joint are made of different materials, can have a different shape, which makes the ease of installation of the threshold and its operational quality dependent. Before we proceed to consider the different options, we note that The ideal nut must meet the following requirements:
- have a height of not more than 2 mm, so that there are no difficulties when moving;
- have a width of not more than 1.5 cm;
- combine with tiles and laminate;
- thresholds without longitudinal relief strips (they complicate cleaning) and with hidden fastening are preferred.
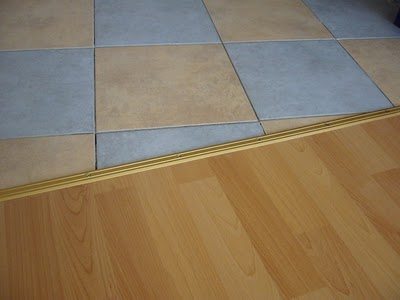
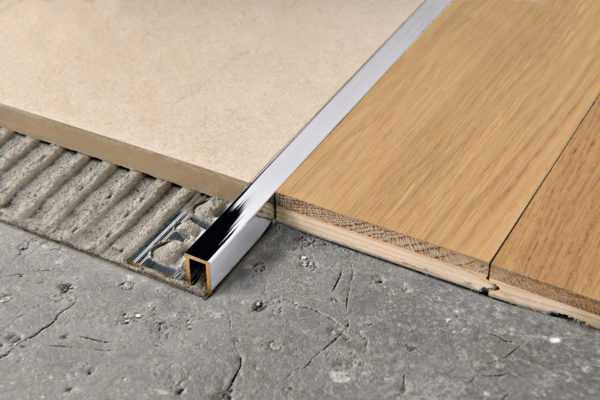
Aluminum threshold
The aluminum overlay is inexpensive, has good durability and looks great. Particularly successfully, the shiny metal surface is in harmony with light tiles and gray wood.
The shape of the aluminum threshold can be:
- flat. Such are usually fixed on self-tapping screws;
- T-shaped. It looks as aesthetically pleasing as possible, all the fastenings are hidden, and only a flat decorative part will be visible
- L-shaped. Well suited if necessary to organize a joint of small width. Well, such a threshold is suitable when the level of coverage is the same.
Please note that some thresholds are mounted only under the tile, and some under the tile and laminate (for example, those that have an H-shaped bottom profile).
According to the method of fastening, the profile can be:
- open - fixing takes place using self-tapping screws;
- hidden - consists of two parts: fasteners, which are mounted on the floor, and decorative trim, which is installed on the fasteners.
Separately, it is worth noting thresholds that have a self-adhesive base. They are as simple as possible to install, while the pad is not glued to the screed, but to the tile and laminate. It is very convenient, but it is difficult to call such thresholds a practical and durable solution.
In shape the threshold may be flat and curved, or transitional. The second option is great for organizing the joint, when the coatings have a different level. The height difference can also be solved with the help of a threshold with different thicknesses of sides.
Many people mistakenly think that a metal threshold is suitable only for straight-in-shape joints. Actually there flexible metal profile, on its basis numerous slots are provided, thanks to which it is possible to beautifully and accurately draw even a curved line of joint.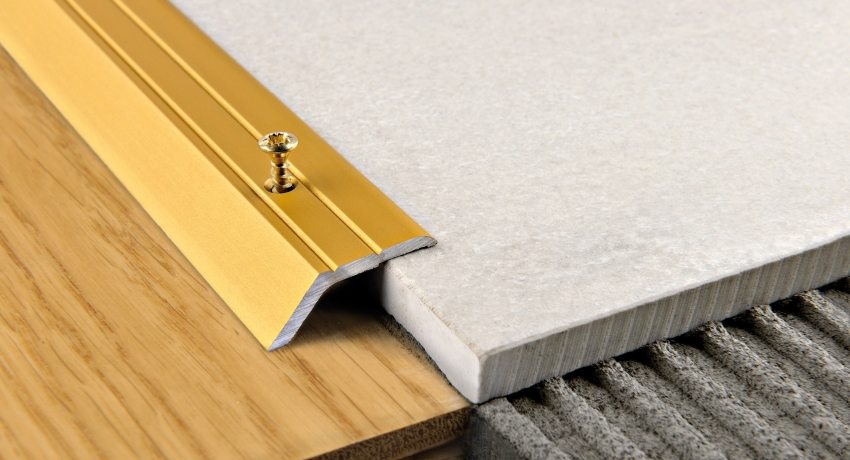
PVC threshold
PVC thresholds can be rigid and flexible. They are mounted as a floor plinth: first on screws or dowels, the base is fixed, and after installing the floor covering, the decorative cover is latched due to the presence of pressure grooves. Flexible PVC threshold can be used to design wavy joints.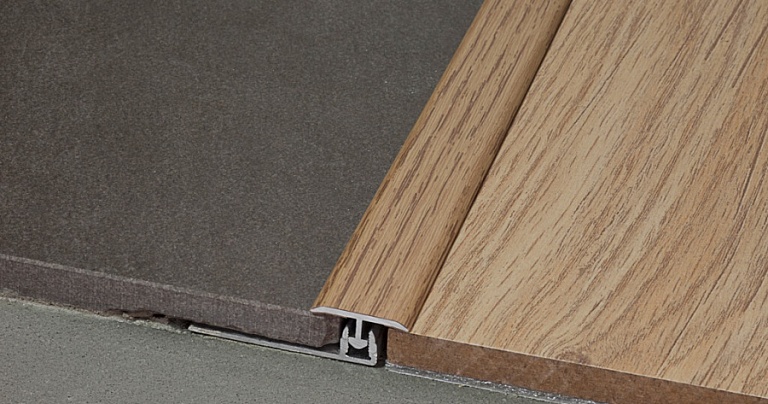
Such thresholds are quite simple to install, inexpensive, and have a decent variety of colors. There are thresholds designed for installation on the floor with a vertical drop of up to 10 mm.
The process of installing a coating using a PVC threshold is very simple. After the screed is made and the junction line is drawn, tile is laid, part of the base of the profile is placed under it. Then lay the laminate, the end is treated with sealant. The final stage is the installation of a decorative cover, it can also be treated with sealant to prevent the accumulation of debris.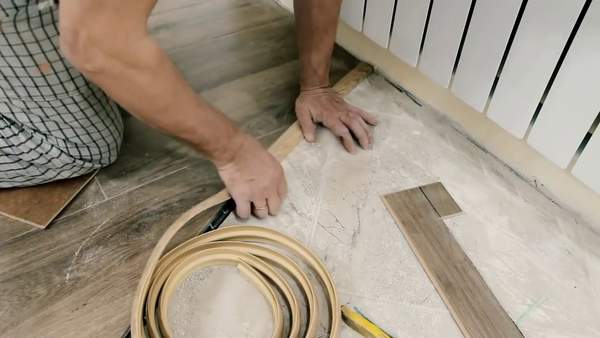
Threshold made of wood or MDF
Of course, a wooden sill is the most aesthetic option. On the other hand, such a solution costs more than all the others, and it is impossible to create a joint of complex shape with its help.
Thresholds from MDF are a little cheaper. This is a wonderful imitation of wood, which is not so afraid of moisture and temperature changes, but, just like wood and wood, this material cannot boast of flexibility.
No. 5. Useful tips
When planning to combine tile and joint, consider the following nuances:
- if the level difference is large (more than 2-4 cm), then it is appropriate to arrange the joint with the catwalk;
- in small rooms it is better not to combine the two coatings, otherwise the junction line will fragment the room and make it visually even more tiny;
- the tiled area should be at least 1 m wide, which is important for kitchens. If this zone is narrower, then part of the drops of water and dirt will fall on the laminate;
- It’s best to start installation with tiles. At first, laying tiles - This is a wet and dirty process, which obviously will not benefit the laminate. Secondly, under the level of the tile it is easier to raise the level of the laminate;
- it is better to entrust the work to a specialist who already had experience in joining two coatings.
In conclusion, we note that it is not always appropriate to combine laminate and tile - it is sometimes easier and better to use porcelain tile under the tree, which combines the practicality of the tiles and the beauty of the wooden coating.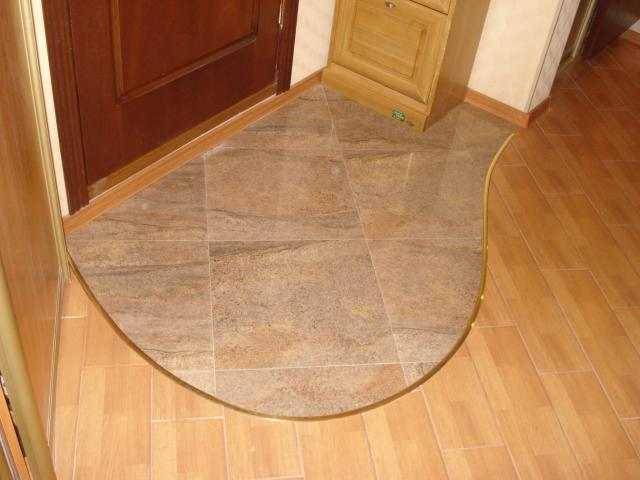

 Laminate for the hallway: which one to choose, with what to combine
 Do-it-yourself laying laminate flooring. Stages of work
 Laminate ceiling. How to fix the laminate to the ceiling
 10 materials for finishing floors in the kitchen
 The laminate sighed: 7 tips on what to do
 7 materials for finishing floors in the bathroom
 11 materials for finishing the floor in the living room
 8 hallway flooring materials
 Choosing a flooring
 9 materials for finishing the floor in the nursery