Do-it-yourself laying laminate flooring. Stages of work
 Among the many floor coverings, laminate is the most popular and practical material that has a wooden structure and attractive appearance. Unlike parquet, laminated floor panels have a much lower price. And in their properties they are not much inferior to the more expensive parquet flooring. Another huge advantage of the laminate is the simplicity of its installation, which does not require special skills. Even an unexperienced person can cope with work if he follows certain rules set forth in the article. So, first you need to buy a laminate and bring it home, after which it will take several days for the material to “acclimatize” to the temperature and humidity of the room where it will be laid. The laminate itself is a panel that has a width of about 20 cm, a length of one to one and a half meters, and a thickness of 6-11 mm. The panels are connected due to the locking structure, which is easily fixed and reliably fastens the panels together.
What tools are needed to lay the laminate?
Before you start laying the laminate should prepare and assemble all the necessary tools. This is a fairly large list that will be needed for work. The list of 8 tools and materials. Let's take a closer look at each one individually to understand where and how to apply them.
- Hammer - Not a single repair is indispensable without this tool, and laying a laminate is no exception. Moreover, without this tool, it is simply not possible to install laminated panels. The hammer must be selected weighing approximately 500-600 grams. This will make it convenient to use. Too heavy can accidentally damage the panels, so this is the best weight.
- Square - it is used for marking the boundaries along which the laminate will be sawn if necessary, in order to fit the required dimensions. It is best to use a metal square, which has a strong base and is not damaged during the laying of the laminate. The length of the tool should be about 23-30 cm.
- Pencil - With this, everything is quite simple, because without marking directly the cut lines, it will not be possible to smoothly cut the material. A special pencil can be purchased at a hardware store, but a regular clerical one will do.
- Roulette - measuring the length and width of laminated panels without this tool is simply impossible. When choosing the length of the tape measure, consider the size of the room. Roulette at 5 meters is usually enough.
- Tamping bar - This tool helps to interconnect the laminate panels. Gently knocking with a hammer, the attached block to the panel grip and lock the lock. It is better to use a plastic bar than a wooden one, since it has a softer structure and will not damage the material.
- Hacksaw - with this tool, everything is clear, because you will need to cut the laminated panels, so you can not do without it. It is best to use a hacksaw with small teeth and a wide blade.
- Bounding wedges - are required in order to create a gap between the wall and the laminate panels.This clearance should be about 10 mm.
- Scotch - used to connect the edges of the substrate web. It is better to use a special masking tape, but the usual clerical tape will do.
Floor preparation
Laminate unlike other floor coverings has more high roughness requirements the surface of the floor on which it will lie. An uneven floor deforms the material and joints may break apart. The permissible value per square meter is 0.5 cm. A larger indicator will lead to undesirable consequences in the future and additional costs for the correction of defects. Different floor surfaces require their own approach to laminate flooring. Let's look at the three main ones - a concrete floor, a wooden floor, and a tile or linoleum surface.
Concrete floor preparation
 During the repair and installation of the laminate, the old coating is removed and the condition of the concrete floor is checked. It should be smooth and without significant flaws. If there are significant irregularities, it should level surface self-leveling mortar. This is not difficult enough - you need to purchase cement, sand and prepare a solution that is evenly distributed on the floor surface. You can buy a special ready-made bulk mixture, which is mixed with water in certain proportions and a solution is obtained. When leveling, a reinforcing mesh is used so that the floor does not crack. After all the leveling work has been completed and the floor has dried well (about 20-30 days), we proceed to the next stage of laying the flooring. It should be noted that a layer of vapor barrier material must be laid on the concrete surface before laying the laminate. Such a material is a plastic film with a thickness of at least 200 microns. Fixation of joints occurs with adhesive tape.
Preparing a wooden floor base
 If you decide to lay the laminate on the wooden surface of the old parquet or floor from the boards, you should make sure that the floor surface is perfectly flat. If there are bumps somewhere, then you should fix them. Shaky hardwood replace or fasten floorboards, and grind irregularities, if necessary. Also, the wooden base for laying the laminate should be without rot and the presence of a biological factor (wood bugs, mold, etc.). This is very important, as it will eventually spoil your new floor and bring significant financial costs. An ideal option to level the old wooden floor is to put sheets of plywood or chipboard on top. Stacking should be staggered. In this case, vapor barrier is not required, but sound insulation needs to be done. Noisiness when walking on a laminate will be much higher if you put it on a wooden surface. For this, a special soundproofing substrate is used.
Preparation of the base from linoleum or tile
When laying a laminate on a surface that is made of linoleum or tile, there are no special problems. Typically, such bases have a flat surface and allow without additional training proceed with the installation of laminated wood panels. If this is linoleum, then the surface under it, as a rule, is well aligned initially, with the same tile. Next, a simple substrate for the laminate is used and the panels themselves are laid. If, however, uneven floors are present in this case, then it is recommended to remove the old coating and level the floor according to building rules.
Laminate Laying Technology
After preparing the base of the floor, leveling it and, if necessary, conducting vapor barrier, sound insulation, you can proceed directly to laying the laminate. So, the installation of the laminate begins with the installation of spacer wedges in that corner of the room, from where the installation of wooden floor panels will begin.This is done in order to leave a gap of 10 mm between the wall and the laminate panel. Since the material tends to expand under the influence of ambient temperature and humidity, the gap will not allow the panel to deform. After laying the floor, the spacer wedges are removed. You can start laying from any corner of the room., but as experts advise, it is better to lay the laminate along the sun's rays, which will shine from the window. Joints of panels will be less noticeable.
First of all, the first panel of the first row is laid, then the first panel of the second row is laid, but it is cut in half. This is done in order to lay the laminate in the form of a checkerboard, which will give an even distribution of the load during the operation of the floor covering. Next, the second panel in the first row is laid, and then the second panel in the second row. This happens until you cover the entire area of the room with panels. The final installation step is to install skirting boardsfor which holes in the wall are pre-drilled. There are two types of laying - this is castle and adhesive. Let's take a closer look at both.
Laminate flooring
 This method involves laying wooden laminated panels without the use of fasteners. Joints between laminate panels made in the form of lockswhich are joined together and form a strong system. Mounting the panels is quite simple, it does not require special knowledge, and even a beginner can do the work. There are two types of locks for fastening laminated parts to each other, let's take a closer look at each separately. This option is used for apartments and small rooms where additional fastening is not required.
- Click lock - This is the most common type of lock, which has designs in the form of a "spike" and a "groove." It has virtually superseded other types for its simplicity and reliability. Docking occurs at an angle of 30 degrees until the lock clicks, and then is driven in by a tamping block until the two laminate panels are completely connected.
- Lock lock - with this type of lock fastening, the panels lie horizontally to each other, and the groove of one panel is inserted into the groove of the other. After this, a knockout by a bar and a snap of the lock occur.
Glue laminate
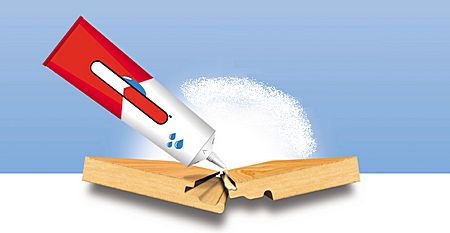 The only difference between the adhesive laying of the laminate from the castle is additional gluing of joints special glue. This gives greater reliability of the joint, as a result of which the service life of the flooring is significantly extended. In addition, the joints are protected from moisture, which also favorably affects the performance of the laminate. When laying cool, good drying of glued joints is required, therefore, it is recommended to use the coating for its intended purpose after 10 hours. The glue is used with a water-repellent property. It’s better not to save on glue, as some do and not use simple PVA. Special adhesives can be purchased at any construction supermarket. This option is used more often in rooms with a large area where additional bonding is required, since the laminate can be dispersed in this case.
When should a laminate not be laid?
Laminate is not a universal floor covering and you should know when it is not recommended to lay it. Do not lay laminated wood panels on carpet. Also, it is impossible to glue the laminate and fix it in other ways to the floor surface. In rooms with high humidity, such as a bathtub, bathhouse and other similar places, it is also not recommended to do this, because the material is afraid of water and quickly deforms under the influence of intense moisture. Not everyone the laminate is suitable for laying as a topcoat on cable or "matte" underfloor heating system. Lay laminate in the kitchen or hallway should be with a high rate of wear resistance. It is imperative to seal the locking systems with adhesive.

 Laminate wall decoration. How to fix a laminate on a wall?
 Which laminate flooring is better to choose?
 How to choose a laminate?
 Quality of flooring: parquet, laminate, linoleum
 Warm floor under the laminate: how to choose and install ...
 Laminate or parquet: what to choose?
 Laminate ceiling. How to fix the laminate to the ceiling
 Laminate for an entrance: what to choose, with what to combine
 The laminate sighed: 7 tips on what to do
 Do-it-yourself bathroom waterproofing